Adobe After Effects Tutorial: Previewing footage in After Effects
What you’ll learn in this After Effects Tutorial:
|
This tutorial provides you with a foundation for working with Adobe After Effects media management. It is the third lesson in the Adobe After Effects CS6 Digital Classroom book. For more Adobe After Effects training options, visit AGI’s After Effects Classes. |
Adobe After Effects Tutorial: Previewing footage in After Effects
Media that has been imported into a project is often called footage. You can preview footage by using the Footage panel, which is one of the panels hidden by default. You can easily display the Footage panel by choosing Window > Footage: (none).
1 Display the Footage panel by choosing Window > Footage: (none).
This will open an empty panel that is standing by to preview a piece of footage from the Project panel.
The Footage panel automatically opens when you double-click on any item in the Project panel. If you have previously used the Footage panel, the name of the last item you viewed is displayed next to the panel name in the Window menu. |
Previewing stills and video
You preview still images and video files in almost exactly the same way. The only major difference between the two is that video footage has a time ruler so that you can adjust its duration.
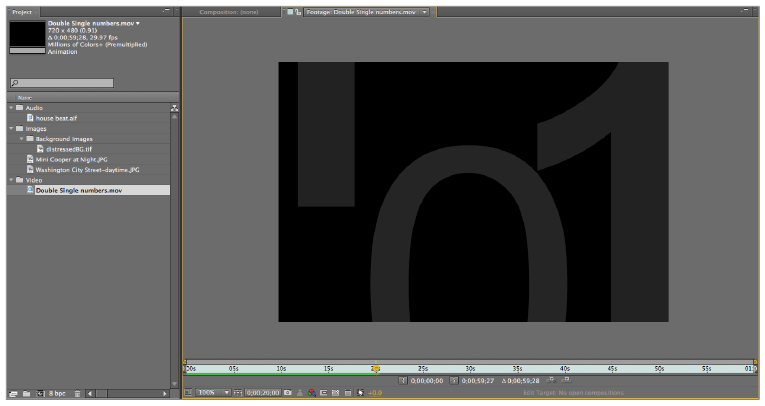
1 In the Project panel, double-click on Double Single numbers.mov to load it into the Footage panel. The text on the tab of the Footage panel changes to “Footage: Double Single numbers.mov,” to indicate that you are previewing a specific footage item.
2 With the Footage panel highlighted, press the spacebar on your keyboard to begin the video preview.
3 Once you see the animation begin to play, you can press the spacebar again to stop the preview.
|
Press the spacebar to start and stop the animation. |
If you click and drag the playhead along the time ruler, you move backward or forward through the video file. You can use this technique, called scrubbing the playhead, to navigate quickly to a specific time in the file. Remember that this is not a real-time preview; the speed at which you scrub the playhead controls the playback speed. |
4 Double-click the Mini Cooper at Night.jpg file to see how easy it is to preview still images as well.
Do not close this file; you will need it in the next part of the lesson.
As is the case when working with the Project panel, you can always press the tilde (~) key while the Footage panel is highlighted in order to expand it to full screen mode, giving you a larger preview area. |
Previewing audio
Just like video and still image files, you can preview audio files using the Footage panel. While an audio file is loaded into the panel in the same way that any other file is (by double-clicking on it), pressing the spacebar does not cause the audio to play in the same way that video does. To preview audio files, you will use a RAM preview.
1 In the Project panel, double-click on house beat.aif to load it into the Footage panel. Unlike when you previewed the video and image files, the Footage panel appears as a blank, gray screen.
The name of the audio file displays in the Footage panel tab and you see a time ruler for the duration of the audio file. Since it is an audio file, there is no visual preview. |
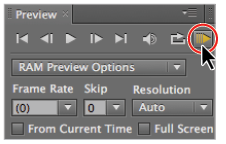
2 With the Footage panel still highlighted, locate the Preview panel on the right side of the workspace and click the RAM Preview button.
|
A RAM Preview will play audio |
You can also initiate a RAM Preview by choosing Composition>Preview>RAM Preview with the Footage panel highlighted. |
3 After a brief pause, the audio file begins to play. When you are happy with the preview, click anywhere in the interface to stop the playback.
4 In addition to creating a RAM preview of your composition you can also preview audio while scrubbing the playhead.
If it is not already there, move the playhead to the beginning (0;00;00;00) of the composition. Hold down the Ctrl (Windows) or Command (Mac OS) key on your keyboard and click on the playhead and drag it back and forth across the timeline to scrub it. You will now hear audio previewing as the playhead moves.
5 Save your file by choosing File > Save or by pressing Ctrl+S (Windows) or Command+S (Mac OS) on the keyboard.
Do not close this file; you will need it in the next part of the lesson.
Trimming a video clip
When video clips are being prepared for use in After Effects, the editor will often include a little extra padding at the beginning and end called handles. Another possible situation may occur when you have a long video clip and only want to use a small portion of it in your project. The process of shortening a video clip is called trimming, and you do it by adjusting the clip’s IN and OUT points. You should note that After Effects is not a video editing program, so the only editing feature available is the ability to trim clips. For more precise or complex editing jobs, you can use a dedicated application such as Adobe Premiere Pro.
1 In the Project panel, double-click on Double Single numbers.mov to load it into the Footage panel. The entire clip is one minute long, but you are going to trim it down so that only a 20-second portion in the middle is used.
2 With the playhead at the beginning of the clip, click the Current Time button ( ) at the bottom left of the Footage panel. The Go to Time dialog box appears.
|
The Go to Time dialog box. |
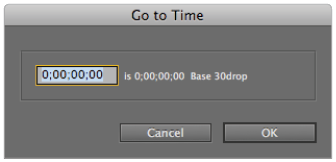
3 Type the number 2000 into the time text field and click in any empty area of the Go to Time dialog box. After Effects automatically converts the number to its time code equivalent, so 2000 becomes 20 seconds (0;00;20;00). Click OK to go to the 20-second mark on the time ruler.
Understanding time code
Time code is used in video editing and motion graphics programs to keep track of your position along a Timeline, tape, or any time-based medium. It is easily identified as a series of four numbers separated by either colons or semicolons. As seen in the example below, starting on the left, the numbers represent Hours : Minutes : Seconds : Frames.
|
A time code. |

Counting hours, minutes, and seconds is done the same way you would with a standard clock, except that the counting starts at zero instead of one. The one variable with time code is the number of frames that make up a second, which is based on the frame rate of the media you are dealing with. Depending on the Composition settings, you could be using the American television standard of 30 FPS (frames per second), the European standard of 25 FPS, or the film standard of 24 FPS. Time code is used to provide a discrete address to each frame of video.
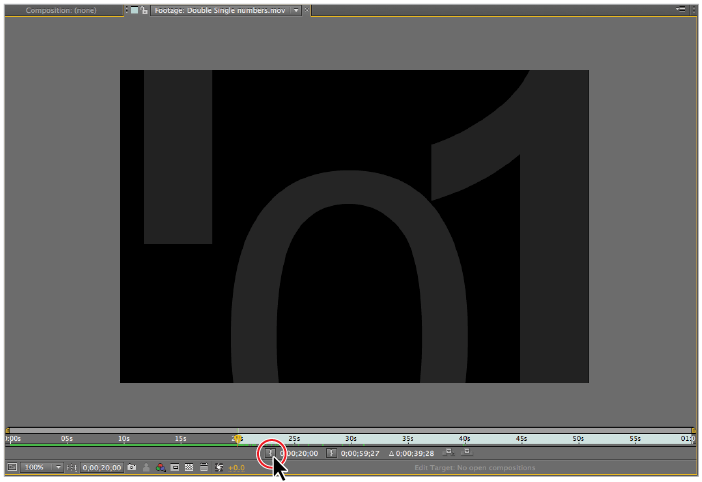
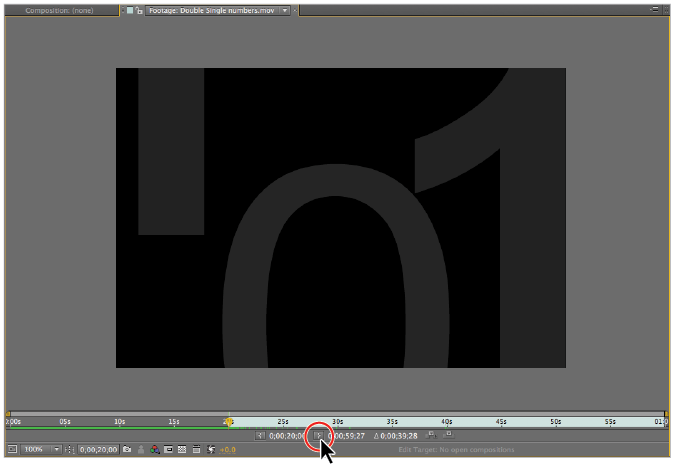
4 Click the Set IN point to current time button ( ) at the bottom of the Footage panel. This moves the start of the clip to the current position of the playhead.
|
The Set IN Point button changes the beginning of the footage item to match the current position of the playhead. |
5 Again, click the Current Time button and in the Go to Time dialog box, type 4000 and click OK to move the playhead to the 40-second (0;00;40;00) mark of the time ruler.
6 Click the Set OUT point to current time button ( ) to move the Out Point of the video clip to the current position of the playhead and finish trimming this clip.
|
Click the Set OUT Point Current Time button. |
7 Save your file by choosing File > Save or by pressing Ctrl+S (Windows) or Command+S (Mac OS) on the keyboard.
Do not close this file, you will need it in the next part of the lesson.
Continue to the next After Effects Tutorial: Importing multiple files in After Effects >