Dreamweaver tutorial: Adding an introduction section to your page in Dreamweaver
What you’ll learn in this Dreamweaver Tutorial:
|
This tutorial provides you with a foundation for working with Adobe Dreamweaver integration. It is the fifth lesson in the Adobe Dreamweaver CS5 Digital Classroom book. For more Adobe Dreamweaver training options, visit AGI’s Dreamweaver Classes. |
Adobe Dreamweaver Tutorial: Adding an introduction section to your page in Dreamweaver
Now you can add additional sections to your page. The first section you’ll add is a box below the header where you’ll end up formatting an introductory paragraph to state the mission of the site, and grab the user’s attention.
1 Click on the Draw AP Div object and draw a box below your header. Don’t worry about the exact size of the box, but make the width smaller than the header and roughly the same height.
A good habit to get into is renaming your AP Divs immediately after they are created. You’ll do that now.
2 Click on the edge of the new div and in the CSS-P Element text field, type intro and press Enter (Windows) or Return (Mac OS).
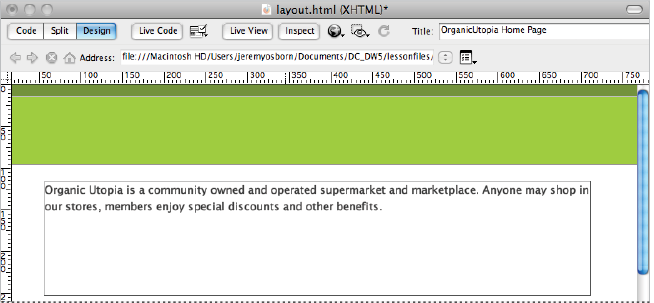
3 Click inside the intro box and type the following text: Organic Utopia is a community owned and operated supermarket and marketplace. Anyone may shop in our stores but members enjoy special discounts and other benefits.
|
The #intro AP Div with added text |
Now you’ll format the text in this box using techniques from the last lesson.
4 In the Property Inspector, click on the HTML button if necessary. Select the text you entered and choose Paragraph from the Format drop-down menu.
5 With the text still selected, click on the CSS button in the Property Inspector. Then click on the Font drop-down menu and choose the Georgia, Times New Roman, Times, serif family. The New CSS Rule definition dialog box will open. The Selector Type will be compound. The Selector Name is #container #intro p. Press the Less Specific button to set the selector to #intro p.
Press OK and the change is applied.
6 In the Property Inspector, click on the Text size drop-down menu and choose the keyword large.
Depending on how large you made your intro box, you may need to adjust the width and height of the box.
|
Set the paragraph text inside the intro box to Georgia and large. |

7 Click on the edge of the intro box to activate it and then click on any of the anchor points on the box to adjust the width and height. We used a width of 655px and a height of 130px.
Adding images to your layout in Dreamweaver
Before you add the remaining sections of your page, you’ll add images to both the header and container sections of the page. First, you’ll add a background image of vegetables to the right side of your header.
1 In the CSS Styles panel double-click the #header rule to open the CSS Rule definition dialog box. Click on the Background category. In addition to the background color, you can also add CSS background images.
2 In the Background image section, press the Browse button. In the select Image Source dialog box, navigate to the images folder within the dw05lessons folder and select veggies.jpg. Press Open (Windows) or Choose (Mac OS). Press Apply and you will see the image tiled across the header.
By default, background images in CSS have this tiled effect, so you will need to add additional properties in order to remove the tiling and position the image to the right.
3 From the Background-repeat drop-down menu, choose no-repeat. From the Background-position (X) drop-down menu, choose right. Press OK and you see the image now aligned to the right side of the header.
|
Background images can be added and positioned to a <div> element. |

A background image is controlled by CSS, and you can only have one background image per element. So in order to have two images inside the header you’ll add the Organic Utopia logo as an inline element which means it is being added to the HTML code, not the CSS.
4 Select the Organic Utopia placeholder text in the #header div and delete it. Then choose Insert > Image. In the Select Image Source dialog box, navigate to the images folder within the dw05lessons folder and select ou_logo.gif. Press Open (Windows) or Choose (Mac OS). Type OrganicUtopia Logo into the text field when asked to add an Alternative text tag, then press OK. The image appears in the top-left corner of the header. You will position this image away from the sides of the header box a bit later in the lesson.
Photoshop Integration in Dreamweaver
Often the images used in your web page need to be modified in Photoshop before they integrate well with your design. Photoshop and Dreamweaver are integrated in a few ways. In this exercise you will see how Dreamweaver can optimize .psd files when you insert them into your page.
1 In the CSS Styles panel, double-click the #container rule. Click on the Background category and choose the Browse button in the Background-image section. In your dw05lessons folder, open the artwork folder. Choose the veggiebackground.psd file and press Open (Windows) or Choose (Mac OS) The Image Preview dialog box appears.
This dialog box appears because you have chosen a .psd file to import and this is not a valid file format for the web. Dreamweaver triggers the Image Preview dialog box, which allows you to optimize the graphic and save it in a more appropriate format.
|
Importing a .psd file into Dreamweaver will trigger the Image Preview, allowing you to save as a web graphic. |
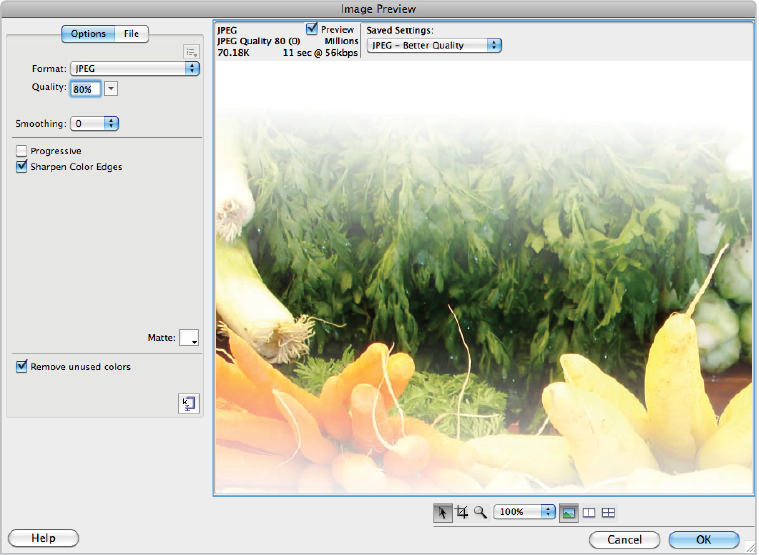
2 Click on the Format menu. The default format is jpeg, but you could also save this as a gif or png. Leave it set to jpeg and slide the Quality slider to 65%.
3 Click on the File button in the top left corner of the Image Preview. This panel below will show you the source dimensions of the image, in this case 800 pixels wide by 600 pixels high. You could choose to resize the image with these controls, however you leave it as is for now. Click OK and the Save Web Image dialog box appears.
4 Navigate to the images folder in the dw05lessons folder and double-click it. In the url section, notice the path images/veggie_background.jpg. It’s important to understand that you are saving a copy of the original PSD file as a jpeg in this step. Click save and you now have a link to the new background image.
5 Click on the background-repeat drop-down menu and choose no-repeat, then click OK.
Continue to the next Dreamweaver Tutorial: Adding Main and Sidebar content areas in Dreamweaver >