Photoshop Tutorial: Exploring Photoshop CS6
What you’ll learn in this Photoshop Tutorial:
|
This tutorial provides you with a foundation for working with vector in Adobe Photoshop. It is the first lesson in the Adobe Photoshop CS6 Digital Classroom book. For more Adobe Photoshop training options, visit AGI’s Photoshop Classes. |
Photoshop Tutorial: Exploring Photoshop CS6
In this lesson, you have the opportunity to learn about some of the new features in Photoshop CS6 by putting together an exciting composition.
Starting up
Before starting, make sure that your tools and panels are consistent by resetting your preferences. See “Resetting Adobe Photoshop CS6 preferences” in the Starting up section of this book.
Users of all levels can follow this step-by-step exercise of new features in Photoshop CS6. However, if you are a new user, we recommend that you start with Lesson 2, “Getting to Know the Workspace,” and return to this lesson when you have completed all the other lessons.
Register your book at www.digitalclassroombooks.com/CS6/Photoshop to gain access to updated lesson files on any computer or watch the videos on any device.
You will work with several files from the ps01lessons folder in this lesson. Make sure that you have loaded the pslessons folder onto your hard drive from the supplied DVD. See “Loading lesson files” in the Starting up section of this book. Now, let’s take a look at some of the new features in Photoshop CS6.
Taking a look at the final project
In this lesson, you’ll create a photocomposition that will come from several sources, allowing you to use some of the new tools and features available in Adobe Photoshop CS6.
1 Choose File > Browse in Bridge. You will use Adobe Bridge to locate your images for this lesson. Adobe Bridge also helps you to search for, organize, and manage your documents. Refer to Lesson 3, “Taking Advantage of Adobe Bridge,” to find out more about Adobe Bridge.
2 In Bridge, choose Window > Workspace > Essentials to make sure that you are viewing the entire workspace.
If you are unfamiliar with Adobe Bridge, click the Folders tab in the upper-left corner of the workspace to navigate from one folder to another. If you saved your lesson files on the desktop, click Desktop; all the folders on your desktop appear in the Content panel.
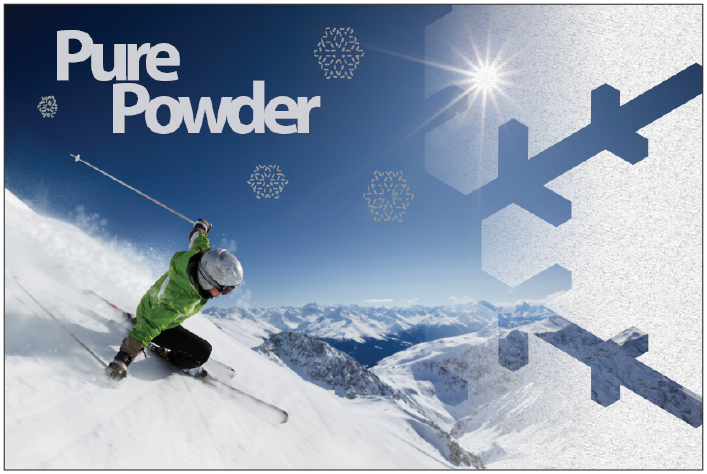
3 Navigate to the ps01lessons folder and double-click to open the file called ps0101_done.psd. An image of a skier appears.
|
The completed lesson file. |
In addition to some standard Photoshop features, some need-to-know new features have been integrated into this lesson. As you can see by investigating the Layers panel for this image, many of the new features in this lesson relate to new and exciting vector capabilities.
4 Now that you have seen the final image, choose File > Close. If a Warning dialog box appears, click No (Windows) or Don’t Save (Mac OS).
Experimenting with new Vector capabilities
In this part of the lesson, you will learn to append custom vector shapes, apply a pattern to them, and adjust the stroke and fill.
1 Choose File > Browse in Bridge. If you do not already have the contents of the ps01lessons folder open, click the Favorites tab in the upper-left of the Bridge workspace, and then choose Desktop. Locate the ps01lessons that you copied from your DVD to the Desktop.
2 Open the ps01lessons folder and double-click to open the ps0101.psd file. An image of a skier appears.
3 Choose File > Save As to open the Save As dialog box. Using the Save In drop-down menu, navigate to the ps01lessons folder. Type ps0101_work in the File Name text field and choose Photoshop from the Format drop-down menu. Then click Save. If the Photoshop Format Options dialog box appears, click OK.
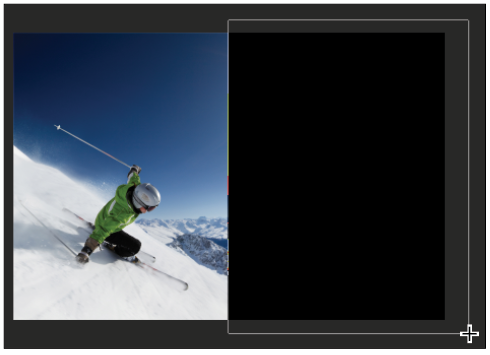
4 Select the Rectangle tool ( ) located directly above the Hand tool in the Tools panel, and then click and drag to create a large rectangle that covers the right half of the image. When you release the mouse, notice that a Rectangle 1 vector layer has been added in the Layers panel.
You will now fill this rectangle with a pattern by taking advantage of some of the new vector features that have been added to Photoshop CS6.
|
Click and drag to create a large rectangle across the right side of the image. |
Filling a vector shape with a pattern
The vector tool capabilities that you can use in Photoshop CS6 have improved dramatically. In this section, you will learn how to fill a vector shape with a pattern.
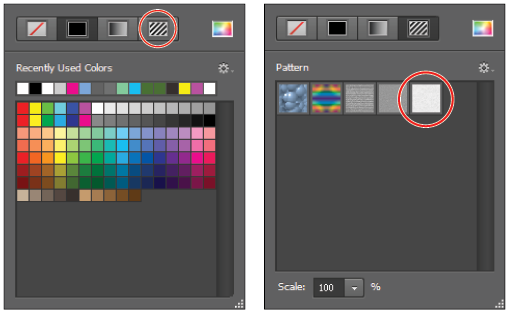
1 With the Rectangle 1 vector layer still active, click Fill in the Options bar, and then click the Pattern button.
2 Select Grey Granite as the pattern. You can learn about saving your own patterns in Lesson 9, “Taking Layers to the Max.”
|
Select Pattern from the Fill menu. Select Grey Granite. |
|
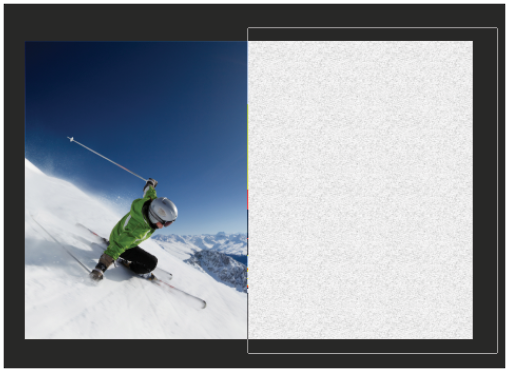
The shape is filled with the pattern. |
| If you do not see the options for the vector layer, you may have inadvertently selected another tool. The Vector options appear only when you have selected a vector shape tool, such as the Rectangle tool. |
You will now create another shape and subtract it from the rectangle.
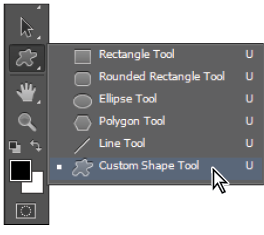
3 Click and hold the Rectangle tool, and then select the hidden Custom Shape tool ( ). Your Options bar reflects the selection of this tool. You gain access to a few default shapes when you select the Custom Shape tool. You can also append additional custom shapes to add more to your collection as you will see in the following steps.
|
Select the hidden Custom Shape tool. |
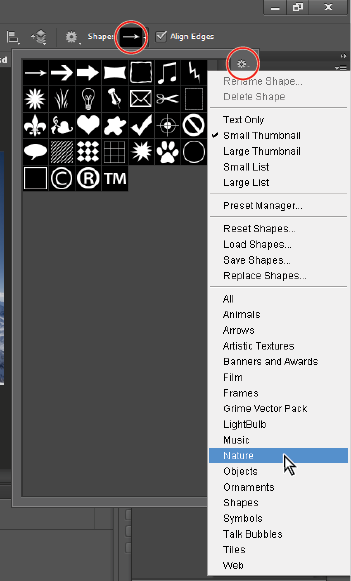
4 Click the arrow in the Shape drop-down (on the right side of the Options bar) menu to see the default shapes.
5 Click the gear icon ( ) in the upper-right of this menu and select the Nature category from the list of collections that appears.
6 When the warning dialog box appears, choose Append. Appending keeps the default shapes and adds the Nature shapes to the bottom of the list. Additional shapes are now added to your list.
|
Select the nature collection of shapes, and then select Append. |
7 Select the shape named Snowflake 1.
|
Select the Snowflake 1 shape. |

8 Click Path operations ( ), which is located in the Options bar, and select Subtract Front Shape. If Subtract Front Shape is not available, make sure that you still have the Rectangle 1 vector layer selected in the Layers panel.
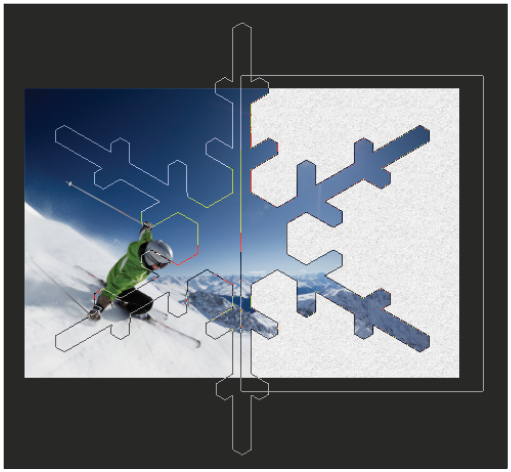
9 Position your mouse approximately in the middle of the left side of the Rectangle shape, and press and hold the Alt key (Windows) or Option key (Mac OS). Click and drag to create a large snowflake shape from the center. Continue dragging until the snowflake is almost as large as the square. The shape is subtracted from the Rectangle shape.
|
Create a large snowflake shape that subtracts from the Rectangle shape. |
If you couldn’t create the large snowflake, press Ctrl+Z (Windows) or Command+Z (Mac OS) to try again. You can use selection and transform tools to resize a vector shape, but it will be easier to practice creating the shape by starting over again.
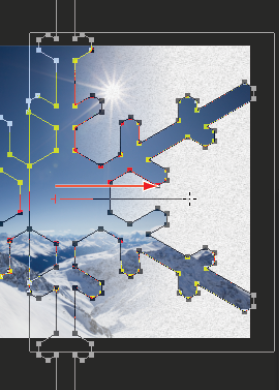
10 Click the Path Selection tool () in the Tools panel, and notice that you can click and drag the snowflake and reposition it as an independent shape. Once you are finished experimenting with moving the snowflake, position it back in the center.
| If you do not like seeing the Path Selection tool, you can choose View > Show > Target Path to make it invisible. You can also toggle this view off and on by pressing Ctrl+Shift+H (Windows) or Command+Shift+H (Mac OS). |
Adding a mask to a Vector layer
In this next part of the lesson, you will add a mask to the large snowflake vector layer. Adding a mask allows you to fade the shape into the rest of the ski image.
Make sure that Rectangle 1 is still the active layer in the Layers panel, and then select the Add layer mask button ( ) at the bottom of the Layers panel. Visually, nothing happens to the image, but a mask appears to the right of the Vector layer thumbnail.
Select the Gradient tool ( ) from the Tools panel and click and drag from the right side of the snowflake toward the center. A gradient appears, but only on the mask. Layer masks allow you to cover-up parts of your image and make them transparent. Notice that the snowflake does not appear where the gradient is black, and that it appears where the gradient is white. Using the gradient, you have faded the snowflake into transparency. If you are not satisfied with the gradient that you created, you can click and drag as many times as you want in different directions until you find one that you like.
|
Click and drag to create a gradient mask. |
Continue to the next Photoshop Tutorial: Using the new brush tips in Photoshop CS6 >