Photoshop Elements Tutorial: Get photos from a scanner in Photoshop Elements
What you’ll learn in this Photoshop Elements Tutorial:
|
This tutorial provides you with a foundation for working with Adobe Photoshop Elements photos. It is the first lesson in the Adobe Photoshop Elements 10 Digital Classroom book. |
Photoshop Elements Tutorial: Get photos from a scanner in Photoshop Elements
Photoshop Elements for Windows can be used to operate many scanners, allowing you to scan your traditional photos and prints, and open them directly in the program. Although this feature is unavailable on the Mac OS platform, you can still import files from your scanner by scanning images using the scanner software that shipped with your scanner, and then importing the scanned images as a second step. See the section below “Adding Files and Folders to the Organizer.”
1 If the Photo Downloader dialog box is open, you will need to press Cancel before you can perform this step. In the Organizer, choose File > Get Photos and Videos > From Scanner.
|
The Get Photos from Scanner dialog box. |
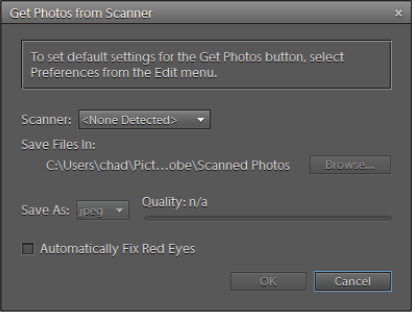
2 Choose your scanner from the drop-down menu.
3 Press the Browse button to choose the folder in which you would like to save your scans.
4 From the Save As drop-down menu, select the format in which you would like to save your image. See Appendix C for an explanation of file format options.
5 Press OK to begin scanning, or press Cancel if you are not connected to a scanner and are simply exploring this option.
 | You can have Photoshop Elements automatically fix red eyes in your scanned image by clicking the checkbox for Automatically Fix Red Eyes. This option is also available in the Photo Downloader when using the Advanced dialog box. |
Get photos and videos by searching If you have photos and videos saved on your hard drive, but aren’t exactly certain of the location, you can have Photoshop Elements search for them.
1 Select File > Get Photos and Videos > By Searching.
|
You can search through your entire hard drive or in specific folders to add images to Photoshop Elements. |
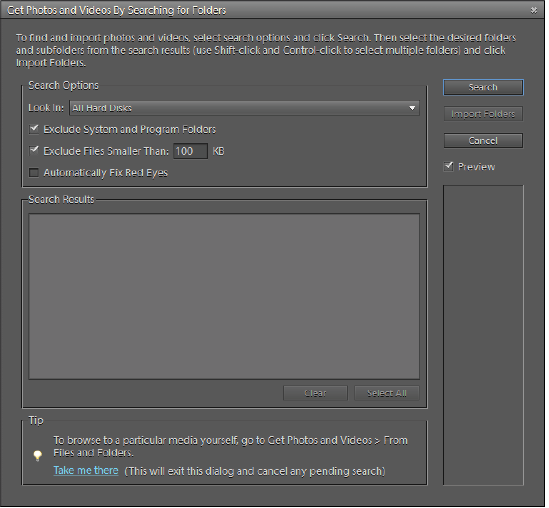
2 Set search options such as location, exclusion size, and automatic red eye fix from the Search Options section.
3 Press the Search button to have Photoshop Elements search your hard drive for any folder containing photo and video files. If you do not want Photoshop Elements to perform this search at the time, press Cancel and go to the next section, “Setting a Watch Folder.”
4 When the search is complete, select the folders that you would like to import photos from, and press Import Folders.
| To select more than one folder, press the Ctrl key while clicking the folders. |
Setting a Watch Folder
Manually adding individual photos and videos to Photoshop Elements can be a time-consuming process. To make this process easier, you can set a Watch Folder. This action allows the program to automatically import any new files that are found in the specified folder, such as the default Pictures folder used by Windows. Note that the Watch Folder feature is not available on the Mac OS version of Photoshop Elements; only the Windows version.
1 Choose File > Watch Folders.
|
Setting a Watch folder makes it easy to import images. |
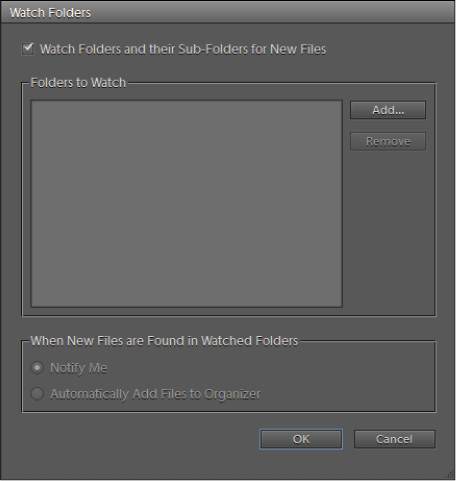
2 Press the Add button and browse to find the folder you want to add to the Watch list. You can add multiple folders if you want.
3 Press OK if you have chosen a Watch folder, or Cancel if you do not want to set up a Watch folder.
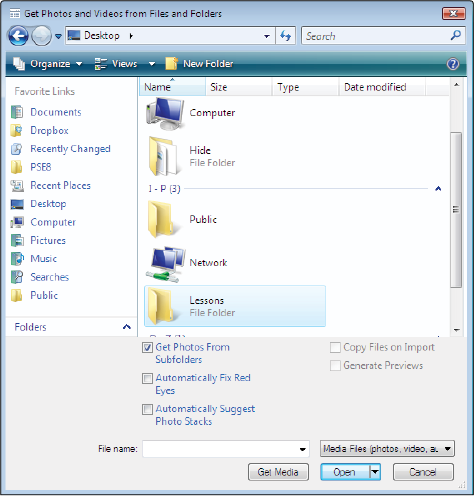
Adding files and folders to the Organizer
In cases where you already have photos on your computer, you simply need to add them to the Organizer. In this example, you’ll use the files provided online that accompanies this book.
|
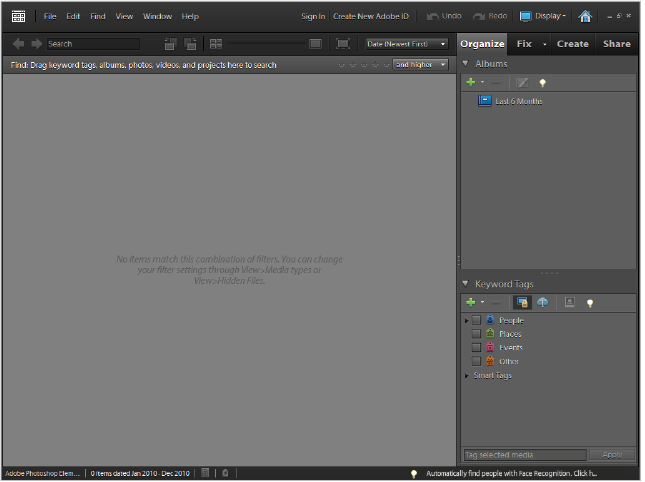
The Organizer is empty until content is imported. |
1 Choose File > Get Photos and Videos > From Files and Folders. In the Get Photos and Videos from Files and Folders dialog box that appears, navigate to the Lessons folder that you copied to your computer.
2 Select the Lessons folder and press the Get Media button. The photos begin to load into the Organizer.
|
You can select a single folder and import all photos from it, and any subfolders as well. |
3 A dialog box appears, asking if you would like to import the keywords that are attached to the photos. Click Select All to import all keywords and all the lesson keywords, and press OK. Keywords help you organize your images and are discussed in more detail in later lessons.
|
If the photos you are importing have keywords attached, you can choose to import them as well. |

| After you import images, only the imported images are displayed. A warning dialog box appears, informing you that the only files you are currently viewing in the Organizer are those that were just imported. Click the Don’t show again checkbox, if you’d prefer that this dialog box didn’t pop up each time you import media. Press OK to close the dialog box. |
4 By default, the images displayed in the Organizer are categorized by date. Choose View > Show File Names to add the filenames to the display. If there is a checkmark next to Show File Names, the feature is already enabled. Choosing Show File Names when it is already selected disables the feature.
| If the filenames still don’t display in the Organizer after choosing View > Show File Names, drag the thumbnail slider to the right until the filenames appear. |
Importing Images from iPhoto
Photoshop Elements 10 for Mac OS offers the ability to import images from an existing iPhoto Library, if you have iPhoto installed on your computer. This is useful if you’ve already been importing images onto your computer via iPhoto. Importing images from iPhoto keeps those images organized while importing them into the Elements 10 Organizer. This capability does not apply to Windows.
1 Choose File > Get Photos and Videos > From iPhoto.
2 In the Import from iPhoto dialog box, you can click the checkbox to convert Events from iPhoto into Albums. This keeps the categorization established in iPhoto when importing into the Elements 10 Organizer.
3 In the More Options Section, you can click the checkbox next to each iPhoto Event and Album that you’d like to import into the Organizer.
|
Photoshop Elements 10 recognizes iPhoto Events and Albums, allowing you to import them into the Organizer. |
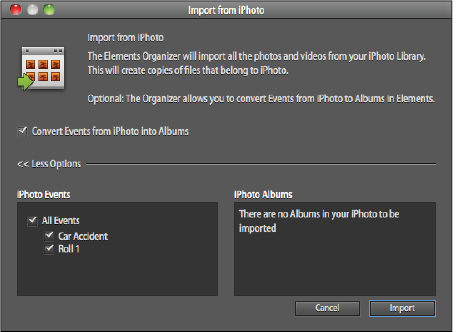
4 Click the Import button to import selected iPhotos Events and Albums into the Organizer or click the Cancel button to exit the dialog box.
Continue to the next Photoshop Elements Tutorial: Getting a still image from a video frame in Photoshop Elements >