Photoshop Elements Tutorial: The Toolbox in Photoshop Elements
What you’ll learn in this Photoshop Elements Tutorial:
|
This tutorial provides you with a foundation for working with the navigator in Adobe Photoshop Elements. It is the second lesson in the Adobe Photoshop Elements 10 Digital Classroom book. |
Photoshop Elements Tutorial: The Toolbox in Photoshop Elements
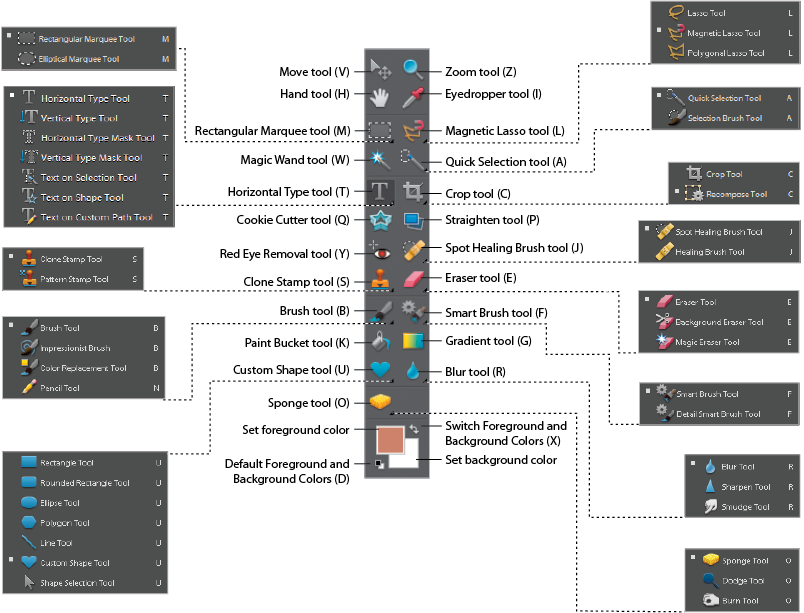
Photoshop Elements is a tool-rich program, and there are tools for accomplishing nearly any task. There are more than 40 tools available in the panel, and they are grouped together based on similarity. Tools with similar names and functions are stored together in tool groups.
|
There are almost 50 tools stored in the Toolbox. Key commands to access the tools using your keyboards are listed in parentheses ( ). |
Using tools
In this next exercise, you will use several tools in order to become more familiar with changing brush sizes or selections.
Red Eye Removal tool
The Red Eye Removal tool analyzes a selection by searching for red spheres, and removes any red areas it finds. It converts the red in the pupils to a neutral black color. The red eye phenomenon is almost always visible in photographs taken at night with a flash. It is actually caused by light reflecting off the back of the eyes. Many cameras now come with a red eye reduction feature, which causes the flash to go off twice, once right before the picture is taken and a second time to actually light the picture. The first flash causes the subject’s pupils to contract, which helps to reduce red eye.
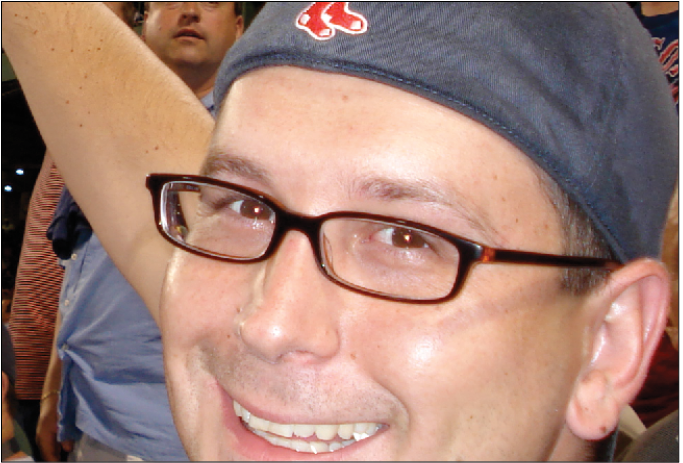
1 In the Organizer, locate and select the red_eye.jpg file. The image contains an image of a man with red eye. You will use the Red Eye Removal tool to remove the red from his eyes.
|
Before using the Red Eye Removal tool. |
2 Press the arrow to the right of the Fix tab and choose Full Photo Edit from the menu that appears, or use the keyboard shortcut, press Ctrl+I (Windows) or Command+I (Mac OS).
3 Choose the Zoom tool ( ) from the Toolbox, then click the person’s face to zoom in. If you zoom in too far, you can hold the Alt (Windows) or Option (Mac OS) key and click to zoom out.
 | You can also use the Navigator to zoom in and out. |
4 Choose the Red Eye Removal tool ( ) from the Toolbox.
5 Click and drag a selection around the first eye. If it doesn’t work on the first pass, try it again. You can also try simply clicking on the pupil with the Red Eye Removal tool. In the Options bar, you’ll also notice options for Pupil Size and Darken Amount. Each picture will present a different circumstance. Try adjusting these values to achieve the results you are looking for.
6 Select an area around the second eye to instantly remove the red from it.
|
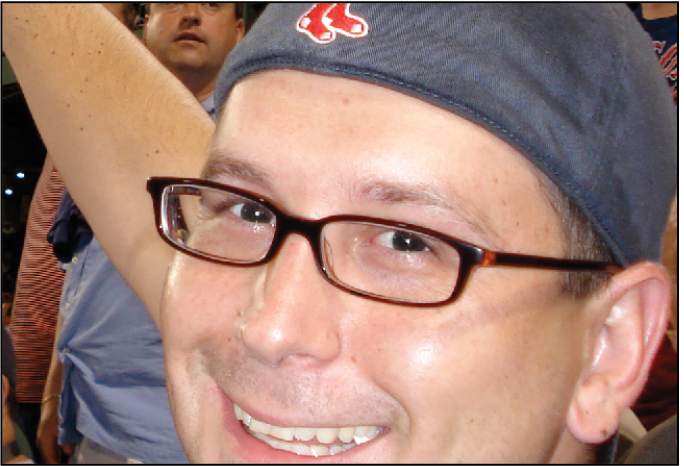
After using the Red Eye Removal tool. |
7 Choose File > Save. In the Save As dialog box, type red_eye_working in the Name text field and change the format to Photoshop. Press Save.
8 Choose File > Close. If you are asked to save the changes, press No.
Whitening teeth
In this exercise, you will use the Smart Brush tool to whiten someone’s teeth. You will also discover how to make a good selection and use an adjustment layer.
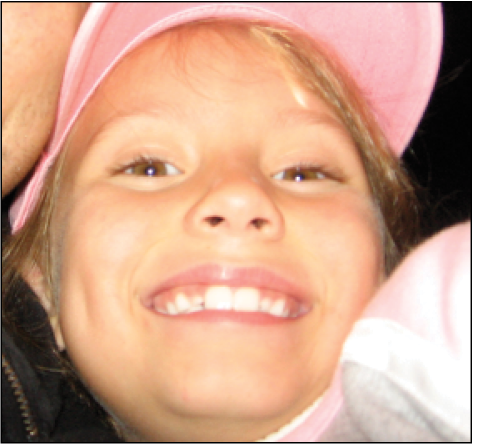
1 In the Organizer, locate and select the pearly_whites.jpg file. The image contains a little girl whose teeth are about to be whitened.
2 Press the arrow to the right of the Fix tab, then choose Full Photo Edit from the menu that appears, or use the keyboard shortcut, Ctrl+I (Windows) or Command+I (Mac OS).
3 Choose the Zoom tool () from the Toolbox, then click the girl’s face to zoom in.
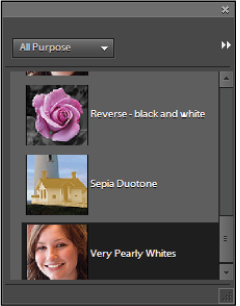
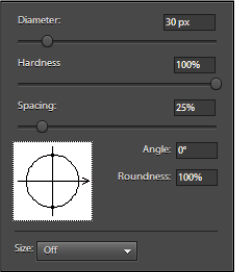
4 Choose the Smart Brush tool ( ) from the Tools pane. The Smart Brush tool panel opens. Scroll to the bottom of the list and choose Very Pearly Whites as the Brush style.
|
This is the Smart Brush tool options panel. |
5 Click and drag the brush on the teeth, being careful not to select outside the teeth. If you need a smaller brush, choose a smaller brush size, or use the slider to choose a smaller diameter from the Brush drop-down menu in the Options bar. Don’t worry if you selected too much; you’ll fix the selection in the next step.
|
Changing the brush size. |
| You can also use the [ ] bracket keys on the keyboard to change the brush size. |
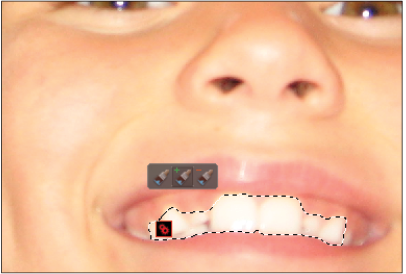
Notice the small toolset that appears above the selection. The first brush is for starting a new selection from scratch. The second brush lets you add to a current selection, and the third brush lets you subtract from a selection.
6 Choose the Subtract from selection brush (the third button). Adjust your brush size if needed, then subtract from the selection so that only the teeth remain selected.
|
Subtracting from a selection. |
7 Once you are happy with the selection, choose the Move tool ( ) from the Toolbox. Notice that a new layer has been added to the Layers panel. This is an adjustment layer. Select the Background layer so that you don’t have to see the selection; you can just view the changes the adjustment layer has made. Notice the visibility icon (
 ) to the left of the adjustment layer. This icon allows you to toggle the visibility of the layer on and off. You can edit this adjustment layer at any time. For more on adjustment layers, refer to Lesson 4, “Adjusting Exposure.”
|
The finished whiter teeth. |
8 Choose File > Save. In the Save As dialog box, type pearly_whites_working in the Name text field and change the format to Photoshop. Uncheck the Save in Version Set with Original checkbox. Press Save.
Because an adjustment layer was used, the original image has not been modified.
9 Choose File > Close. If you are asked to save the changes, press No.
Enhancing blue skies
In this exercise, you will use the Smart Brush tool to make the sky in the photo appear more blue. You’ll first choose the correct Smart Brush option, then make a selection.
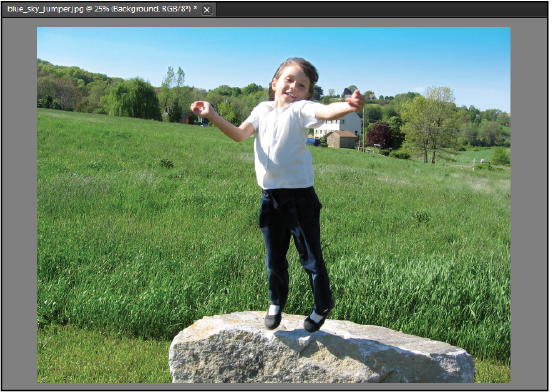
1 In the Organizer, locate and select the blue_sky_jumper.jpg file. The image contains a little girl jumping, and you will change the way the sky looks using the Smart Brush tool.
2 Press the arrow to the right of the Fix tab and choose Full Photo Edit from the menu that appears, or use the keyboard shortcut, Ctrl+I (Windows) or Command+I (Mac OS).
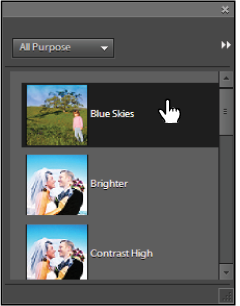
3 Choose the Smart Brush tool ( ) from the Toolbox. The Smart Brush tool panel appears. Scroll to the top of the list and choose Blue Skies as the brush style.
|
Choose Blue Skies. |
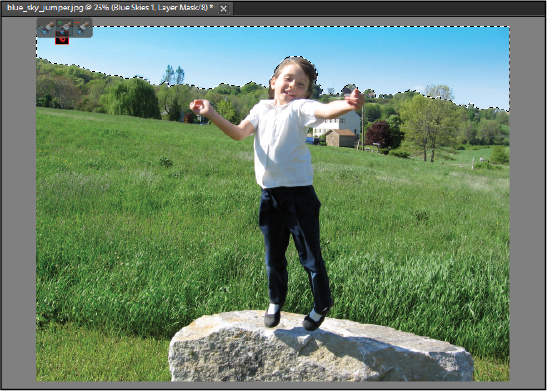
4 Click and drag the brush on the sky, being careful not to select the trees. If you need a bigger brush, choose a bigger brush size or use the slider to choose a bigger diameter from the Brush drop-down menu in the Options bar. Don’t worry if you selected too much; you’ll fix that in the next step.
|
Making the selection. |
5 If necessary, select the third, Subtract from selection, brush. Adjust your brush size if needed, and subtract from the selection, so that only the sky remains selected. Don’t worry about being too precise; you’ll adjust that later.
6 You may have noticed that the image has a selection but there has been only a minor color change. This is because the adjustment layer you are currently working on has an automatic blending mode of Color Burn applied to it. Blending modes describe the way layers blend or interact with each other. In the Layers panel, change the blending mode to Multiply, and the effect is more visible. If you like the Color Burn effect better, change the blending mode back to Color Burn.
|
Modifying the selection. |
7 You can still see a rough edge around the selection. You will blur that edge by feathering it so the edge is less noticeable. Press the Refine Edge button in the Options bar at the top of the screen. Type 3 in the Smooth field, 10 in the Feather text field, and -30 in the Contract/Expand field. Press OK.
|
Making adjustments in the Refine Edge dialog box. |

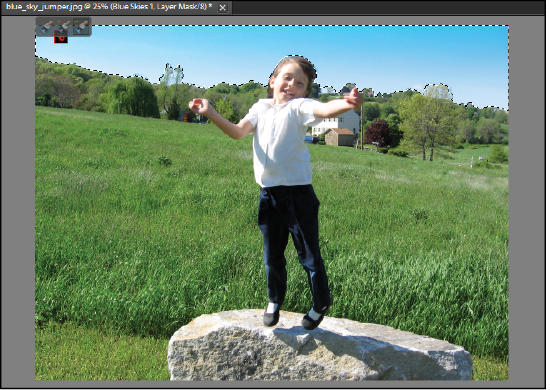
8 Once you are happy with the selection, choose the Move tool ( ) from the Toolbox. Notice that a new adjustment layer has been added to the Layers panel. Select the Background layer so that you don’t have to see the selection; you can just view the changes the adjustment layer has made. Notice that you made the sky more blue and it fades into the trees instead of having a solid edge. Toggle the visibility on the Blue Skies 1 layer by pressing the visibility icon (
 ) to the left of the layer.
|
The image with the enhanced sky. |
9 Choose File > Save. In the Save As dialog box, type blue_sky_jumper_working in the Name text field and change the format to Photoshop. Press Save.
10 Choose File > Close. If you are asked to save the changes, press No.
Sharpening
Using Unsharp Mask corrects common focus problems, such as blurriness caused by an improperly focused or jostled shot. As with any sharpening effect, the more distortion there is in an image, the lower the likelihood that it can be corrected. Sharpening should always be the last step in the correction process. In this exercise, you will sharpen an image.
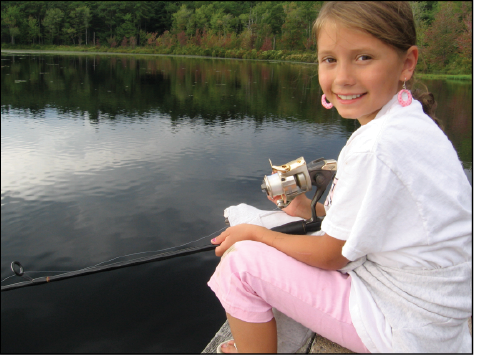
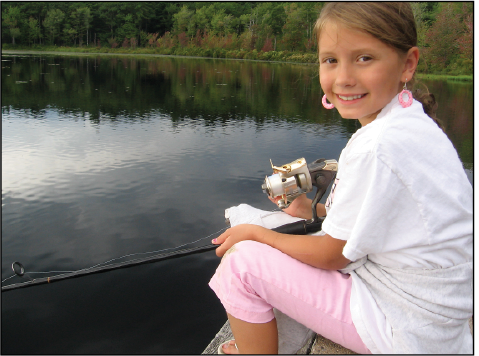
1 In the Organizer, locate and select the fishing.jpg file.
2 Press the arrow to the right of the Fix tab and choose Full Photo Edit from the menu that appears, or use the keyboard shortcut, Ctrl+I (Windows) or Command+I (Mac OS).
|
Before using Unsharp Mask. |
3 Choose Enhance > Unsharp Mask from the menu bar.
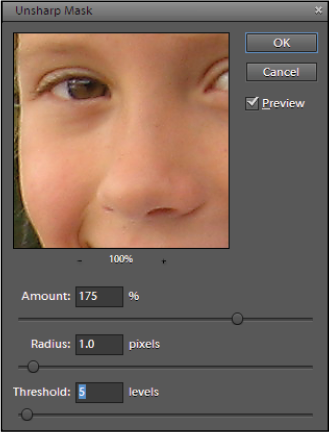
4 In the Unsharp Mask dialog box, type 175 in the Amount text field. Type 1 in the Radius text field and 5 in the Threshold text field. To see how the sharpening is affecting different areas of the image, click inside of the preview window in the Unsharp Mask dialog box and drag to expose other areas of the image. In addition, if you click in the preview window and hold your mouse button down, you’ll see the image before the sharpening is applied. Release the mouse button to see the sharpening. This is a nice way to see a before and after view of the image.
|
The Unsharp Mask settings. |
Press OK. Notice how much sharper this made the image. Another way to see the effect of sharpening is to click the Undo and Redo buttons at the top of the screen to toggle back and forth. It’s easiest to see the effects of sharpening when viewing an image at 100% magnification. Simply select the Zoom tool in the Toolbox and click the 1:1 button in the options bar.
|
After applying Unsharp Mask. |
5 Choose File > Save. In the Save As dialog box, type fishing_working in the Name text field and change the format to Photoshop. Press Save.
6 Choose File > Close. If asked to save the changes, press No.
Unsharp Mask defined
Unsharp masking is a traditional film compositing technique used to sharpen edges in an image by increase the contrast between differing pixels. The Unsharp Mask command corrects blurring in the image, and it compensates for blurring that occurs during the resampling and printing process. Unsharp Mask is recommended as a last step for your images, whether they will end up printed or on the web. A good place to start is to set the Amount to 150, the Radius to 1 or 2, and the Threshold to 10, then adjust as needed. The Amount determines how much the contrast of pixels is increased. The Radius determines the number of pixels around the edges that are affected. The Threshold determines how different the brightness values of pixels should be before they are considered edge pixels.
Cropping images
Cropping an image allows you to remove unwanted, excess area from around your photo. Sometimes it is simply a matter of removing unimportant elements; at other times, it may be a matter of correcting an excess fringe or border around your photo. It’s always best to compose your shot on camera, however the crop tool allows you to correct or enhance the composition of your photo after the shot was taken. The new crop guides in Photoshop Elements 10 allow you to quickly use the rule of thirds and create the best composition for your photo.
1 In the Organizer, locate and select the statue.jpg file. The image needs to be cropped.
2 Press the arrow to the right of the Fix tab and choose Full Photo Edit from the menu that appears, or use the keyboard shortcut, Ctrl+I (Windows) or Command+I (Mac OS).
3 Choose the Crop tool ( ) from the Toolbox. Click and drag to make a selection around the girl and the statue. You can adjust the crop area by dragging on the side, top, bottom, or corner points.
|
Making a selection with the Crop tool. |

4 Double-click the image to apply the crop or click the green checkbox to apply the crop to the image.
5 Choose File > Save. In the Save As dialog box, type statue_working in the Name text field and change the format to Photoshop. Press Save.
6 Choose File > Close. If you are asked to save the changes, press No.
Rotating images
Photoshop Elements gives you the ability to control almost everything about your images, from color and tone, to orientation and size. Rotating and resizing images is a quick and easy process but one that you’ll use more than any other.
1 In the Organizer, locate and select the horizon.jpg file. The image needs to be cropped and rotated.
2 Press the arrow to the right of the Fix tab and choose Full Photo Edit from the menu that appears, or use the keyboard shortcut, Ctrl+I (Windows) or Command+I (Mac OS).
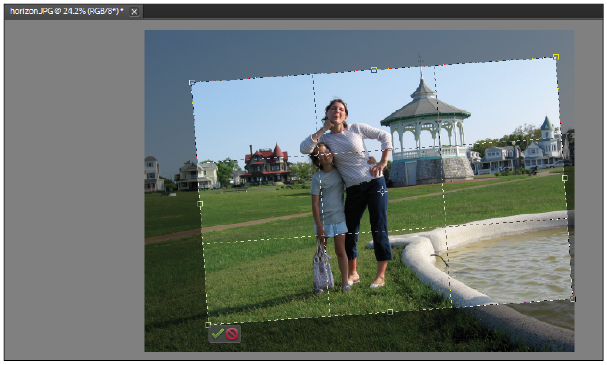
3 Choose the Crop tool ( ) from the Toolbox. Make a selection around the mother and daughter. You can rotate the crop area by placing your cursor just outside a corner point. Notice how the cursor changes to a circle with two arrows.
4 Rotate the crop area so that the two middle points on the left and right of the image match up with the horizon line. With the crop area selected, you can also click in the middle of the crop area and drag it to reposition the crop area on the photo. Drag the side handles to maximize the cropped area of the image.
|
Rotating a crop. |
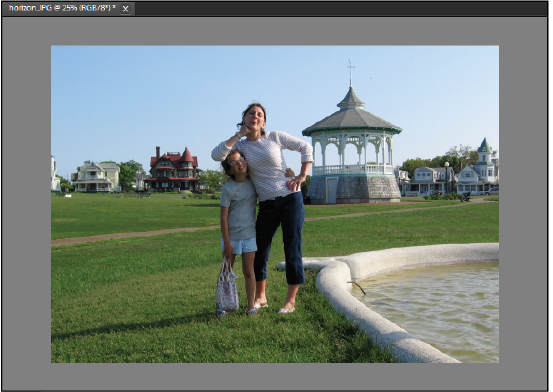
6 Double-click the image or click the green checkmark at the bottom of the crop area to apply both the rotate and crop in one step. Leave the file open for the next exercise.
|
The finished cropped and rotated image. |
Resizing images
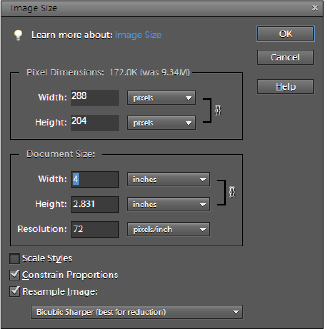
There will be times when you need to resize the width and height of your documents, or adjust the pixel resolution. The Image Size dialog box allows you to do both these things. The Image Size dialog box is divided into two main areas: Pixel Dimensions and Document Size. Pixel Dimensions shows the number of pixels that make up the image. For web graphics, the pixel dimensions are more relevant than the document’s actual printing size. Document Size shows the resolution information, as well as the actual physical size of the image. Pixel Dimensions can be changed when the Resample Image checkbox is checked. In this exercise, you will make an image smaller so that you can e-mail it to someone.
1 Select Image > Resize > Image Size. The Image Size dialog box allows you to change the printable size and resolution of your images.
2 Select the Resample Image checkbox at the bottom of the dialog box. If the image doesn’t resample when you decrease the resolution, the file size will grow. You want to shrink both the physical dimensions and the file size.
3 Type 72 in the Resolution text field, type 4 in the Document Size Width text field, and change the Resample Image option to Bicubic Sharper. Note that the file size is reduced dramatically.
| Bicubic Sharper uses an algorithm that yields good results when reducing the size of an image. Whenever an image is resampled, some quality is lost. Bicubic Sharper helps to minimize this loss in quality. |
|
The new image size settings showing the reduced file size. |
4 Press OK.
5 Choose File > Save. In the Save As dialog box, type horizon_working in the Name text field and change the format to Photoshop. Press Save.
6 Choose File > Close. If asked to save the changes, press No.
The image could now be sent as an e-mail attachment, as it is much smaller. Sharing images is covered in more detail in Lesson 6, “Sharing Your Photos.”
Recompose
Photoshop Elements takes resizing images to a new level with the Recompose tool. The recompose tool analyzes an image and tries to detect elements of importance. Think of the recompose tool as a way of internally cropping your photo! Let’s take a look at how this tool works.
1 In the Organizer, type 0920 in the Search text field at the top of the Organizer to filter the images displayed to those that contain 0920 in the filename. One image of planes flying is displayed. Click the image to select it.
2 Click the arrow to the right of the Fix tab and choose Full Photo Edit from the drop-down menu.
4 Click and hold the Crop tool ( ) and choose the Recompose tool (
 ). Press OK when the Recompose dialog box appears. Note that handles appear on every side and every corner of the photo.
|
The image prior to using the Recompose tool. |
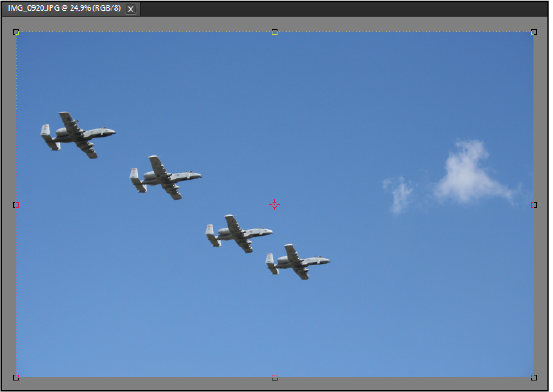
5 Select the handle on the right side of the photo and drag to the left, to about 75% of its original size. Notice how the planes themselves are not actually scaling but the space between them is. The planes are actually closer together now. Click the green checkmark at the bottom of the image to commit the change.
6 Click and hold the Recompose tool and choose the Crop tool.
7 Drag a crop area around the new (smaller) image area. Click the green checkmark at the bottom of the image to commit the crop.
8 Choose File > Save. Type IMG_0920_recomposed in the File name text field and choose Photoshop from the Format drop-down menu. Uncheck the Save in Version Set with Original checkbox and press Save.
|
The recomposed image. |

9 Continue practicing with other images. As your images get more complex, you may need to assist Photoshop Elements in determining the important and non-important areas of the image. You’ll notice when you choose the Recompose tool that protect and remove brushes appear in the options bar. You can use these brushes to paint over areas that can be removed and over areas that need to be protected or not scaled.
|
The protect and remove brushes tells Photoshop Elements what can be removed and what needs to be protected. |

When you have finished practicing with other images, choose File > Close All.
Congratulations, you have completed the lesson.