Photoshop Tutorial: Navigating the image area in Photoshop
What you’ll learn in this Photoshop Tutorial:
|
This tutorial provides you with a foundation for working with Adobe Photoshop navigation. It is the first lesson in the Adobe Photoshop Digital Classroom book. For more Adobe Photoshop training options, visit AGI’s Photoshop Classes. |
Photoshop Tutorial: Navigating the image area in Photoshop
To work most efficiently in Photoshop, you’ll want to know how to zoom (magnify) in and out of your image. Changing the zoom level allows you to select and paint accurately and helps you see details that you might otherwise have overlooked. The zoom function has a range from a single pixel up to a 3200 percent enlargement, which gives you a lot of flexibility in terms of viewing your images.
You’ll start by using the View menu to reduce and enlarge the document view, and end by fitting the entire document on your screen.
1 Choose View > Zoom In to enlarge the display of ps0201_work.psd.
2 Press Ctrl+plus sign (Windows) or Command+plus sign (Mac OS) to zoom in again. This is the keyboard shortcut for the Zoom In command that you accessed previously from the View menu.
3 Press Ctrl+minus sign (Windows) or Command+minus sign (Mac OS) to zoom out. This is the keyboard shortcut for View > Zoom Out.
Now you will fit the entire image on the screen.
4 Choose View > Fit on Screen, or use the keyboard shortcut Ctrl+0 (zero) (Windows) or Command+0 (zero) (Mac OS), to fit the document to the screen.
5 You can also display artwork at the size it will print by choosing View > Print Size.
Using the Zoom tool
When you use the Zoom tool (), each click increases the view size to the next preset percentage, and centers the display of the image around the location in the image that you clicked on. By holding the Alt (Windows) or Option (Mac OS) key down (with the Zoom tool selected), you can zoom out of an image, decreasing the percentage and making the image view smaller. The magnifying glass cursor is empty when the image has reached either its maximum magnification level of 3,200 percent or the minimum size of one pixel.
1 Choose View > Fit on Screen.
2 PSelect the Zoom tool, and click two times on the license plate to zoom in. You can also use key modifiers to change the behavior of the Zoom tool.
3 Press Alt (Windows) or Option (Mac OS) while clicking with the Zoom tool to zoom out.
You can accurately zoom into the exact region of an image by clicking and dragging a marquee around that area in your image. To do this, you must disable a new Zoom tool option.
4 Uncheck the Scrubby Zoom checkbox in the Zoom tool’s Option bar to disable this feature. The Scrubby Zoom feature allows you to click and drag to zoom immediately. In this example, you need a more predictable zoom area.
|
Disable the Scrubby Zoom in the Zoom tool’s Option bar. |
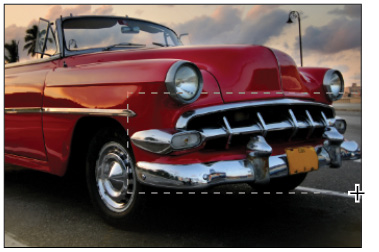
5 With the Zoom tool still selected, hold down the mouse and click and drag from the top left of car’s grill to the lower-right of the bumper. You are creating a rectangular marquee selection around the front of the car. Once you release the mouse, the area that was included in the marquee is now enlarged to fill the document window.
|
Drag a marquee over the front of the car. |
6 Double-click the Zoom tool in the Tools panel to return to a 100 percent view.
Because the Zoom tool is used so often, it would be tiresome to continually have to change from the Zoom tool back to the tool you were using. Read on to see how you can activate the Zoom tool at any time without deselecting your current tool.
7 Select the Move tool () at the very top of the Tools panel.
8 Hold down Ctrl+spacebar (Windows) or Command+spacebar (Mac OS). Note that on the Mac OS you must hold down spacebar before the Command key, otherwise you trigger Spotlight; the Move tool is temporarily converted into the Zoom In tool. While still holding down Ctrl/Command+spacebar, click and drag over the front of the car again, then release. Note that although you have changed the zoom level, the Move tool is still active.
 | You can zoom out by holding down Alt+spacebar (Windows) or Option+spacebar (Mac OS). |
9 Choose View > Fit on Screen.
Using the Hand tool
The Hand tool allows you to move or pan around the document. It is a lot like pushing a piece of paper around on your desk.
1 Select the Zoom tool then click and drag on an area surrounding the front of the car.
2 Select the Hand tool then click and drag to the right to push the picture to the right. Notice that when the Hand tool is active, four view buttons appear in the Options bar (at the top of the work area) that allow you to change your current view to Actual Pixels, Fit Screen, Fill Screen, and Print Size.
3 Select the Zoom tool and hold the spacebar. Notice that the cursor turns into the Hand tool. Click and drag left to view the front of the car again. By holding down the spacebar, you can access the Hand tool without deselecting the current tool.
4 Double-click the Hand tool in the Tools panel to fit the entire image on your screen. This is the same as using Ctrl+0 (zero) (Windows) or Command+0 (zero) (Mac OS).
Navigation Shortcuts | Windows | MAC OS |
Zoom In | Ctrl+plus sign Ctrl+spacebar | Command+plus sign Command+spacebar |
Zoom Out | Ctrl+minus sign Alt+spacebar | Command+minus sign Option+spacebar |
Turn Zoom In tool into Zoom Out tool | Alt | Option |
Fit on Screen | Ctrl+0 (zero) or double-click the Hand tool | Command+0 (zero) or double-click the Hand tool |
Hand tool (except when Type tool is selected) | Press spacebar | Press spacebar |
Using tabbed windows in Photoshop
In Photoshop, you have control over how your windows appear in the workspace. You can work with floating image windows, or choose to tab your windows across the top of the workspace. In this section, you find out how to use the new tabbed workspace.
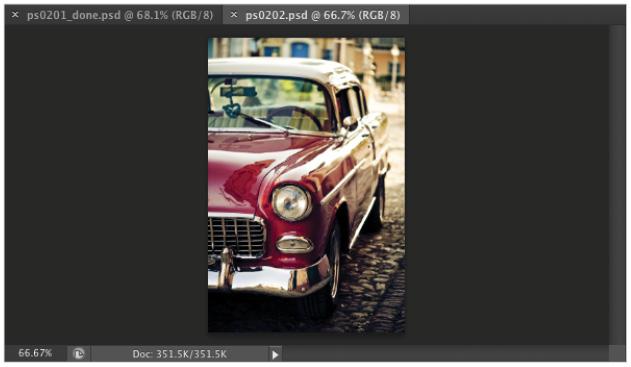
1 If the Mini Bridge is not visible, choose File > Browse in Mini Bridge. In the Navigation pod, double-click on the image named ps0202.psd to open it in Photoshop.
2 The image is displayed as a separate tab within Photoshop, allowing you to click on the tab to switch between active images.
Image  |
Multiple open images appear as tabs at the top of the screen. |
3 Click on the ps0202.psd tab and then click and drag the tab away from its tabbed position and release the mouse button. The image second window is now floating.
4 Click the title bar of the floating window and drag upward until your cursor is next to the tab of the other image. When you see a blue bar appear, release the mouse button. The image is now back to being a tabbed window. You can stop a window from tabbing accidentally by holding down the Ctrl (Windows) or Command (Mac OS) key while dragging the floating window.
If you would prefer not to take advantage of the tabbed window feature, you can choose Edit > Preferences (Windows) or Photoshop > Preferences (Mac OS), then choose Interface. In the Panels & Documents section, uncheck Open Documents as Tabs and press OK.
To quickly move all floating windows back to tabbed windows, choose Window > Arrange > Consolidate All to Tabs. |
Maximizing productivity with Photoshop’s screen modes
Now that you can zoom in and out of your document, as well as reposition it in your image window, it’s time to learn how to take advantage of screen modes. You have a choice of three screen modes in which to work. Most users start and stay in the default—Standard Screen mode—unless they accidentally end up in another. Screen modes control how much space your current image occupies on your screen, and whether you can see other Photoshop documents as well. The Standard Screen mode is the default screen mode when you open Photoshop for the first time. It displays an image on a neutral gray background for easy and accurate viewing of color without distractions, and also provides a flexible work area for dealing with panels.
1 Click on the tab of the ps0201_work.psd image to make that image active.
2 Press the Tab key; the Tools panel and other panels disappear, creating much more workspace. Press the Tab key again to bring the Tools panel and other panels back.
3 Press Shift+Tab to hide the panel docking area while keeping the rest of the panels visible. Press Shift+Tab to bring the hidden panels back. Both the Tools panel and the panel docking area should now be visible.
As you position your cursor over various tools, you see a letter to the right of the tool name in the tooltip. This letter is the keyboard shortcut that you can use to access that tool. You could, in fact, work with the Tools panel closed and still have access to all the tools via your keyboard. |
You will hide the panels once more so that you can take advantage of a hidden feature in Photoshop CS6.3
4 Press the Tab key to hide the panels. Then position your cursor over the thin gray strip where the Tools panel had been, and pause. The Tools panel reappears. Note that the Tools panel appears only while your cursor is in the Tools panel area, and it disappears if you move your cursor out of that area. Try this with the panel docking area to the right of the screen, and watch as that also appears and disappears as your cursor moves over the gray border off to the right.
By changing the screen modes, you can locate over-extended anchor points and select more accurately up to the edge of your image. Changing modes can also help you present your image to clients in a clean workspace.
5 Press the Tab key again to display all the panels.
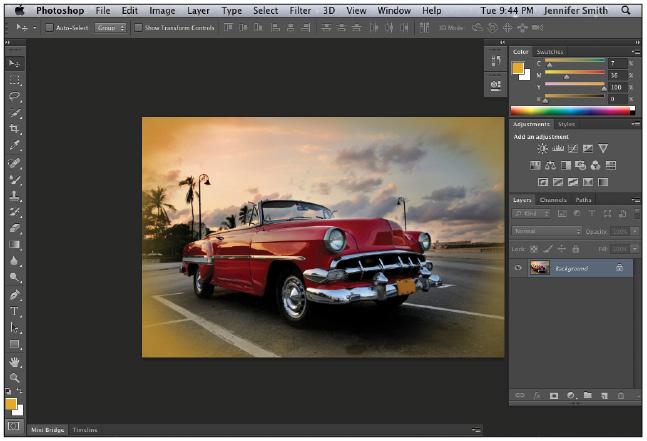
6 Press F to cycle to the next screen mode, which is Full Screen Mode With Menu Bar. This view surrounds the image out to the edge of the work area with a neutral gray (even behind the docking area) and displays only one image at a time, without tabs, and centered within the work area. You can access additional open images by choosing the image name from the bottom of the Window menu.
You can also change your screen mode by selecting View > Screen Mode.
7 Notice that the gray background area (pasteboard) now extends to fill your entire screen, and your image is centered within that area. One of the benefits of working in this mode is that it provides more area when working on images.
Image  |
The Full Screen mode with Menu bar. |
8 Press F on the keyboard again to see the last screen mode, Full Screen Mode.
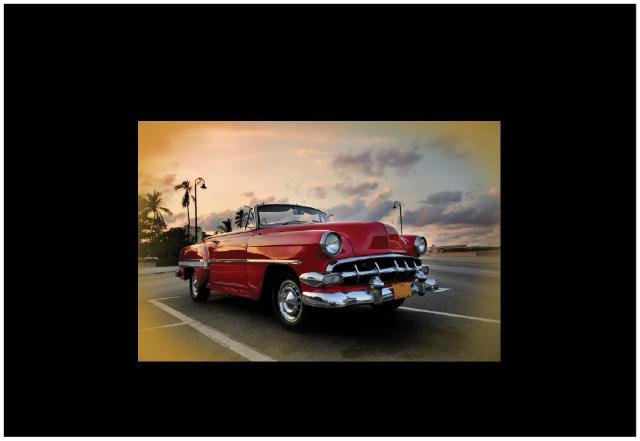
Image  |
Full Screen mode. |
This is Full Screen mode. A favorite with multimedia users, it allows you to show others your document full-screen with no distracting screen elements. All menus and panels are hidden automatically in this mode; however, they are still accessible by hovering the cursor over the area where the panels normally reside. The panels temporarily reappear for easy access. If you’d like to see the panels while in this mode, simply press the Tab key to display and hide them.
9 Press the F key once to cycle back into Standard Screen mode, or click and hold on the Change Screen Mode button at the bottom of the Tools panel and select Standard Screen Mode. If you do not see your the Tools panels you can press Tab.
