Adobe After Effects Tutorial: Importing multiple files in After Effects
What you’ll learn in this After Effects Tutorial:
|
This tutorial provides you with a foundation for working with Adobe After Effects media management. It is the third lesson in the Adobe After Effects CS6 Digital Classroom book. For more Adobe After Effects training options, visit AGI’s After Effects Classes. |
Adobe After Effects Tutorial: Importing multiple files in After Effects
Using the Import File command allows you to select multiple files simultaneously, but only if they reside in the same folder. Using this command is a little troublesome if you need to import files that reside in different folders on your hard drive. To address this problem, After Effects uses a command called Import Multiple Files.
1 Choose File > Import > Multiple Files to open the Import Multiple Files dialog box.
You can also use the keyboard shortcut Command+Option+I (Mac OS) or Ctrl+Alt+I (Windows) or right-click in any empty area of the Project panel and choose Import > Import Multiple Files. |
2 Navigate to the images folder; press and hold down the Ctrl (Windows) or Command (Mac OS) key on your keyboard, and click on fountain.jpg and Washington Church.jpg to select them both. Click the Open button to import them. The files are imported and the Import Multiple Files dialog box opens again to allow you to select additional files.
3 Navigate to the audio folder and click on Subliminal.mp3 to highlight it. Click Open to import this file as well. Again, After Effects imports the file and the dialog box reopens.
4 Navigate to the video folder, hold down the Command (Mac OS) or Ctrl (Windows) key on your keyboard, and click on forest.mov and pingpongnode.mov to select them both. Click Open to import these files. Again, the dialog box opens.
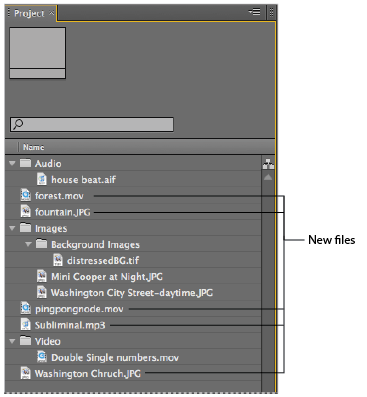
5 Click Done to close the dialog box, as you no longer need it. The Project panel now shows that all the files that you imported have been added to your project.
|
Whenever you import a file, it appears highlighted in the Project |
6 With the Project panel highlighted, press the tilde key on your keyboard to maximize it to full-screen size.
7 Move the video files (forest.mov and pingpongnode.mov) into the Video folder. Move the audio file (Subliminal.mp3) into the Audio folder, and move the image files (fountain.jpg and Washington Church.jpg) into the Images folder.
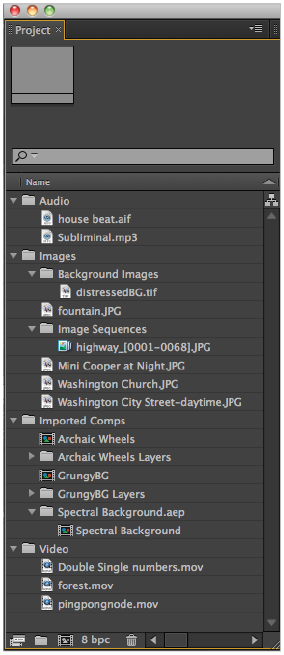
Your Project panel should now match the figure below.
With the Project panel highlighted, press the tilde (~) key on your keyboard to minimize the panel and return to the Standard workspace layout.
|
Enlarge the Project panel, then organize your files for easier access. |

8 Save your file by choosing File > Save or by pressing Ctrl+S (Windows) or Command+S (Mac OS) on the keyboard.
Do not close this file, you will need it in the next part of the lesson.
Importing Photoshop and Illustrator files
Adobe Photoshop and Illustrator are two industry-standard applications for creating pixel-based and vector graphics, respectively. While you can export a wide variety of file formats from either of them for import into After Effects, it is best to import the native file formats that both applications produce. When importing native Photoshop (.psd) and Illustrator (.ai) files, you can take full advantage of the integration between the applications. You can import layered Photoshop and Illustrator files either as footage or as compositions. If you import a file as footage, After Effects automatically flattens the layers; however, if you choose to import it as a composition, the file is converted into a new composition in After Effects and the application imports each layer as an individual footage item so that they can be animated separately. The process is virtually identical for both types of files.
1 With the Project panel highlighted, press the tilde (~) key on your keyboard to maximize the panel to full screen mode.
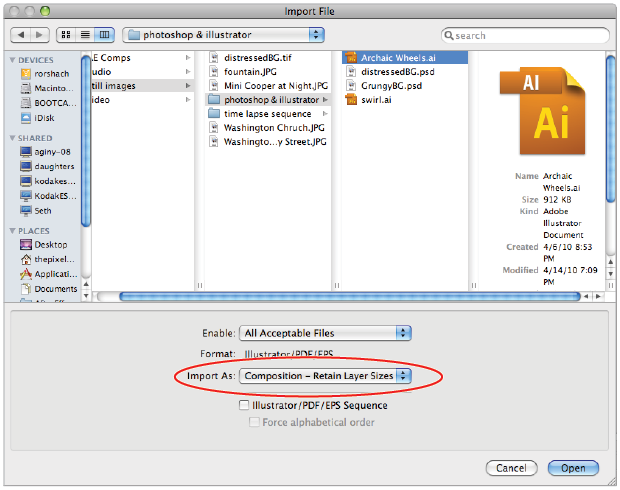
Choose File > Import > File. Navigate to images > photoshop & illustrator, and select the file Archaic Wheels.ai.
2 From the Import As drop-down menu, choose Composition – Retain Layer Sizes. Click the Open button to import the file.
|
From the Import As drop-down menu, choose Composition – Retain Layer Sizes. |
When you import a Photoshop or Illustrator file as a composition, the Project panel has a new composition automatically added to it that is named for your file, and a new folder that holds the individual footage items that make up the new composition. |
Composition versus Composition — Retain Layer Sizes
When you import native Photoshop and Illustrator files into After Effects, an often-misunderstood setting is the Import As feature. The difference isn’t technically in how the file is imported, but actually has to do with how After Effects arranges the layers in the file when it converts the file into a composition.. Regardless of which one you choose (Composition or Composition – Retain Layer Sizes), you end up with a new composition and a folder that contains each individual layer from your file. The difference isn’t in how After Effects brings in your files; it is in how it sets up the anchor point for each imported layer.
|
Composition. |

When using the Composition setting, After Effects looks at the boundary of the layered file that is being imported and sets the anchor point for each layer to the center of the file, regardless of the content of each layer. When importing a Photoshop file, the center point is calculated based on the document size, while with an Illustrator file, the center point is set based on the contents of the file. This setting can be very helpful when you have a symmetrical composition and you want to transform every layer in relation to the image’s central axis.
|
Composition – Retain Layer Styles. |

When using the Composition – Retain Layer Sizes option, After Effects takes a different approach to assigning anchor points. With this setting, the anchor point of each layer is based only on the content of each layer. This setting is usually more beneficial when dealing with artwork that is asymmetrical or when you want to transform each layer separately on its own axis.
3 Click the Create a new Folder button ( ) at the bottom of the Project panel to create a new folder. Name the new folder Imported Comps, then press Enter (Windows) or Return (Mac OS) to exit the folders name field. Drag the Archaic Wheels composition and Archaic Wheels Layers folder into it. If necessary, click the reveal training to the left of the folder name to reveal its contents.
4 Click the Imported Comps folder to highlight it. Choose File > Import > File, navigate to images > Photoshop & Illustrator, and select the file GrungyBG.psd. Choose Composition in the Import As drop-down menu.
Click Open to go to the secondary PSD Import dialog box.
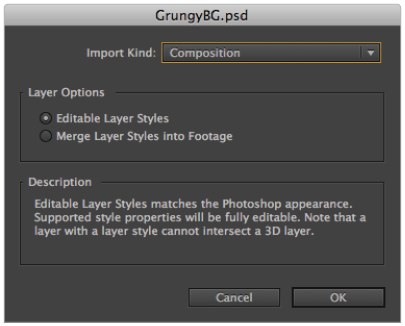
5 In the dialog box, make sure that the radio button for Editable Layer Styles is enabled. Click OK to import the file. The new Composition and its Layers folder is imported right into the Imported Comps folder.
|
The Import options dialog box. |
6 Save your file by choosing File > Save or by pressing Ctrl+S (Windows) or Command+S (Mac OS) on the keyboard.
With the Project panel highlighted, press the tilde (~) key on your keyboard to minimize the panel and return to the Standard workspace layout.
Do not close this file; you will need it in the next part of the lesson.
Importing image sequences
Image sequences can be produced from a wide range of programs and also from devices such as scanners and digital cameras. While there is some variation in the naming convention for the images in a sequence, they generally begin with a filename followed by a number and then the file extension—for example, image01.jpg. When you select an image in a sequence, you can have After Effects search the folder for other images with similar names and import them as if they were part of a video file.
1 With the Project panel highlighted, press the tilde (~) key on your keyboard to maximize the panel to full screen mode.
Click the Images folder to highlight it, and then click the Create New Folder button at the bottom of the Project panel. Name the new folder Image Sequences, then press Enter (Windows) or Return (Mac OS).
2 With the Image Sequences folder highlighted, choose File > Import > File or press Ctrl+I (Windows) or Command+I (Mac OS) to open the Import File dialog box.
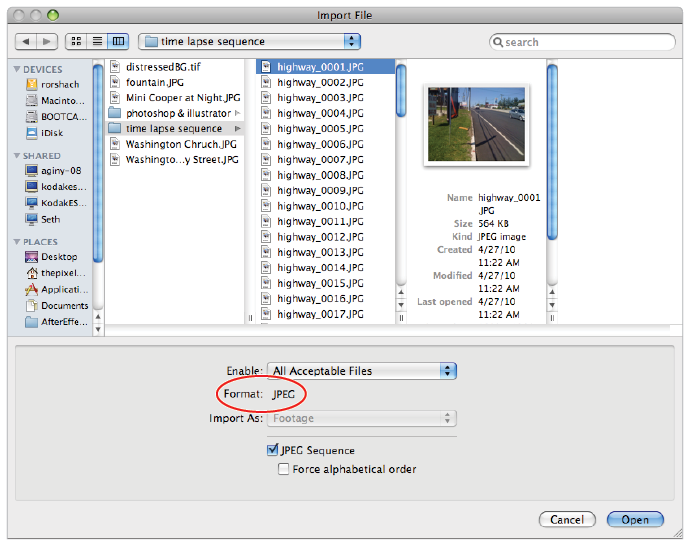
3 Navigate to images > time lapse sequence and click on the first file in the folder, highway_0001.jpg, to select it.
4 Confirm that the JPEG Sequence checkbox is enabled at the bottom of the dialog box and click the Open button.
|
Make sure JPEG sequence is enabled in the Import file dialog box. |
5 The files are imported and placed in the Project panel as a single entry named highway_[0001-0068].jpg.
With the Project panel highlighted, press the tilde key on your keyboard to minimize the panel and return to the Standard workspace layout.
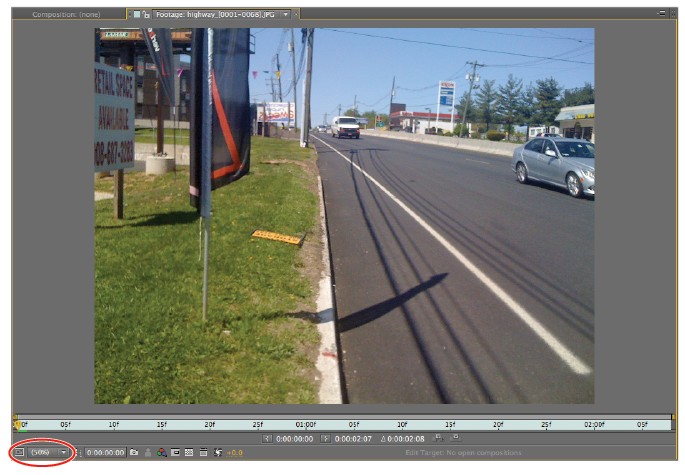
Double-click the image sequence to preview it in the Footage panel.
6 If necessary, click the Magnification ratio pop-up menu at the bottom left of the panel and choose Fit up to 100% from the menu that appears. This resizes the preview to fit inside the Footage panel up to a maximum magnification of 100%.
|
When set to Fit up to 100%, the video preview will adjust whenever you resize the footage panel. |
The Fit up to 100% option is also available when working in both the Composition and Layer panels. |
7 Press the spacebar on your keyboard to preview the sequence. You can press the spacebar again at any time to stop the playback.
The preview created by pressing the spacebar is not a real-time preview—at least it isn’t the first time it plays. A green bar appears at the top of the time ruler as you preview the file. This is an indication that the program is rendering the video file for playback. The second time you preview the footage, the rendering is complete and you experience the playback in real time. |
8 Save your file by choosing File > Save or by pressing Ctrl+S (Windows) or Command+S (Mac OS) on the keyboard.
Do not close this file, you will need it in the next part of the lesson.
Importing After Effects compositions
So far in this lesson, you have imported individual still images, video, audio, and even image sequences. In addition to all these file types, you can import entire projects into other After Effects projects. This option is necessary when you need to move or share compositions or footage between multiple projects. In many other applications, you would just use a copy-and-paste command, but since you cannot open multiple files simultaneously in After Effects, another solution is needed. This is why you have the ability to import entire After Effects projects into another.
1 With the Project panel highlighted, press the tilde (~) key on your keyboard to maximize the panel to full screen mode.
Highlight the Imported Comps folder in your Project panel and choose File > Import > File, or press Ctrl+I (Windows) or Command+I (Mac OS), to open the Import File dialog box.
2 Navigate to the AE Comps folder and select Spectral Background.aep. The Import As menu automatically sets itself to Project. Click Open to import the file.
The entire project, including all the links to its imported media, and everything else that was in the imported files’ Project panel, are now a part of your current project and are stored inside of a folder named for the project file. In this case, the imported project contains a single Composition, and it is called Spectral Background.
3 With the Project panel highlighted, press the tilde key on your keyboard to minimize the panel and return to the Standard workspace layout.
Click the reveal triangle to expand the Spectral Background.aep folder. Double-click on the Spectral Background composition to preview it in the Composition and Timeline panels.
|
Preview the Spectral Background composition by |
4 Compositions must be rendered first before you can view them in real time. Click the RAM Preview button in the Preview panel to the right. The preview begins building, which is indicated by the green bar at the top of the Timeline. Once After Effects has finished building the preview, it begins automatically from the beginning. Depending upon the speed of your computer, it may take a few minutes. Faster computers with more RAM will speed your work with After Effects.
The duration of the composition preview is based on the amount of RAM on your system, which is why it is called a RAM preview. If you don’t have enough RAM, you may not be able to preview the entire Timeline at once. If necessary, you can increase the duration of the RAM preview by reducing the resolution of the composition in the Resolution/Down Sample Factor drop-down menu at the bottom of the Composition panel. |
5 Save your file by choosing File > Save or by pressing Ctrl+S (Windows) or Command+S (Mac OS) on the keyboard. Do not close this file, you will need it in the next part of the lesson.
Continue to the next After Effects Tutorial: Locating missing files in After Effects >