Dreamweaver tutorial: Previewing Pages in a Web Browser using Dreamweaver
What you’ll learn in this Dreamweaver Tutorial:
|
This tutorial provides you with a foundation for working with the Adobe Dreamweaver workspace. It is the third lesson in the Adobe Dreamweaver CC Digital Classroom book. For more Adobe Dreamweaver training options, visit AGI’s Dreamweaver Classes. |
Adobe Dreamweaver Tutorial: Previewing pages in a web browser using Dreamweaver
Viewing your pages in the Design view is helpful, but visitors to your site will be using a web browser to access your site. In Lesson 1, “Dreamweaver CC Jumpstart,” you learned how browsers use HTML code to render a page. Unfortunately, not every browser renders HTML code in exactly the same way, so it’s important to test-drive your pages in a number of different browsers to check for inconsistencies and basic functionality.
Next, you’ll use Dreamweaver’s Preview in Browser feature to see how the OrganicUtopia site looks in a web browser.
1 With events.html open in Dreamweaver, choose File > Preview in Browser and select a browser from the available options. This list varies, depending on the browsers you have installed on your hard drive.
|
Preview in Browser allows you to see how a selected browser would render your page. |
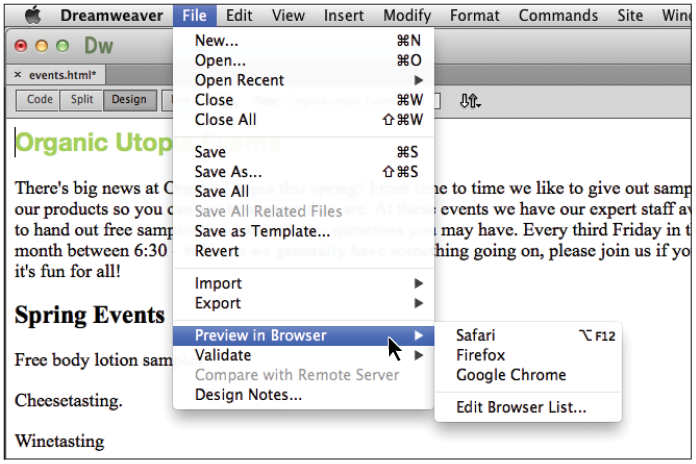
The options found under File > Preview in Browser can be customized by choosing File > Preview in Browser > Edit Browser List. |
2 When events.html opens in the browser of your choice, look for differences between the Design view preview and the version rendered by your browser. At this stage, there shouldn’t be anything too surprising, but there could be subtle differences in spacing and font style. Close your web browser.
There is another method to preview your pages: the Live View feature. Live View allows you to preview your page without having to leave the Dreamweaver workspace. You can think of Live View as a browser within Dreamweaver (in fact, it is the same WebKit rendering engine found in browsers such as Apple’s Safari and Google’s Chrome, among others).
3 Click the Live button located in the Document toolbar at the top of your page. You will not see a dramatic difference, but your text could shift slightly. Select the first heading in the window and try to delete it; you will be unable to, because Live View is a non-editable workspace. However, Live View does allow you to edit your page when you are in Split view. You are allowed to edit in the Code view and changes will be reflected in real time. An additional advantage is that your document does not have to be saved in order to see the changes.
|
When Live View is enabled, Dreamweaver simulates a web browser. |

4 Click the Live button again to deactivate this view. While Live View is a useful addition to Dreamweaver, it does not replace the need to preview your page in a browser. Web pages might be rendered differently depending on your visitor’s browser, and so it is a good habit to check your page occasionally as you make changes to your design.
Understanding hyperlinks
When people visit a website, they usually expect to see more than one page. Imagine trying to shop for a new book by your favorite author on a site that consisted of nothing more than a single order form with every book offered by a retailer like Amazon.com. This might seem absurd, but without hyperlinks you wouldn’t have much choice.
Hyperlinks make the Web a truly interactive environment. They allow the user to freely navigate throughout a website, or jump from one site to another. There are a number of ways to create links in Dreamweaver, but before you get started, you should be aware of some fundamental facts.
Links rely on directory paths to locate files. A directory path is simply a description of a file’s location that can be understood by a computer. A classic, real-world example is an address. If you wanted to send a letter to your friend Sally in Florida, you would have to specify the state, city, street, and house number where Sally can be found. If Sally lived at 123 Palm Street in Orlando, the path would be:
Florida/Orlando/123 Palm Street/Sally
This simply means that inside Florida, inside Orlando, in the house numbered 123 on a street named Palm Street, you can find a person named Sally. Hyperlinks follow the same logic:
www.somewebsitesomewhere.com/photos/mydog.jpg
This URL address is a link to a JPEG image named mydog.jpg, which is inside a folder named photos on a website named somewebsitesomewhere.com.
Creating hyperlinks
Later in this lesson, you’ll be creating a gallery page to showcase some of the sample products mentioned in the main paragraph. Before you work on that page, you’ll link it to the home page by creating a hyperlink. If you are not already in Design view, select Design view now.
1 In the Property Inspector, click the HTML button to access the HTML properties.
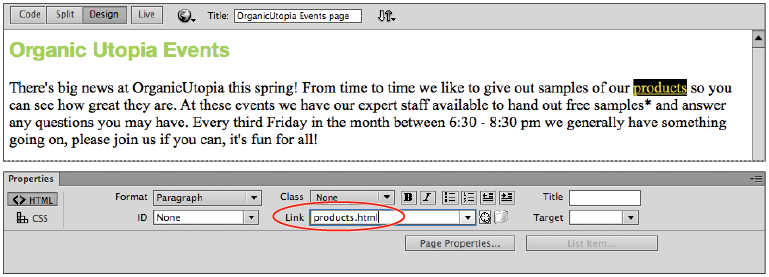
2 In the first paragraph, highlight the word products in the second sentence.
3 In the Property Inspector, type products.html in the Link text field. Press Enter (Windows) or Return (Mac OS). The highlighted word automatically becomes underlined. It is important to note that we have created this page for you and it is currently inside your site folder, you are simply linking to it.
|
Type products.html into the Link text field in the Property Inspector. |
4 Choose File > Save and then File > Preview in Browser.
5 Click the new products link. The products page appears in your browser window. This is because a previously existing page named products.html was located in this folder.
Now visitors can easily navigate to the products page, but what happens when they want to go back to the events page? It looks like you’ll need another link.
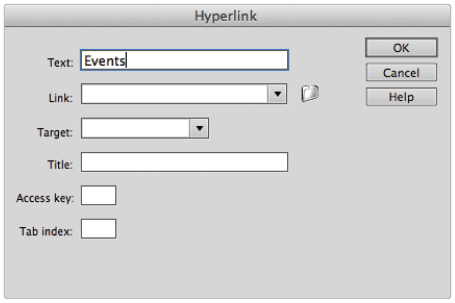
6 Return to Dreamweaver and double-click products.html in the Files panel. Click to the right of the word Produce and press Enter (Windows) or Return (Mac OS) to create a new line. Choose Insert > Hyperlink to open the Hyperlink dialog box.
The Hyperlink dialog box is one of the many ways to create a link in Dreamweaver. It offers all the options found in the Property Inspector, with a few additions.
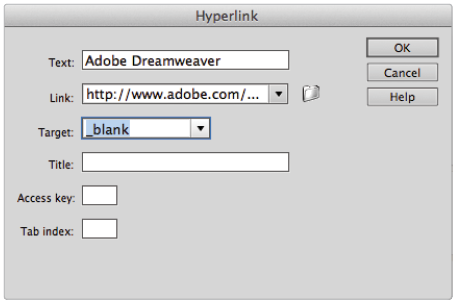
7 Type Events in the Text field.
|
The Hyperlink dialog box is one of the many ways to create links in |
8 Click the Browse button to the right of the Link text field to open the Select File dialog box. The dw03lessons folder you defined as the root for this site should be selected for you by default. If not, click the Site Root button. Select events.html and click OK (Windows) or Open (Mac OS).
9 Click inside the Title field and type Organic Utopia events page. Titles are strictly optional for hyperlinks, but they improve accessibility for users with assistive technologies, such as Screen Readers. Additionally, adding titles to your hyperlinks can also improve your site’s search engine rankings. Click OK to commit the changes; notice that a link to events.html has been created for you using the text entered into the Text field in the Hyperlink dialog box.
10 Choose File > Save and keep this file open for the next part of this lesson.
Relative versus absolute hyperlinks
After reading about the fundamentals of hyperlinks and directory paths a few pages ago, you might be surprised by the simplicity of linking events.html and products.html. Instead of entering a long directory path in the Link text fields, you merely typed the name of the file. This kind of link is called a relative link. Let’s go back to the address example to see how this works.
Remember Sally from Orlando? Imagine you were already standing on Palm Street, where she lives. If you called her for directions to her house, she probably wouldn’t begin by telling you how to get to Florida. At this point, all you need is a house number. Relative links work the same way. Because events.html and products.html both reside in the dw03lessons folder, you don’t need to tell the browser where to find this folder.
Now you’ll create an absolute link that will allow visitors to access the Adobe website to learn more about Dreamweaver CC.
1 Click the events.html tab above the Document toolbar to bring the page forward. Scroll down to the bottom of the page if necessary. Using the Design view window, create a new line at the bottom of the page after the text that reads “Occasionally we gather...”, and type This page was created with Adobe Dreamweaver.
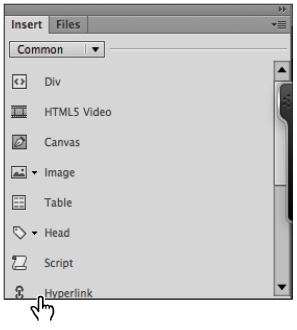
2 Highlight the words Adobe Dreamweaver and in the Common section of the Insert panel on the right side of the screen, click the Hyperlink icon to open the Hyperlink dialog box.
|
The Hyperlink icon in the Insert panel is another convenient way to create links. |
3 The Hyperlink dialog box opens. Notice that Adobe Dreamweaver has been entered into the Text field for you. In the Link text field, type http://www.adobe.com/products/dreamweaver.html. Make sure to include the colon and the appropriate number of forward slashes.
The absolute link http://www.adobe.com/products/dreamweaver.html instructs the browser to find a website named adobe.com on the World Wide Web. Then the browser looks for a file named dreamweaver.html located inside a folder named products.
You do not have to type the absolute hyperlinks if you have the website open in your browser. In your web browser, select the address in the address bar, copy it, and then paste it into the Link field in Dreamweaver. |
4 Choose _blank from the Target drop-down menu. Choosing the _blank option will cause the hyperlink to the Adobe website to open in a new, blank browser window or tab (depending on the browser).
|
Set the target window for the hyperlink to open in a blank browser window |
5 Click OK to close the Hyperlink dialog box. Choose File > Save, then File > Preview in Browser, or click the Preview/Debug in Browser button ( ) in the Document toolbar.
6 Click the Adobe Dreamweaver text. Unlike the Events and Products links you created earlier, this link causes your browser to open a new tab or window, and it is pointing to an external web page on the Internet.
7 Close your browser and keep this file open; you will be adding to it in the next exercise.
Linking to an e-mail address
Absolute and relative links can be used to access web pages, but it’s also possible to link to an e-mail address. Instead of opening a new web page, an e-mail link opens up the default mail program on a visitor’s computer and populates the address field with the address you specify when creating the link. As you can imagine, this kind of link can work differently depending on how your visitors have configured their computers.
In the previous part of this lesson, you gave the visitor a link to some information on Dreamweaver. Now you’ll link them to an e-mail address where they can get some information on learning Dreamweaver from the folks who wrote this book.
1 Place your cursor at the end of the last line, then press and hold your Shift key and press Enter (Windows) or Return (Mac OS). Instead of creating a new paragraph, this creates a line break, or a soft return, and the text begins immediately below the previous line. Type Contact info@agitraining.com for information on Dreamweaver classes.
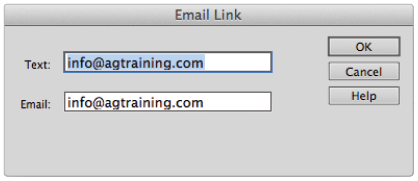
2 Highlight the text info@agitraining.com and click the Email Link button in the Insert panel.
3 The Email Link dialog box opens with both fields automatically populated. Click OK. You can preview this page in your browser. Remember that if you click the link, your e-mail client will begin to launch.
|
The Email Link dialog box allows you to link to an e-mail address. |
Continue to the next Dreamweaver Tutorial: Creating Lists in Dreamweaver >