Flash tutorial: Working with colors in Flash
What you’ll learn in this Flash Tutorial:
|
This tutorial provides you with a foundation for working with the Adobe Flash drawing tools. It is the first lesson in the Adobe Flash Digital Classroom book. For more Adobe Flash training options, visit AGI’s Flash Classes. |
Adobe Flash Tutorial: Working with colors in Flash
Flash offers a lot of options for creating, saving, and working with colors and gradients. In addition, the panels and workspace make it easy to choose and apply colors from virtually anywhere, or to save color sets that you can share between multiple Flash documents and projects.
Getting set up
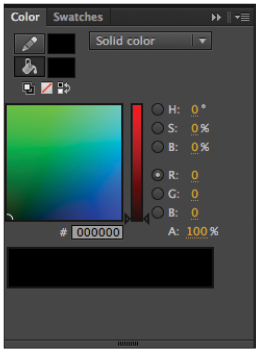
1 First you’ll want to make sure that the Color and Swatches panels are visible. Choose Window > Color. By default, the Color and Swatches panels are already grouped together.
|
The Swatches and Color panels are grouped together by default |
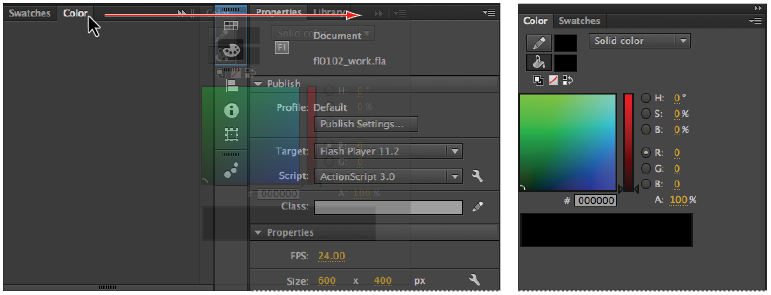
2 Drag the panel group by its title bar over the Property Inspector and Library panel on the right-hand side, releasing the mouse when you see a light blue line. The two panels should now appear docked in the panel group above the Property Inspector and Library panel.
|
Move the Color and Swatches panel group to the Properties and Libraries panel group. |
Creating gradients
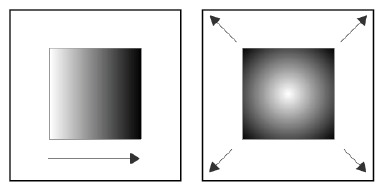
A gradient is a gradual blend between two or more colors, and is often used for complex color transitions or to imply lighting effects. You can create and save gradients and apply them to fills or strokes within your artwork. Flash supports linear gradients and radial gradients. Both types can include any number of colors.
Linear gradients blend in a uniform manner and, as the name implies, in a straight line going in any direction or angle.
Radial gradients blend in a circular manner, either from the inside out or the outside in (depending on your perspective, of course).
|
On the left, a linear gradient; on the right, a radial gradient. |
Your fish is almost complete, so it’s time to bring it to life with some dynamic and exciting colors.
1 Choose your Selection tool ( ), and click once on your fish to select it. Choose Modify > Break Apart to separate the fish and its parts, and then choose Edit > Deselect All. Click once on the body of the fish.
2 Locate the Color type drop-down menu at the top-right corner of the Color panel. This allows you to choose a solid color or gradient for the currently active color. Choose Radial gradient to set a radial gradient to your fill. The fish displays the default black-to-white gradient.
|
Choose Radial to switch your shape’s fill to a radial gradient. |

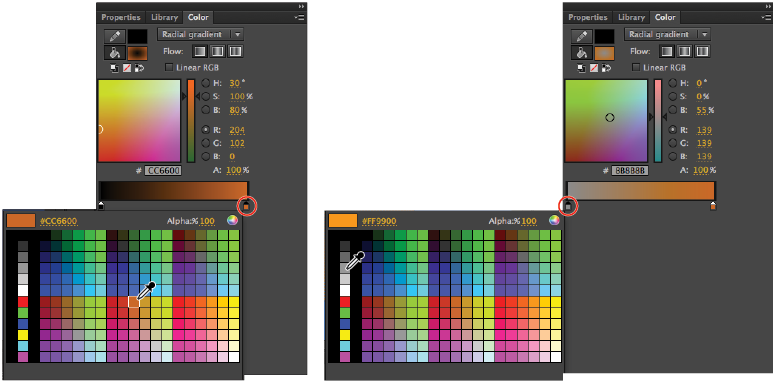
3 At the bottom of the Color panel, you see the color ramp, which now appears with two color stops (sliders), one for each color that forms your gradient. You’ll need to assign a new color to each stop.
4 Double-click the right slider, and the Swatches panel appears. Choose the dark orange color marked #CC6600. Double-click the left slider, and from the Swatches panel, choose the light orange color marked #FF9900.
|
Set a unique value for each color stop on your gradient. |
5 The position and distance between the two sliders determines the blend point. Moving one slider closer to the other changes the balance between the two colors.
Click and drag the left slider slightly toward the middle—this makes the lighter orange more prominent than the dark orange.
6 To add colors to your gradient, you’ll add more color stops. Add a new color stop by clicking on the far left edge of the color ramp. A new stop should appear below the color ramp. Double-click the stop, and choose white (#FFFFFF) from the Swatches panel.
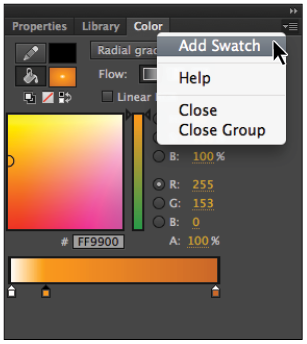
Now, you’ll save this gradient for use later on.
7 Locate and open the Color panel menu ( ) in the upper-right corner of the panel. Choose Add Swatch to add your new gradient swatch to the existing swatch presets.
|
Save your new gradient as a preset that you can recall later on from the Swatches panel. |
8 Choose File > Save to save your file.
Using opacity with gradient colors
A cool feature in Flash is the ability to set a unique opacity level for each individual color in a gradient. This can create some interesting effects, and add cool lighting-style effects to your illustrations. In this next exercise, you’ll create and color some underwater bubbles using this interesting effect.
1 Choose the Oval tool ( ) from the Tools panel. If it’s not already enabled, activate Object Drawing mode by pressing the button at the bottom of the Tools panel.
2 From the bottom of the Tools panel, choose white (#FFFFFF) for your stroke color, and choose the black-to-white radial gradient preset for your fill color.
3 While holding the Shift key down (to constrain proportions), click and drag to draw a small circle to the left of your fish. Leave the circle selected.
4 If it’s not already open, choose Window > Color to open the Color panel.
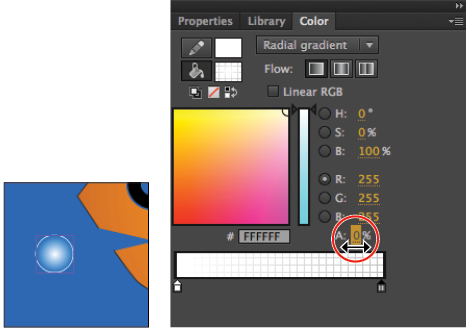
5 Double-click the black color stop to open the Swatches panel, and choose white (#FFFFFF).
6 With the stop still active, locate the Alpha slider; this sets the opacity of the selected color in the current gradient. Click and drag the slider downward until the value reads 0 percent. This produces an interesting light flare effect inside the bubble.
|
Draw a new oval, and use the Color panel to reduce the opacity of one of your oval’s gradient colors. |
7 Choose File > Save to save your file.
Creating custom colors
As you may have discovered, creating and saving a solid color swatch is nearly identical to creating and saving a gradient swatch. In this case, you’ll set specific RGB values to create a color that you can apply to your artwork, as well as add to your existing swatches.
1 Choose the Selection tool () and double-click once on your fish to select it. In the Property Inspector, set the stroke color style to solid and the color to black (#000000).
2 Locate the R, G, and B text fields on the Color panel, click the stroke icon ( ) to make certain the stroke (and not the fill) is selected, and type 250, 100, and 16, respectively. This creates a dark orange color that is immediately applied to the stroke.
3 From the Color panel menu located in the upper-right corner, select Add Swatch to add your new color to the Swatches panel.
4 Choose File > Save to save your file.
Saving a custom color set
Once you’ve added new color swatches, you’ll want to save that set for use with other projects and documents. If you’ve ever created and saved custom color swatches in applications like Photoshop or Illustrator, you’ll find that saving color sets in Flash is very similar.
1 Press the Swatches panel tab located next to the Color panel tab to open the Swatches panel. Press the panel menu button ( ) in the upper-right corner of the Swatches panel.
2 From the panel menu, choose Save Colors.
|
Save the current swatches as a new color set that you can recall at any time. |
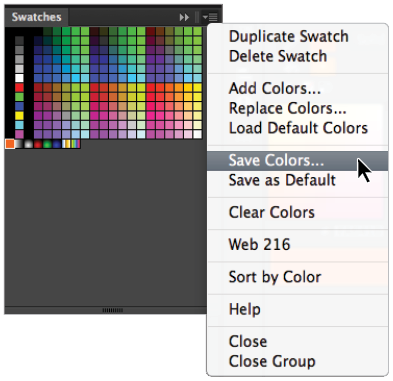
3 From the dialog box that appears, choose your Save location (for this lesson, you can choose the fl01lessons folder), and name the new file fl01colors.clr.
4 Press Save to save the color set into the selected folder. The color set appears in your destination folder as a single .clr (Flash Color Set) file.
You can also choose to save your swatches in .act (Adobe Color Table) format, which allows you to exchange it with Adobe applications such as Photoshop and Fireworks. You can even load .act color tables exported from Fireworks back into Flash if you’d like! |
Continue to the next Flash Tutorial: Organizing and layering graphics in Flash >