InDesign tutorial: Using styles to format text in InDesign
What you’ll learn in this InDesign Tutorial:
|
This tutorial provides you with a foundation for working with Adobe InDesign styles. It is the third lesson in the Adobe InDesign CC Digital Classroom book. For more Adobe InDesign training options, visit AGI’s InDesign Classes. |
Adobe InDesign Tutorial: Using styles to format text in InDesign
Styles save time when you’re working with text that shares the same look and feel across a document. If you decide that your body text should be a different size or font, styles let you make the change in one location, avoiding the need to make changes on every page. Additionally, styles make it easy to keep a consistent design, as you can use styles to apply multiple text attributes in a single click. A more complete discussion of styles occurs in the next lesson, Lesson 4, “Using Styles to Save Time.”
Creating a headline and applying a style
In this exercise, you will create a style and apply it to a headline.
1 In the Pages panel, double-click the page 2 icon.
2 Select the Type tool ( ) from the Tools panel.
3 Select the text in the headline What is the next innovation in cell phones?
4 Choose Type > Paragraph Styles or click the Paragraph Styles button in the panel docking area. The Paragraph Styles panel opens.
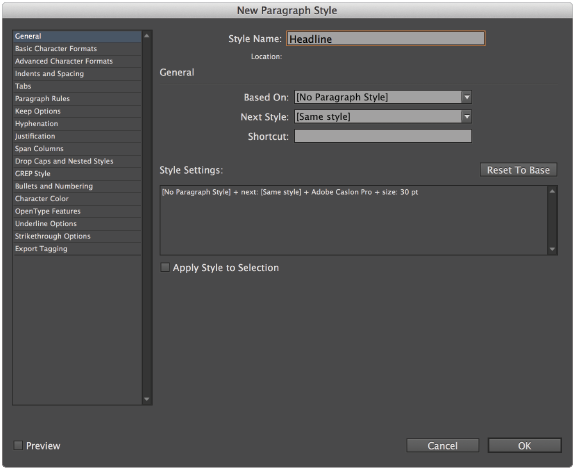
5 Click the panel menu button ( ) in the upper-right corner of the Paragraph Styles panel and choose New Paragraph Style. In the Style Name text field, type Headline, and then click OK.
The new style contains the text attributes from where the cursor was located when you created the new style, including font, style, color, and spacing.
|
Creating a new paragraph style. |
6 Select the Headline style in the Paragraph Styles panel to apply the style to the text. The appearance of the text does not change, but the text is now attached to the style. If the style is updated, the appearance of this headline will also update.
 | When you create a new style, you can also have InDesign apply it to the current selection. In the General section of the New Paragraph Style dialog box, select the Apply Style to Selection check box. |
7 On page 3, click to place the cursor in the headline When is the best time to update equipment? In the Paragraph Styles panel, select the Headline style to apply it. The headline is formatted with the paragraph style you created.
Importing styles from other documents
You can import styles from one InDesign document to another, making it possible to share formatting across various documents. In this exercise, you will import a Drop Cap style from another document and use the style in this document.
1 In the Paragraph Styles panel, click the panel menu button () and choose Load Paragraph Styles. You will locate a file from which to import a style.
2 In the Open a File dialog box, navigate to the id03lessons folder and select the id0301_done.indd file. Click Open. The Load Styles dialog box appears.
3 In the Load Styles dialog box, click the Uncheck All button to deselect all the styles, because you will only import one specific style. Select the Drop Cap check box to select only this one style.
|
Loading the Paragraph style Drop Cap. |
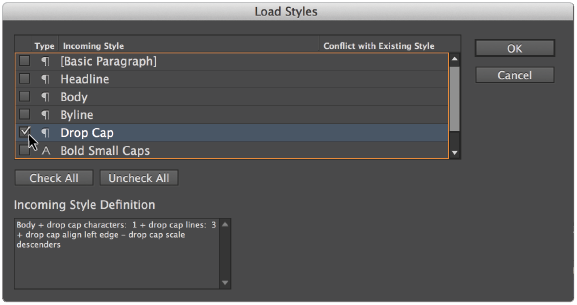
4 Click OK. Drop Cap is now added to the styles in the Paragraph Styles panel in your document. In the next exercise, you will update an existing style, and then apply the Drop Cap style.
Redefining styles
You will now update the Body paragraph style to contain a new attribute, which will align the text to the baseline grid you specified earlier in this lesson.
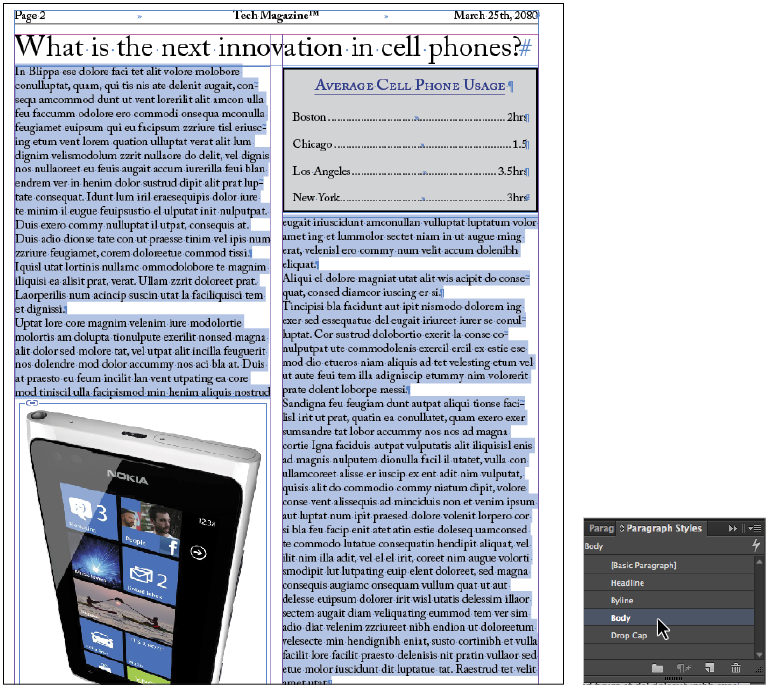
1 Navigate or scroll to view page 2.
2 Choose the Type tool () and click in the text frame containing the story on page 2; then choose Edit > Select All.
3 Select the Body style in the Paragraph Styles panel to apply this style to all the selected paragraphs.
4 If a plus sign appears next to the style name, press and hold the Alt (Windows) or Option (Mac OS) key and select the style name again. This removes any formatting changes that have been made since the style was applied.
| Changes made to text after a style has been applied are known as overrides. If you edit a style attribute outside the Paragraph Styles panel, the style is manually overridden, and a plus sign displays next to the style name in the styles panel. If you place your cursor over the style in the Paragraph Styles panel without clicking, and pause, a tooltip appears. The tooltip identifies which attribute is causing the override. |
|
Applying the Body style. |
5 In the Paragraph Formatting Controls section of the Control panel, click the Align to Baseline Grid button ( ).
).
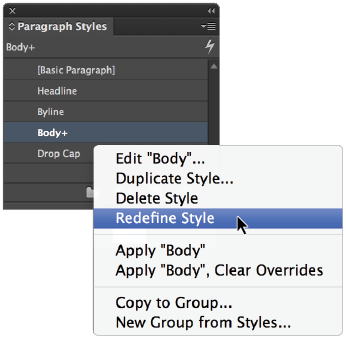
6 In the Paragraph Styles panel notice that a plus sign (+) is displayed next to the style name. This plus sign indicates that the style was changed after it was applied to this text. You changed the text by aligning it to the baseline grid—something that was not part of the original style definition. Next you will change the style so it includes this change as part of the definition of this style, and all text using this style will include this modification.
7 In the Paragraph Styles panel, click the panel menu or right-click (Windows) Control+click (Mac OS) on the style name, and choose Redefine Style. All the text styled with the Body style now aligns to the baseline grid.
|
Redefining the Body style. |
8 Click anywhere in the first paragraph of the story. In the Paragraph Styles panel, click to select the Drop Cap style. The first paragraph is now formatted with the Drop Cap style, and the rest of the story is formatted using the Body style.
9 Choose File > Save to save your work.
Placing text on a path
Text placed on a path can follow a line or shape, such as the outline of a circle, square, or an arc.
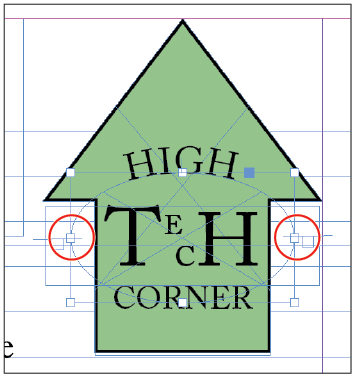
1 In the Pages panel, double-click page 4 and navigate to the logo at the top of the page. If necessary, increase the magnification to zoom-in on the logo containing a green arrow using the Zoom tool ().
2 Notice that there is an oval surrounding the word Tech in this logo. The logo should read High Tech Corner. You will place the word High on the oval.
3 Click and hold the Type tool () in the Tools panel until the hidden tools are revealed, and then choose the Type on a Path tool ( ).
).
4 Move your cursor over the bottom center of the oval until you see a plus sign appear next to the cursor, and then click once.
|
The cursor changes to indicate that you |

5 Type HIGH, and then highlight the text using the Type on a Path tool by clicking and dragging or double-clicking to select the word.
6 In the Paragraph Formatting Controls section of the Control panel, click the Align Center button ( ). You will adjust the exact position of the text in the next steps, as the text may be positioned upside-down or along the bottom of the circle.
7 Choose the Selection tool () from the Tools panel. Notice that there are two vertical handles that appear directly to the left of where you clicked on the path. These are handles and they mark the starting and ending points for the text on the path.
8 Select the left-most vertical handle that appears along the path and drag it clockwise, stopping when the line is centered between the top and bottom half on the right side of the oval—where the 3 o’clock location would be on a clock. If the text moves so that it is placed inside the oval as you are moving the handle, choose Edit > Undo and repeat the process, carefully following the oval as you drag clockwise. Be careful to not click the boxes when you move the handles, as these boxes are the In and Out Ports, which are used for flowing text into and out of the path.
9 Take the handle that marks the ending point of the text and drag it counterclockwise, positioning it so it is centered along the left half of the oval—where the 9 o’clock location would be on a clock.
Because you had already centered the text, aligning the start and end points of the text to the opposite sides of the circle lets you know that the text is centered correctly.
|
The new start and end points of the text. |
10 Choose File > Save to save your work.
| To center text on a path you can also click the bottom of the circle using the Type on a Path tool (). This causes text to start and end at the bottom of the shape and you can quickly center the text by setting the paragraph alignment to align center. |
Importing text from Microsoft Word
You’ve already seen that you can import text from Microsoft Word documents into your InDesign layouts. When importing text from Microsoft Word, InDesign uses the Remove Styles and Formatting from Text and Tables option to automatically eliminate styles applied to the text using Microsoft Word. You can also have the styles imported or even converted to styles you’ve set-up in your InDesign layout, as you’ll discover in this exercise.
1 Navigate to page 6 in the document.
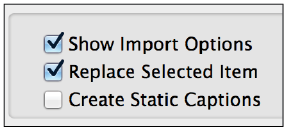
2 Choose File > Place. In the Place dialog box, navigate to the id03lessons folder and select the id0302.doc file. Select the Show Import Options check box, which is located toward the bottom of the Place dialog box, and then click Open. The Microsoft Word Import Options dialog box opens.
|
The Show Import Options and Replace Selected |
| To open the Import Options dialog box automatically when opening a file, press and hold the Shift key while you click Open. |
3 In the Microsoft Word Import Options dialog box, select the Preserve Styles and Formatting from Text and Tables radio button. This maintains styles and other text formatting in the imported file. Also select the Customize Style Import radio button.
|
The Microsoft Word Import Options dialog box. |
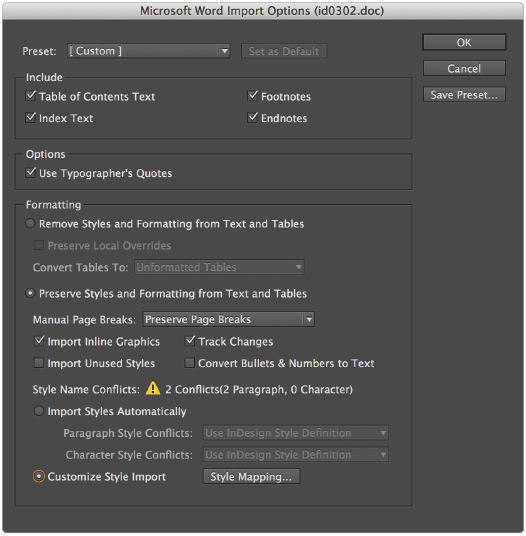
About Microsoft Word import options
Any Table of Contents text, index text, footnotes, and endnotes can be brought from a Microsoft Word document into an InDesign layout. By default, the Use Typographer’s Quotes option is checked, which changes all quotes to typographer’s (curly) quotes. This means that every inch and foot-mark quote is converted as well.
If the Remove Styles and Formatting from Text and Tables radio button is selected, all text is imported and formatted using the default Paragraph style, which is usually the Basic Paragraph style. If you want to keep all the character attributes that were applied in Microsoft Word, select the Preserve Local Overrides check box.
If you select the Preserve Styles and Formatting from Text and Tables radio button, the styles created in Word are imported into your document, and the text adopts the imported styles, trying to mimic the styles from Word. However, if you create a template in Word that contains styles with the same names as the styles in your InDesign document, there will be paragraph style conflicts upon importing, and the imported text will use InDesign’s style definition by default. This means that, regardless of how text looked in Word, once imported into InDesign, the text is formatted with InDesign’s styles. This only occurs if the Microsoft Word document and the InDesign document have styles with identical names.
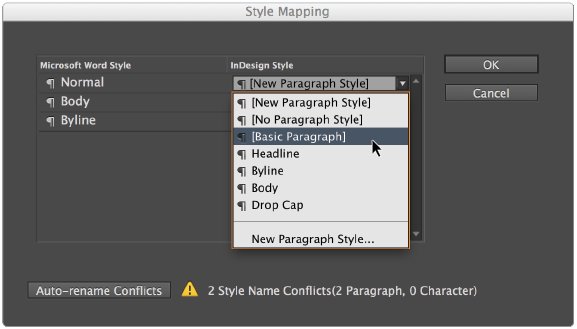
4 Click the Style Mapping button at the bottom of the dialog box, next to the Customize Style Import radio button. The Style Mapping dialog box appears.
The Style Mapping window shows that the Body and Byline styles from the Word document have mapped to the InDesign styles with the same names. Identically named styles are automatically mapped so that they use the InDesign style when you use Style Mapping at the time you import the Microsoft Word document into your InDesign layout.
5 The dialog box shows that the Microsoft Word style Normal is not mapped to a style in this InDesign document. Next to Normal, select the New Paragraph Style and choose Basic Paragraph style from the drop-down menu. This causes the text in the Word document that uses the style Normal to be formatted using the Basic Paragraph style once it is imported into InDesign.
|
Mapping styles. |
6 Click OK to close the Style Mapping dialog box. Click OK again to accept the Microsoft Word Import Options. The cursor is loaded with text that is ready to be placed with already-applied paragraph styles.
7 Click in the left column on page 6 to place the text from the Microsoft Word document into the InDesign layout.
Missing fonts
Fonts, like graphics, are not embedded within an InDesign document. If you receive an InDesign document from a colleague, you may need the fonts that they used when creating the document if you don’t have them installed on your computer. In this exercise, you will import text from a Microsoft Word document that uses a font that you may not have installed on your computer, and you will discover how to address errors that are displayed when fonts are not available.
| By default, InDesign highlights missing fonts in pink within a layout to alert you to the fact that the font being displayed is not the same as what was used when the text was originally formatted. |
Finding and fixing missing fonts
1 In the Pages panel, navigate to page 5 by double-clicking the page 5 icon.
2 Select the Type tool () in the Tools panel.
3 Click inside the empty text frame at the top of page 5.
4 Choose File > Place. In the Place dialog box, navigate to the id03lessons folder and select the id0303.doc file. Select the Show Import Options check box if it is not selected, and then click Open.
5 Confirm the Preserve Styles and Formatting from Text and Tables radio button is selected. Click OK.
The Missing Font dialog box appears if you do not have the font Futura Bold already installed on your computer.
|
The Missing Font dialog box. |
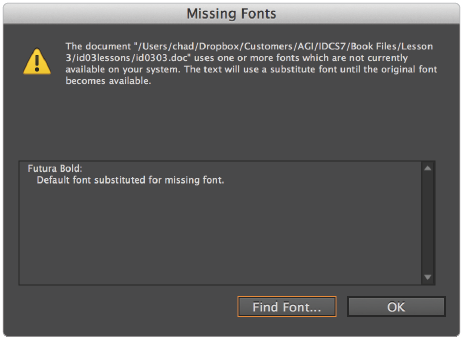
6 Click the Find Font button. The Find Font dialog box opens. Highlight the font Futura Bold by clicking it in the Fonts in Document section. Notice the Warning icon ( ) next to the font name. This indicates that the font is missing.
7 In the Replace With section at the bottom of the dialog box, highlight the text in the Font Family text field and type Adobe Caslon Pro. You are going to replace Futura Bold with Adobe Caslon Pro Regular. If you do not have Adobe Caslon Pro Regular, you may use another font that is available on your computer.
|
Replacing a font. |
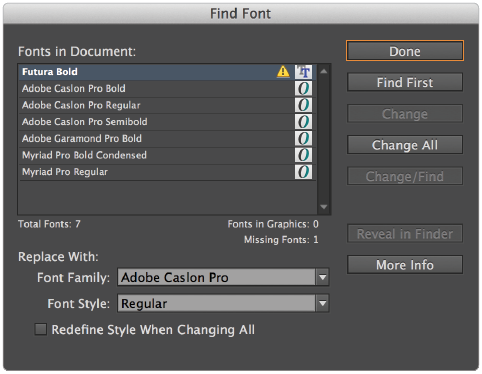
8 Click Change All. To see the missing font replaced, click Done.
9 Choose File > Save to save your work, and then choose File > Close.