Add or Remove Borders in Excel
You can add or remove borders in Excel. Just as text and number formats can help guide the eye in a worksheet, so too can the use of borders. A border can be applied to all four sides of a cell in a variety of line styles.
There are two ways to add a Border: you can add a predesigned border to a selected range of cells or you can draw your own, changing the line style and color yourself.
Adding a border in Excel
The following steps show an example of how to add a border.
- Select range B6:D7.
- Choose Borders from the Font group on the Home tab.
- Select Outside Borders.
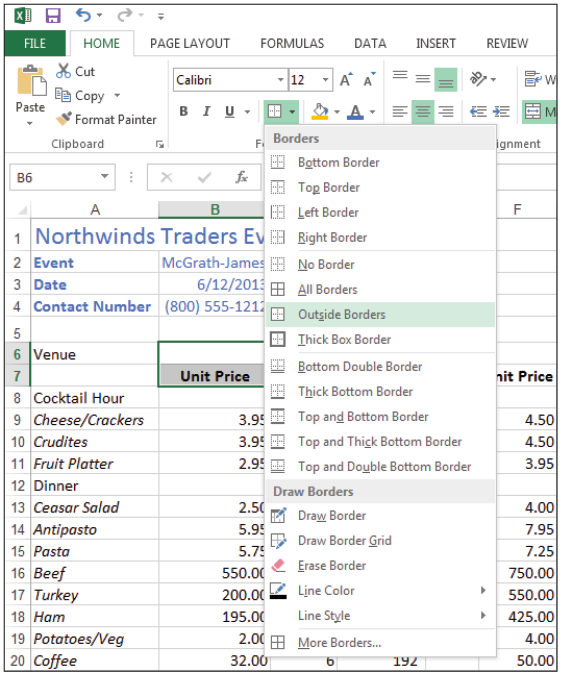
Add borders to your worksheet to help draw the eye. - Click another cell so you can view the thin border.
 | Once you select a Border style, the Border icon maintains that style until you pick a new one. Select each range of cells and click the Border icon to apply the style. |
Adding a border in Excel
Excel automatically uses a single black line style when you add a border. You can change both the line style and color of a border you drawn, as illustrated by the next set of steps.
- From the Font group choose Borders.
- Choose Line Style and select the Thick-Dashed line style. The cell pointer changes its shape into that of a pencil.
- Choose Borders again, click Line Color and select Green.
- Click and drag the pencil around range F6:H7 to add the border.
- Press the Esc key on the keyboard when you have finished to remove the pencil cell pointer.
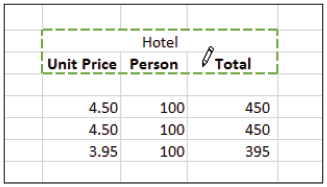
- Draw a custom border around a range of cells.
Removing a border in Excel
Just as there are two ways to add a border, there are two ways to remove a border in Excel. When you apply a border, you select the range of cells and then pick the border you want to use. To remove a border, select the range of cells and choose No Border from the Border command. You can also use the Erase Border command to erase the border by clicking each cell that has a border.
Follow these steps to remove a border in Excel using the No Border option:
- Select range B6:D7.
- From the Home tab, choose Border.
- Choose No Border from the displayed list.
You can also remove a border in Excel using the Border Eraser by following these steps:
- From the Home tab, choose Border.
- Choose Erase Border. The mouse pointer is displayed as an eraser.
- Click the eraser on the edge of each cell in range F6:H7 to remove the border.
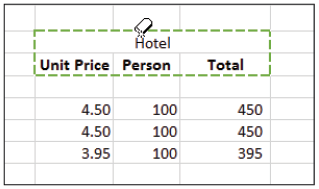
Remove a border from a range of cells with the Eraser. - Press the Esc key when finished to return the cursor (pointer) back to normal.