Adobe After Effects Tutorial: Organizing the Project panel in After Effects
What you’ll learn in this After Effects Tutorial:
|
This tutorial provides you with a foundation for working with Adobe After Effects media management. It is the third lesson in the Adobe After Effects CS6 Digital Classroom book. For more Adobe After Effects training options, visit AGI’s After Effects Classes. |
Adobe After Effects Tutorial: Organizing the Project panel in After Effects
You can’t keep your project panel at full-screen size all the time, or you would never be able to get any work done. And even with the Project panel at this size, it may still need a few modifications so you can work more efficiently. By default, the panel displays all your imported files in alphabetical order, but this often is not be the best approach to organizing your media. What you want to do is make it as easy as possible to find the media you need exactly when you need to use it. To accomplish this, you will adjust the display of the Project panel.
Modifying the column displays
The Project panel is organized using columns. Each one holds important information that may be useful to you while working on your projects in After Effects. The files are organized alphabetically by name as indicated by the arrow at the top of the panel. You can click on any other column header to reorganize the content in the panel. You can also hide or change the size of each column at any time.
1 Because you don’t need the File Path column for this project, you will hide it in the column header display. With the Project panel highlighted, press the tilde (~) key on your keyboard to maximize the panel to full-screen size. Right-click the File Path column header, and from the menu that appears, choose Hide This.
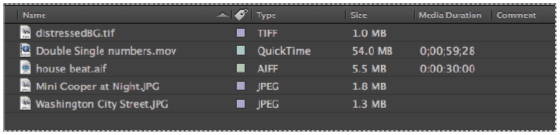
You should now have the following columns visible: Name, Label, Type, Size, Media Duration, and Comment. The Label column isn’t identified by name, but appears as a Tag icon ( ).
).
You can reveal a column in almost exactly the same way that you hide it, right-clicking on any label. You may have also noticed that there are other columns that you can add to the Project panel, such as Date, Frame Rate, Duration, and Tape Name. The Project panel can display much of the meta-data that can be saved with media files. |
2 You will now resize a column. Place your cursor at the dividing line between the Name and Label columns. As mentioned previously, you will notice that the label column isn’t identified by name but by a Tag icon. When you hover over this dividing line, the cursor changes: it becomes a double-headed horizontal cursor. Click and drag the dividing line to the right to increase the size of the Name column.
3 Increase the width of the Type, Size, and Comment columns as well.
Do not close this file; you will need it in the next part of the lesson.
|
Increase the width of the columns. |
Creating folders and subfolders
Just as in real life, folders are a helpful tool for organizing the content of your Project panel in After Effects. They provide an excellent tool for efficiently managing your media assets. Folders are very flexible and can be created in the root of the Project panel or even nested inside other folders.
1 Click the Create a new Folder button ( ) at the bottom of the Project panel to create a new untitled folder.
|
Click the Create a new Folder button. |
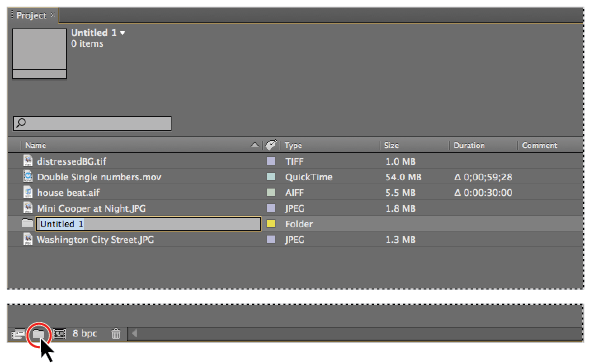
2 The folder name is highlighted, so rename it Video, then press Enter (Windows) or Return (Mac OS).
If you deselect the folder before naming it, you can always right-click on the highlighted folder and choose Rename from the context menu. Additionally, you an click on any item to highlight it and then press the Enter (Windows) or Return (MacOS) key on your keyboard, making the items name editable. |
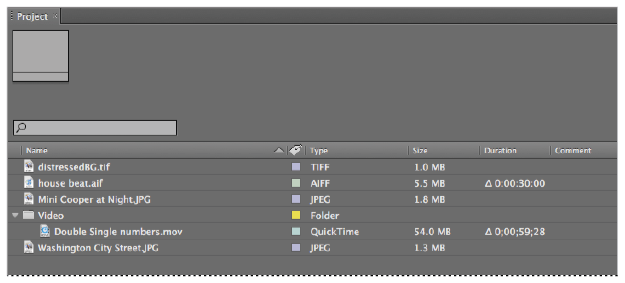
3 Click the Double Single numbers.mov file and drag it onto the Video folder. When the folder becomes highlighted, release your mouse button to add the video file to it. The folder may expand automatically, but if it doesn’t, click the arrow that now appears to the left of the Video folder’s name to reveal the contents of this folder.
|
Click on the arrow to reveal the folder’s contents. |
4 Deselect the Video folder by clicking any empty area of the Project panel, create two additional folders, and name them Audio and Images, respectively. Make sure that the Audio folder is deselected before creating the Images folder.
You should deselect each folder before creating the next one; otherwise, the new folder will be placed inside the highlighted one, thus creating a sub-folder.
5 Select all three image files—Washington City Street.jpg, Mini Cooper at Night.jpg, and distressedBG.tif—by first clicking on any one of them. Hold down the Ctrl (Windows) or Command (Mac OS) key on your keyboard and then click to add the other two files to your selection.
6 Click and hold any one of your highlighted files and drag it to the Images folder to move all the selected image files simultaneously. If necessary, click the triangle to the left of the Images folder to display its contents.
Drag the house beat.aif file into the Audio folder, and if necessary, click the triangle to the right of the Audio folder to display its contents.
7 Right-click (Windows) or Ctrl+click (Mac OS) on an empty area of the Project panel and choose New Folder from the context menu that appears. Rename this folder Background Images. When you are finished renaming it, the folder jumps toward the top of the panel, as it is still organized alphabetically by name.
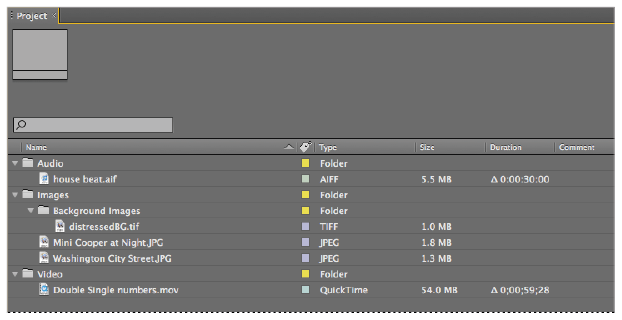
8 Click on the Background Images folder and drag it into the Images folder. Then drag the distressedBG.tif file into this folder. If necessary, click the triangle to the left of the Background Images folder to display its contents.
This folder nesting is a useful way of providing even better organization in the Project panel and is probably very similar to the kind of structure you use with folders on your own computer.
With the Project panel highlighted, press the tilde (~) key on your keyboard to minimize the panel and return to the Standard workspace layout.
|
Nesting files and folders keeps your Project panel organized. |
9 Save your file by choosing File > Save.
Do not close this file; you will need it in the next part of the lesson.
The keyboard command for the Save function is Ctrl+S (Windows) or Command+S (Mac OS). |
Renaming files
Renaming files in After Effects is a little different from other programs you may be used to working with. In most programs you can just click on a highlighted file to rename it. Trying this approach in After Effects doesn’t work. Here you will change the name of the Washington City Street.jpg file.
1 With the Project panel highlighted, click the tilde (~) key on your keyboard to maximize it to full screen size. Then click the file named Washington City Street.jpg to highlight it.
2 Press the Enter (Windows) or Return (Mac OS) key on your keyboard. The filename becomes editable.
3 Change the filename by placing your cursor at the end of the word Street and adding -daytime at the end so that it now reads as Washington City Street-daytime.jpg, then press Enter/Return to complete your text editing and commit the change.
Changing the name of a file in the Project panel does not affect the actual file on your computer. Like all video editing programs, After Effects has a non-destructive workflow. Nothing you do in After Effects changes the original files on your hard drive. The one exception to this is when you use Edit Original commands, which are designed to open the original source files that you imported in external editing applications such as Photoshop and Illustrator. |
4 Press the tilde key on your keyboard to minimize the Project panel and return to the Standard workspace.
5 Save your file by choosing File > Save or by pressing Ctrl+S (Windows) or Command+S (Mac OS) on the keyboard.
Do not close this file; you will need it in the next part of the lesson.
Continue to the next After Effects Tutorial: Previewing footage in After Effects >