Dreamweaver tutorial: Inserting Images in Dreamweaver
What you’ll learn in this Dreamweaver Tutorial:
|
This tutorial provides you with a foundation for working with the Adobe Dreamweaver workspace. It is the third lesson in the Adobe Dreamweaver CC Digital Classroom book. For more Adobe Dreamweaver training options, visit AGI’s Dreamweaver Classes. |
Adobe Dreamweaver Tutorial: Inserting images in Dreamweaver
Images are an essential part of most web pages. Just as lists make content friendlier and more accessible, images help to give your visitors the rich, visual experience that they’ve come to expect on the Web. However, before you learn to insert images, you will briefly learn about web graphics.
Image resolution
While it is possible to resize images with Dreamweaver, it’s generally not a good idea. Specifying the width and height of an image in the Property Inspector changes the display size of the image, but it does not resample the image the way a graphic processing application like Photoshop does. For example, a JPEG image that is 150 pixels by 150 pixels might have a file size of 30k. You could resize this image in Dreamweaver by 50% and the result would be a thumbnail image displayed at 75 pixels by 75 pixels. However, even though the image is visually smaller, the file size remains the same. A visitor to your website still must download the 30k file which translates to slower loading time for the image (and possibly the page) and a potentially poor user experience, especially if they have low bandwidth.
Image formats
The three most common image formats on the Web are JPEG, GIF, and PNG. While an exhaustive description of how each of these formats compresses data is beyond the scope of this book, a general overview can help you avoid some common pitfalls.
The JPEG format was created by a committee named the Joint Photographic Experts Group. Its sole purpose is to compress photographic images. Specifically, it uses lossy compression, which means that it selectively discards information, to reduce the size of a file. When you save a JPEG, you decide how much information you are willing to sacrifice by selecting a quality level. A high-quality image preserves more information and results in a larger file size. A low-quality image discards more information, but produces a smaller file size. The goal is to reduce file size as much as possible without creating distortion and artifacts.
Because JPEGs were designed to handle photographic images, they can significantly reduce the size of images containing gradients and soft edges, without producing noticeable degradation. However, reproducing sharp edges and solid areas of color often requires a higher quality setting.
The GIF format was created by CompuServe. GIF is an acronym for Graphics Interchange Format. Unlike the JPEG format, GIFs do not use lossy compression. Instead, GIFs rely on a maximum of 256 colors to reduce the size of images. This means that images with a limited number of colors can be reproduced without degradation. Logos, illustrations, and line drawings are well-suited to this format. Unlike JPEGs, GIFs excel at reproducing sharp edges and solid areas of color. However, because photographic elements such as gradients and soft edges require a large number of colors to appear convincing, GIF images containing these elements look choppy and posterized.
The PNG format has become increasingly popular on the Web in recent years because it incorporates many of the best features of JPEGs and GIFs. The PNG format is closer to GIFs in that it offers lossless compression and comes in two categories: 8 bit and 24 bit. This means it can be used quite effectively for simple graphics as well as continuous tone photographic images. A PNG also offers better transparency features than a GIF, most significantly the support of alpha channels. For many years the adoption of PNGs (especially the use of the transparency) was held back because Internet Explorer 6 ignored the transparency. As the number of people using this browser continues to decline, the PNG format is being used more frequently. For more information on web graphics see the Web Design with HTML and CSS Digital Classroom book, which is available in both print and electronic formats.
Creating a simple gallery page
Now that you have a better understanding of the types of images that are appropriate for use on your website, it’s time to build the products.html page that you linked to earlier in this lesson.
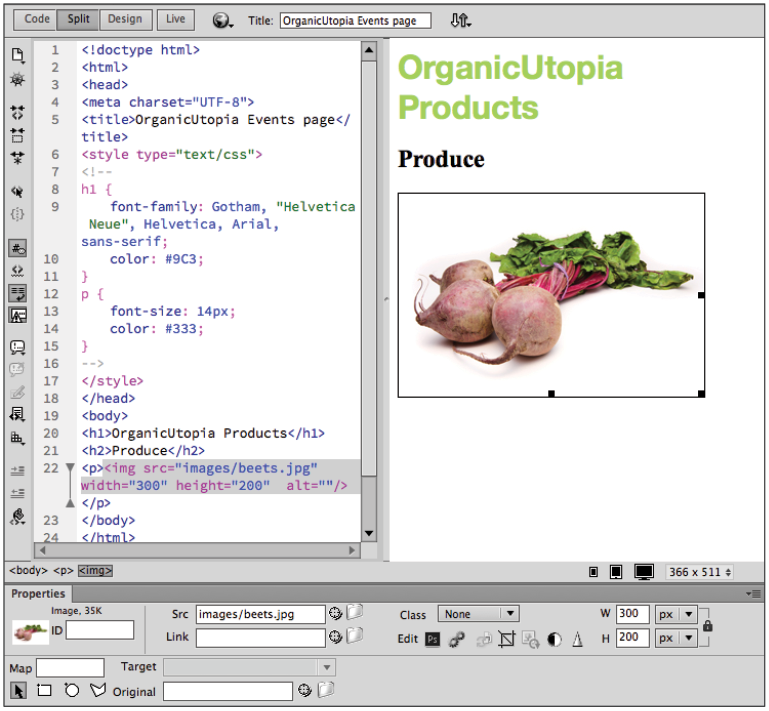
1 Double-click products.html in the Files panel or click the tab, as it’s still open. Place your cursor after the word Produce and press Enter (Windows) or Return (Mac OS) to create a new line.
2 Choose Insert > Image > Image. The Select Image Source dialog box appears. If your site folder does not open automatically, click the Site Root button, and then double-click the images folder. Select beets.jpg and click OK (Windows) or Open (Mac OS).
3 In the Property Inspector, locate the Alt field and type Beets in the text box. Press Enter (Windows) or Return (Mac OS).
In previous versions of Dreamweaver, the Image Tag Accessibility Attributes dialog box would open upon inserting an image. Dreamweaver CC instead inserts an empty value for the Alt attribute of the <img> tag. Including a description of the inserted image recommended by the Web Content Accessibility Guidelines (WCAG) published by the W3C. For more information on the WCAG, visit http://www.w3.org/TR/WCAG10/. It provides information about the images to visually impaired visitors using screen readers. Also, Alt text is displayed in place of images on some handheld devices, and browsers where images are disabled. |
4 Click the Split button in the Document toolbar to view the code that was written by Dreamweaver when you inserted beets.jpg. An <img> tag was created, with four attributes. The src attribute is a relative link to the .jpg file in your images folder. The alt attribute is the alternate text string created in the last step. The width and height attributes are simply the width and height of the image, which have automatically been added by Dreamweaver. Click the Design button to return to this view.
|
Dreamweaver creates an <img> tag with a number of attributes when you insert an image. |
5 Double-click the images folder in the Files panel to reveal its contents. In the document window, click to the right of the beets image and press Enter (Windows) or Return (Mac OS) to create a new line. Click and drag cucumbers.jpg from your Files panel directly below the beets image in the Design view.
6 In the Properties panel, locate the Alt field and type Cucumbers in the text box. Press Enter (Windows) or Return (Mac OS).
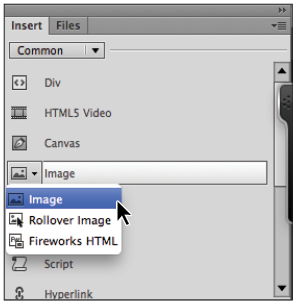
7 Click to the right of the cucumber image to place your cursor, and press Enter (Windows) or Return (Mac OS) to create a new line. To add the last image, you’ll use the Insert panel on the right side of your page. Click the menu at the top of the Insert panel and choose Common from the list. Click the Images:Image option, and the Select Image Source dialog box appears.
|
Choose Image from the Images drop-down menu in the Common section of the Insert panel. |
Linking images
Often, gallery pages on the Web contain small thumbnail images that are linked to larger, high-resolution images. Like many web conventions, there are practical reasons for this format. Because all the images on a gallery page must be downloaded by visitors in order to view the page, small images are necessary to keep the page from taking too long to load. Additionally, a user’s screen isn’t large enough to accommodate multiple large pictures at one time. Giving your visitor a way to preview which pictures they would like to see on a larger scale makes the page more user friendly and interactive.
1 In products.html, click the image of the beets to select it. In the Property Inspector, type images/beets_large.jpg into the Link text field. Press Enter (Windows) or Return (Mac OS).
Manually typing in the link is one way to link to the image, but can introduce errors. Here is a second method using Dreamweaver’s Point to File feature.
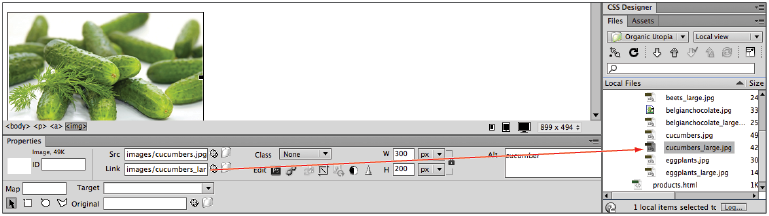
2 Click the image of the cucumbers to select it. In the Property Inspector, locate the Point to File icon ( ) next to the Link text field. Click and drag this icon into the Files panel. An arrow with a target at the end follows your cursor. As you hover over items in the Files panel, they become highlighted. Release the mouse while hovering over the cucumbers_large.jpg file.
|
With the Point to File feature, you can click and drag to create a link. |
3 Select the image of the eggplants and use the Point to File icon to link it to eggplants_large.jpg.
4 Choose File > Save, and then File > Preview in Browser. Click the thumbnails to see the large versions of each image. You’ll have to use your browser’s back button to get back to the products page.
Editing images
Although it’s best to make adjustments to your images using a professional graphics-editing program like Adobe Photoshop, sometimes that’s not an option. Dreamweaver offers a number of editing options, including an Edit link that allows you to quickly open a selected image in the graphics editor of your choice.
The Edit button can be customized in the File Types/Editors section of the Preferences dialog box, found under the Dreamweaver drop-down menu. You can use this section to add or subtract programs from the list of available editors, and set programs as the primary choice for handling specific file extensions. |
Adjusting brightness and contrast
Now you’ll use Dreamweaver’s Brightness and Contrast button to lighten up the eggplants image on your products page.
1 Click the eggplants.jpg image in products.html to select it, then click the Brightness and Contrast button in the Property Inspector.
|
Select the Brightness and Contrast button in the Property Inspector. |

A warning dialog box appears, indicating that you are about to make permanent changes to the selected image. Click OK.
2 When the Brightness/Contrast dialog box appears, drag the Brightness slider to 20 or type 20 in the text field to the right of the slider.
3 Drag the Contrast slider to 10 or type 10 in the text field to the right of the slider.
4 Click the Preview check box in the lower-right corner to see the original photo. Click the Preview check box again to see the changes. Click OK.
While changing the brightness and contrast is very convenient in Dreamweaver, you should be sure you are not performing the corrections on the original, as these changes are destructive. |
Optimizing images
In most cases, if you need to have fine control over the appearance of your graphics, you should open an image editor designed for that purpose. Both Dreamweaver and Photoshop are made by Adobe, and you’ll see some of the integration between the two in this exercise. However, sometimes you will just want to make a quick-and-easy change to a graphic. In this scenario, you can use the Edit Image Settings option in the Property Inspector.
You’ll use this feature to change the optimization of the belgianchocolate.jpg image, but before you make any permanent changes, you’ll duplicate this image in the Files panel. It’s good practice to save copies of your image files before making permanent changes. Later, you’ll use this backup copy to undo your changes.
1 In the Files panel, click the belgianchocolate.jpg file to select it. Drag it to your document window to place it beneath the other images inside your web page.
2 Go back to the Files panel and click the belgianchocolate.jpg file to select it again. From the Files panel menu ( ), select Edit > Duplicate. A new file named belgianchocolate - Copy.jpg appears in the list of files inside the images folder.
3 Click on the belgianchocolate.jpg image in the document window to make sure it is selected, then click the Edit Image Settings button ( ) in the Property Inspector at the bottom of your page. The Image Optimization window appears. This window allows you to either choose from a number of compression presets, or to create your own. Currently, the format is set to JPEG because Dreamweaver recognizes the type of file you have selected. Notice in the bottom-left corner that the file size is listed; in this case, 31k. Pay attention to this number as it plays a role in the rest of this exercise.
|
The Image Optimization window appears when you click |
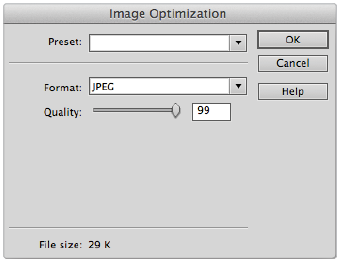
4 Click the preset menu and choose GIF for Background Images. The optimization settings appear. Click the Color menu and choose 4. The image of the chocolate changes to a preview of these settings, and the image has become flat with most of the detail removed. Notice that the file size has changed to 3K.
This tells you that you would achieve a tremendous reduction in file size, but it would occur at the expense of image quality. In fact, the GIF file format is not generally suited for photographic images. You will now try a custom setting.
5 Click the Format menu and choose JPEG from the list. You now have a slider for quality, the default value is 80 and you can see the file size has changed to 9K. Drag the slider to the left to a quality of 10 and notice that the image quality changes instantly. Again, this is too drastic a trade-off. Drag the quality slider to 90. The image looks slightly better than it did at a quality of 80, and you have a file size of around 14K (which is approximately 50% of the original image).
Click OK to commit the change. Note that this method of optimization is risky if you do not have a backup. (Recall the backup created in step 1.)
6 You can also choose to do your optimization in Photoshop. Click the cucumbers image, and then in the Property Inspector, click the Photoshop icon if available. Note that you must have Photoshop installed for this icon to be visible. As noted earlier, you can always change the photo editor that Dreamweaver uses by opening Edit > Preferences > File Types/Editors (PC) or Dreamweaver > Preferences > File Types/Editors (Mac), and then changing the application associated with images.
|
Click the Photoshop icon to launch Photoshop. |

7 The image will open in Photoshop, and then you can make any changes you want, as well as use the more in-depth controls of the Save for Web feature. We will not walk through that process now, so you can close this image and return to Dreamweaver.
Updating images
Assuming you have a backup copy of an image, it is possible to swap one image for another. To swap out the image, you’ll simply change the Src attribute using the Property Inspector. But first, it’s a good idea to rename the duplicate image.
1 Right-click (Windows) or Ctrl+click (Mac OS) the file named belgianchocolate - Copy.jpg in the Files panel and choose File > Rename. Type belgianchocolate_original.jpg and press Enter (Windows) or Return (Mac OS).
2 Click the chocolate image in the Design view to select it. In the Property Inspector at the bottom of your page, highlight the text that reads images/belgianchocolate.jpg in the Src text field.
3 Click and drag the Point to File icon to the belgianchocolate_original.jpg image you just renamed. The compressed image is replaced with the copy you made earlier.
4 Choose File > Save.