Dreamweaver tutorial: Styling Your Pages with CSS in Dreamweaver
What you’ll learn in this Dreamweaver Tutorial:
|
This tutorial provides you with a foundation for working with styling Adobe Dreamweaver pages. It is the fourth lesson in the Adobe Dreamweaver CS5 Digital Classroom book. For more Adobe Dreamweaver training options, visit AGI’s Dreamweaver Classes. |
Adobe Dreamweaver Tutorial: Styling Your Pages with CSS in Dreamweaver
Many years ago, creating a beautiful web page required a lot of work, using the limited capabilities of HTML tags. The introduction of Cascading Style Sheets changed the way pages are created, giving designers an extraordinary amount of control over text and page formatting, as well as the ability to freely position content anywhere on a page. In this lesson, you’ll focus on techniques for styling text with Cascading Style Sheets.
Starting up
Before starting, make sure that your tools and panels are consistent by resetting your workspace. See “Resetting the Dreamweaver workspace” in the Starting Up section of this book.
You will work with several files from the dw04lessons folder in this lesson. Make sure that you have loaded the dwlessons folder onto your hard drive from the supplied DVD. See “Loading lesson files” in the Starting Up section of this book.
Before you begin, you need to create site settings that point to the dw04lessons folder from the included DVD that contains resources you need for these lessons. Go to Site > New Site, or, for details on creating a site, refer to Lesson 2, “Setting Up a New Site.”
What are Cascading Style Sheets?
In the last lesson you had a brief introduction to Cascading Style Sheets (CSS); now you will dive in a bit deeper. CSS is a simple language that works alongside HTML to apply formatting to content in web pages, such as text, images, tables, and form elements. Developed by the World Wide Web Consortium (W3C), CSS creates rules, or style instructions, that elements on your page follow. There are three locations for CSS: (1) directly within the <head> section of an HTML document, (2) inline (the CSS is located side by side with your HTML tags), or (3) an external file that can be linked to any number of HTML pages. If you completed Lesson 3, you have had experience with the first option.
A style sheet is a collection of CSS rules; typically, rules that belong to a specific project, theme, or section are grouped together, but you can group rules in any way you want. You can place style sheets directly within your page using the <style> tag or in an external .css file that is linked to your document with the <link> tag. A single page or set of pages can use several style sheets at once.
You can apply CSS rules selectively to any number of elements on a page, or use them to modify the appearance of an existing HTML tag. Whenever or wherever you apply a rule, that rule remains linked to its original definition in the style sheet, so any changes you make to the rule automatically carry over to all items to which the rule has been applied.
Each CSS rule is composed of one or more properties, such as color, style, and font size, which dictate how an item is formatted when the rule is applied. A single CSS rule can include several properties, just as a single style sheet can include multiple CSS rules. Dreamweaver’s CSS Styles panel lets you easily view and modify any of these properties and change the appearance of your page in real time.
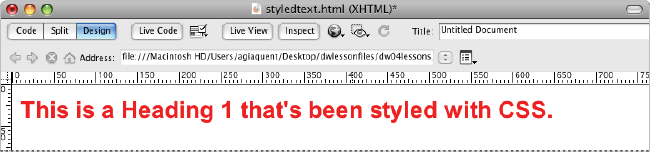
This sample rule is composed of three properties that control the color, typeface, and size of any text to which it’s applied. In the simplest example, the CSS rules define the appearance of an H1 or heading element:
H1 {
color: red;
font-family: Arial,Helvetica,Sans-serif;
font-size: 28px;
}
Here is the result of the preceding code snippet:
|
CSS-styled text shown in the Design view. |
CSS rules can affect properties as simple as typeface, size, and color; and as complex as positioning and visibility. Dreamweaver uses CSS as the primary method of styling page text and elements, and its detailed CSS Styles panel makes it possible to create and manage styles at any point during a project.
A little bit of ancient history: when <font> tags roamed the Earth in Dreamweaver
Before CSS came along, you styled text on a page using the <font> tag in HTML; you could wrap this limited but easy-to-use tag around any paragraph, phrase, or tidbit of text to apply color, or set the font size and typeface. Although it worked well enough most of the time, the <font> tag was a one-shot deal. Once applied, that tag’s job was done and you had to use a new <font> tag to style additional text, even if the color, size, and typeface values were exactly the same. You will now open an HTML document in which the list is styled using the <font> tag.
1 In your Files panel, locate and double-click the HTML file named FontTagList.html to open it in the document window.
2 Press the Code View button in the Document toolbar at the top of the document window. Notice that the <font> tag is used to style the items in the bulleted list.
|
Here, a <font> tag is used to format each bullet point. If you add more bullet points, you’ll need to use more <font> tags to keep the style of those bullets consistent with the others. |
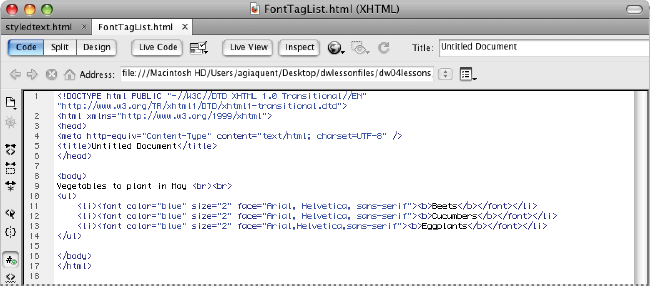
As you can see, there’s a lot of repetition in this code.
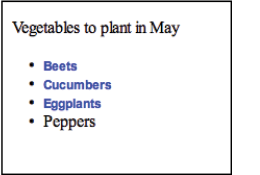
3 Press the Design View button on the Document toolbar. Position your cursor at the end of the last bulleted item, press Enter (Windows) or Return (Mac OS) to add a new bullet point, and type Peppers. You see that the text reverts to the default typeface, size, and color. You would have to add a new <font> tag with the same attributes as the others to get it to match. If you wanted to change an attribute such as the color for all the bullet points, you would have to adjust each tag separately. In early versions of Dreamweaver, there were actually ways to perform global changes using HTML; however, these were sometimes tricky to control, and CSS offers a better solution in any case.
|
You may lose the formatting between bullet |
4 Choose File > Save to save your work, then choose File > Close.
The dawn of CSS in Dreamweaver
CSS introduces a new level of control and flexibility beyond the <font> tags in HTML. A significant benefit of CSS is the ability to apply consistent formatting of elements across one or all pages in a web site. In the following exercises you will learn a few different ways to create CSS rules that affect the style of your text. The first method you will explore involves creating tag- or element-based style rules. If you completed Lesson 3, you saw this method used to format text. This type of rule alters the appearance of an existing HTML tag, so the tag and any content that appears within it always appear formatted in a specific way. Instead of having to add a <font> tag around the contents of each new bullet point in a list, it would be easier for you to tell the HTML tags used to create lists, that bullet point items should always be formatted a certain way.
1 Locate and double-click the file named CSSList.html from the Files panel to open it.
2 Press the Design View button in the Document toolbar if necessary. The list that appears onscreen, unlike the one you saw in the previous example, is formatted without the use of <font> tags, and uses only CSS.
3 Position your cursor after the last bulleted item and press the Enter (Windows) or Return (Mac OS) key to create a new bullet point. Type in Peppers. The new text matches the bullet points above it.
4 Press Enter/Return again to add a fifth bullet point, and type Okra.
No matter how many bullet points you add, the formatting is applied automatically every time.
5 Select Split view at the top of the document window so that you can see both code and design:
|
Tags are not used to format this list. |
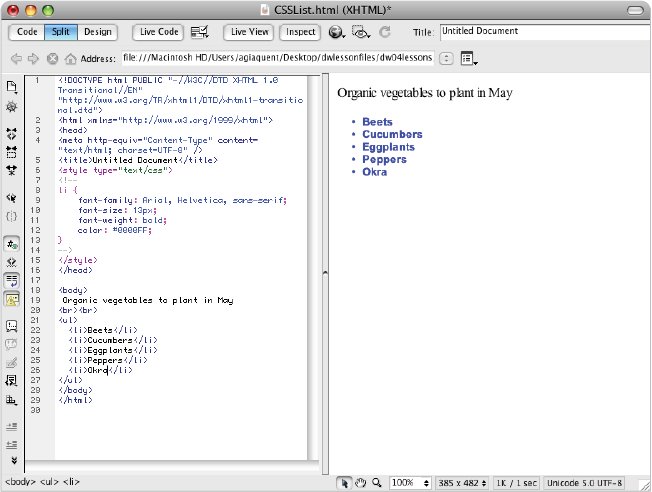
What you’ll notice is the absence of any formatting tags like the <font> tags you saw in the last exercise. In this example, you have several list items; however, all the styling information, such as the font-family, size, font-weight, and color, is being defined in one place: the CSS rule for the <li> tag.
6 If necessary, scroll to the top of the page and you’ll see the code that makes this possible:
<style type=”text/css”>
<!--
li {
font-family: Arial, Helvetica, sans-serif;
font-size: 13px;
font-weight: bold;
color: #0000FF;
}
-->
</style>
The formatting rules for color, weight, size, and typeface are assigned directly to the <li> tag, which creates new bullet points in an HTML list. It’s almost like a dress code for all <li> tags; they know that when they are used on the page, they must look a certain way. Best of all, if you need to modify their appearance, you don’t have to go through every <li> tag in your document and modify <font> tags or attributes; just make your changes to that single style rule at the top of the page. You will get a chance to do this shortly; however, let’s take a step back and look at how CSS is controlled in Dreamweaver.
7 Choose File > Save to save your work, then choose File > Close.
How do you create CSS rules in Dreamweaver?
In this exercise, you will take a tour of Dreamweaver’s CSS controls. If you haven’t worked with CSS before, this is a chance to learn a bit more about how it works. If you have worked with CSS previously, this section will help you understand the Dreamweaver interface and how it applies to familiar concepts. Regardless of your comfort level with CSS, you won’t be making any changes, merely getting familiar with features that you will be using in later exercises.
You work with CSS rules in a few ways in Dreamweaver:
Continue to the next Dreamweaver Tutorial: Using the CSS Styles panel in Dreamweaver >