Flash tutorial: Getting Started with the Drawing Tools in Flash
What you’ll learn in this Flash Tutorial:
|
This tutorial provides you with a foundation for working with the Adobe Flash drawing tools. It is the first lesson in the Adobe Flash Digital Classroom book. For more Adobe Flash training options, visit AGI’s Flash Classes. |
Adobe Flash Tutorial: Getting Started with the Drawing Tools in Flash
In addition to creating engaging animated content, Flash functions as a full-featured vector illustration program that enables you to create attractive graphics and digital illustrations for use in your movies. If you use industry-standard applications such as Photoshop or Illustrator, you’ll find many similarities as well as some powerful tools that are unique to Flash.
Starting up
Before starting, make sure that your tools and panels are consistent by resetting your workspace. See “Resetting the Flash workspace” in the Starting up section of this book.
You will work with several files from the fl01lessons folder in this lesson. Make sure that you have loaded the CClessons folder onto your hard drive. They are available for download if you purchased the digital version of the book, or on the DVD that is included with the print version. See “Loading lesson files” in the Starting up section of this book.
Drawing in Flash
Adobe Flash Professional CC has many powerful tools to help you create shapes, paths, colors and patterns. Whatever you create with the drawing tools can then be animated using the Timeline. In this lesson, you will experiment with two different drawing models that you can use to create artwork in Flash: the Merge Drawing mode and the Object Drawing mode.
Using the Merge Drawing mode
The default mode is the Merge Drawing mode. At first, this mode may be difficult for new users to grasp, especially those already familiar with the drawing tools in Adobe Illustrator. In this lesson, however, you’ll see how the Merge Drawing mode offers some unique benefits over traditional drawing tool behaviors. To view the finished project, choose File > Open within Flash Professional CC. In the Open dialog box, navigate to the fl01lessons folder and select the file, fl0102_done.fla, then press Open. Keep this file open for reference or choose File > Close to close the file.
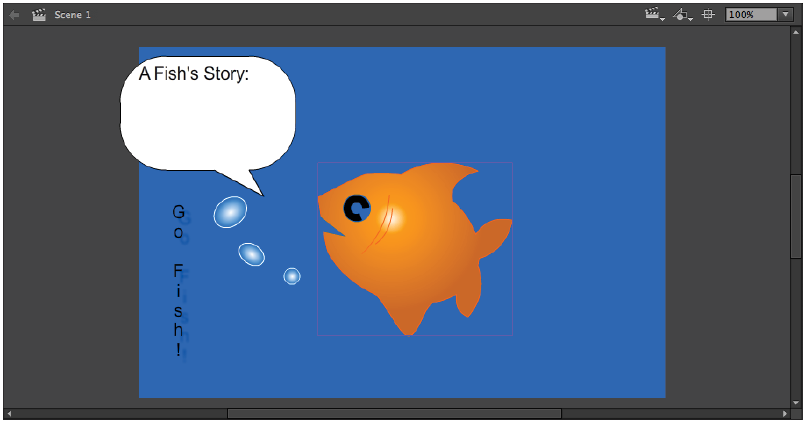
|
The finished project. |
Creating artwork in Merged Drawing mode
In Merge Drawing mode, shapes can be easily torn apart like clay—strokes can be separated from fills (and vice versa) and you can create partial selections to break up your shapes even further. Most importantly, two shapes drawn in this mode will automatically merge when they overlap, making it easy to create complex combined shapes. Mergeable artwork is easily distinguishable on the Stage by its stippled (dotted) appearance.
You’ll first get familiar with how this unique mode behaves before diving into a more complex drawing lesson.
1 Launch Flash CC Professional, if it is not already open.
2 Choose File > Open and navigate to the fl01lessons folder that you copied onto your computer. Select and open the file named fl0101.fla. You’ll start your artwork off with a basic shape drawn in Merge Drawing mode. First, you’ll need to make sure you’re in the right drawing mode.
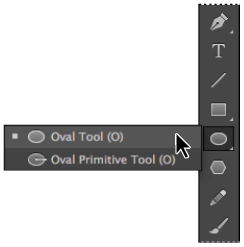
3 Select the Oval tool ( ) from the Flash Tools panel. This tool is grouped with the Oval Primitive tool, and you may need to click and hold down the mouse button on currently selected shape tool to select it.
|
Click your mouse button to reveal more shape tools under the Oval tool. |
4 At the bottom of the Flash Tools panel, locate the Object Drawing button ( ) and make sure it’s not selected. This button controls whether or not you’re drawing in Merge or Object Drawing mode. When selected, the button appears shaded.
5 Next, you’ll choose your fill (inside) and stroke (outline) colors. At the bottom of the Flash Tools panel, locate the color swatch marked with a pencil icon ( ) and click it. The Swatches panel appears—select black as your stroke color. Below it, click the color swatch marked with a paint bucket icon (
 )—from the Swatches panel, select a light orange for your fill color. Click the Reset button at the bottom of the Property Inspector to make sure the Oval Options are all set at 0.
6 Click and drag in the middle of your Stage to draw an oval—once you’re satisfied with the size and shape, release the mouse button. Switch to your Selection tool ( ) at the top of the Tools panel; this tool allows you to select, move, and manipulate items on the Stage.
7 Click once on the fill (inside) area of your shape and the fill becomes selected without the stroke (outline). Double-click the fill, and both the stroke and fill become selected. You can now move or manipulate the shape as one whole object. Deselect the shape by clicking on the Stage.
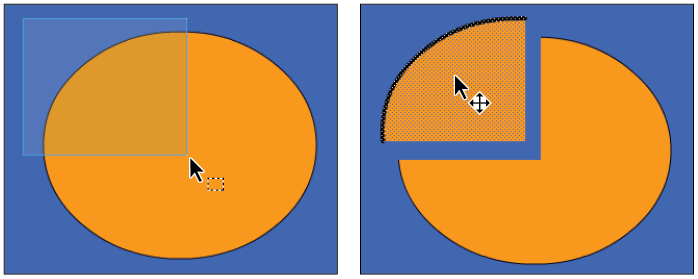
8 Off to the upper-left corner, click and drag to create a marquee (selection area), and release it once it partially overlaps your new shape. You’ll notice that the shape becomes partially selected; you can now use the Selection tool ( ) to click and drag the selected portion away from the rest.
|
You can partially select mergeable shapes and pull them apart, which can create some interesting shape variations. |
9 Next, you’ll draw a new shape that overlaps the current one. Reselect the Oval tool () from the Tools panel on the right. You can leave your current color settings the same. Click and drag to draw a new shape that partially overlaps the first. Once again, switch to the Selection tool.
10 Double-click the fill of the new shape to select it, and pull it away from the existing one. Click on the stage to deselect the object when you’re done. You’ll notice that the new shape has taken a piece out of the old one where the two overlapped!
|
Overlapping shapes automatically merge, causing one to “knock” the other out when removed. |

11 Choose File > Save As. In the Save dialog box, navigate to the fl01lessons folder, then type fl0101_work.fla into the Save As text field. Press Save.
Keeping panels open
You can set a preference in Flash so that it automatically collapses panels after you are done working with them.
To have your panels collapse automatically, choose Flash > Preferences (Mac) or Edit > Preferences (Windows) then check the Auto-Collapse Icon Panels option.
Continue to the next Flash Tutorial: Working with Drawing Objects in Flash >