Flash tutorial: Transforming graphics in Flash
What you’ll learn in this Flash Tutorial:
|
This tutorial provides you with a foundation for working with Adobe Flash graphics. It is the first Flash lesson in the Adobe CC Design Tools Digital Classroom book. For more Adobe Flash training options, visit AGI’s Flash Classes. |
Adobe Flash Tutorial: Transforming graphics in Flash
Once you’ve created artwork on the Stage, Flash gives you a lot of options for scaling, rotating, skewing, and tweaking graphics and colors. Transforming existing graphics is as much a part of illustration as building them, so in the next steps you’ll explore the various tools and panels at your disposal.
The Transform menu and Free Transform tool
The Modify menu at the top of your screen features a Transform menu, which provides shortcuts to many common transformation tasks as well as helpful dialog boxes. You’ll use this menu in the next exercise to tweak the size and rotation of your fish.
1 Choose the Selection tool ( ), and click once on the fish to select it (make sure its layer is unlocked).
2 Choose Modify > Transform > Scale and Rotate. This opens the Scale and Rotate dialog box, where you can enter values for Scale (in percentage) and Rotation (in degrees).
|
Choose Modify > Transform > Scale and Rotate to open the Scale and Rotate dialog box. |
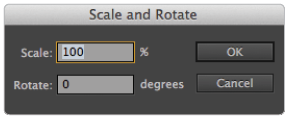
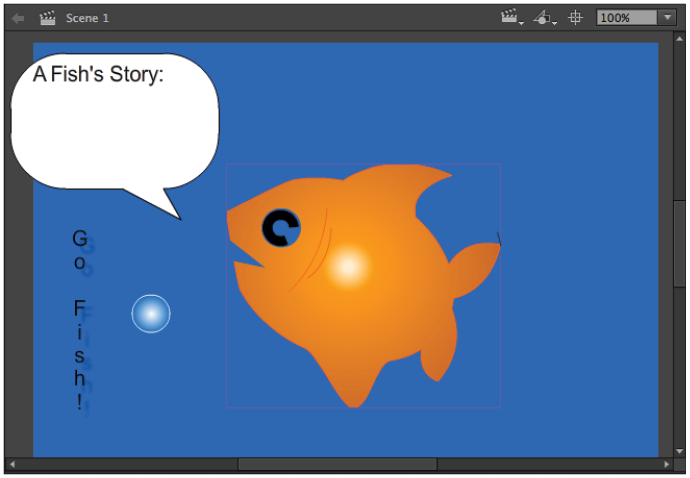
3 Type 75 for the Scale value, and 25 for the rotation value; then press OK to exit the dialog box.
4 Your fish now appears smaller and rotated slightly upward. Use the Selection tool to move your fish to the center of the Stage, closer to the word bubble.
To fine-tune, you’ll use the Free Transform tool, which offers a more tactile (but less precise) way of scaling and rotating your artwork.
|
Rotate the fish. |
5 Leave the fish selected, and choose the Free Transform tool ( ) from the Tools panel. The fish now appears inside a black bounding box with eight handles.
6 Move your mouse pointer over the top-right handle of the bounding box until you see a double-arrow icon appear. While holding down the Shift key, click and drag the corner handle down and to the left to resize your fish slightly smaller. If the text box makes it difficult to select the fish, you may move the text to another location on the Stage.
|
With the Free Transform tool, you can use corner handles to rotate or resize your artwork. |
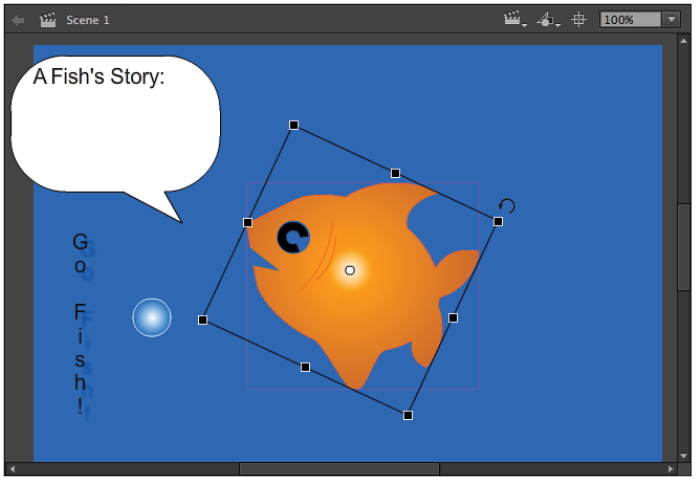
7 Move your cursor just above the same handle until you see the rotating arrow icon ( ). Once this icon appears, click and drag in a clockwise or counter-clockwise motion to adjust the rotation of your graphics to your liking.
8 Choose File > Save to save your file.
Getting the (transformation) point
What is that mysterious white dot that appears in the middle of your artwork when you use the Free Transform tool? That’s your transformation point, which determines the point on a graphic from which scaling and rotation is set.
If you’d like to rotate a graphic around a different point than the center, for instance, you can move the transformation point to a different location within your graphic.
To do this, select your graphic with the Free Transform tool, locate the point, and click and drag it to a different part of your graphic.
The Transform panel
An alternative to the Free Transform tool and Transform menus is the Transform panel, which offers many of the same features plus some additional options for skewing and transforming graphics in the 3D plane.
1 Choose Edit > Deselect All. If necessary, unlock the Bubble layer for editing. Use the Selection tool () to select the bubble graphic.
2 Select Edit > Copy and then Edit > Paste in Center to make a copy of the bubble. Repeat this to make a third bubble. Use the arrow keys on your keyboard or the Selection tool to arrange the three bubbles vertically to the left of your fish’s mouth.
3 Select the bottommost bubble. Choose Window > Transform to open the Transform panel. Locate the horizontal and vertical scale values at the top. The Constrain button ( ) directly to the right is activated by default and will keep the horizontal and vertical values locked together.
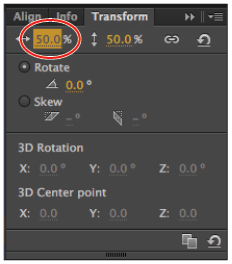
4 Click and drag left over the horizontal value until the overall scale of the bubble is reduced to around 50 percent.
|
Use the Transform panel to precisely scale an object. |
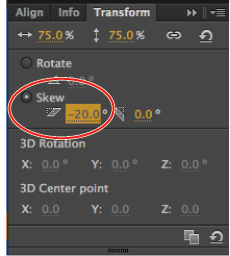
5 Select the next bubble above the last, and repeat the same technique from step 4 to reduce this bubble to 75 percent. This time, however, click and select the Skew radio button. Click and drag the horizontal (left) skew value until it reads -20 degrees. This adds a slight leftward tilt to the bubble.
|
Add skewing to an object by selecting it and using the Skew values on the Transform panel. |
6 Select the top bubble, and click to select the Skew radio button. Click and drag the horizontal (left) skew value until it reads 15 degrees. Close the Transform panel.
To remove all the transformation values from an object, select it and click the Remove Transform button ( |

Transforming gradients
If you use gradients to fill or stroke graphics in your movie, you can precisely position, scale, and modify them using the Gradient Transform tool. Because your fish and bubbles both use gradient fills, you’ll finalize your artwork with a little gradient tweaking.
1 From the Tools panel, click and hold down your pointer on the Free Transform tool ( ) to select the Gradient Transform tool (
 ), then click on the body of your fish to select it.
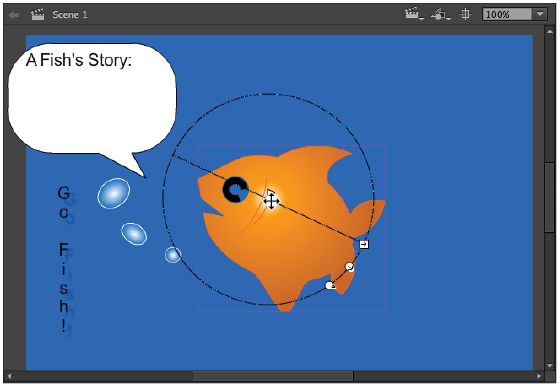
2 A circular bounding box appears around your fish. Move your cursor over the center point of the bounding box until a four-way arrow appears. You can click and drag this point to shift the center point of the gradient. Click and drag the point up and to the left—this helps to imply a light source coming from the upper left.
|
Move the point shown in a Gradient Transform bounding box to shift a gradient’s center point. |
3 Locate the scale handle in the lower-right corner of the bounding box. Click and drag it inward to scale the gradient down inside the fish. This increases the presence of the darkest color that makes up your fill.
|
Scale down a gradient using the handle shown. This also changes the perceived balance of colors. |

4 Choose File > Save to save your file.
For linear gradients, the rotate handle allows you to change the direction of the gradient. This also works for radial gradients if the center point is offset from the middle. |