Illustrator tutorial: Combining shapes using the Shape Builder tool in Illustrator
What you’ll learn in this Illustrator Tutorial:
|
This tutorial provides you with a foundation for working with Adobe Illustrator panels. It is the first lesson in the Adobe Illustrator CC Digital Classroom book. For more Adobe Illustrator training options, visit AGI’s Illustrator Classes. |
Adobe Illustrator Tutorial: Combining shapes using the Shape Builder tool in Illustrator
In this section, you have the opportunity to create an illustration using a drawing feature called the Shape Builder tool ( ). By using the Shape Builder tool, you can create unique shapes by adding, subtracting, and intersecting one shape from another.
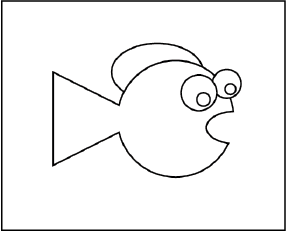
1 Choose File > Browse in Bridge. When Bridge comes forward, navigate to the ai03lessons folder and double-click on the file named ai0505_done. An image of a fish appears. You will create this shape by using the Shape Builder tool.
|
The completed artwork. |
2 Choose File > Close to close this file, or keep it open for reference.
You will start out by creating the fundamental shapes that will be used to create the fish in the illustration.
3 Create a new Illustrator document by choosing File > New. In the New Document dialog box, type ai0505_work in the File name text field. Choose Print from the New Document Profile drop-down menu. Choose Letter from the Size drop-down menu, if it is not already selected, and set the Units to Inches. Click OK.
4 Select File > Save. Make sure that you are in the ai03lessons folder, and keep the type Adobe Illustrator. When the Illustrator Options dialog box appears, click OK.
5 Press D to confirm that the fill and stroke are set at the default of white and black, respectively.
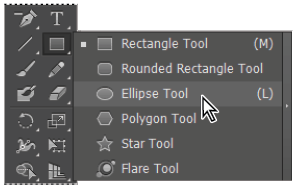
6 Click and hold on the Rectangle tool and select the hidden Ellipse tool.
|
Select the hidden Ellipse tool. |
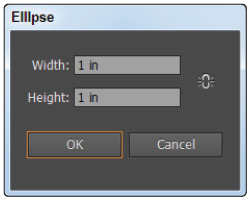
7 Click anywhere on the artboard (don’t click and drag). If you inadvertently create an ellipse, press Ctrl+Z (Windows) or Command+Z (Mac OS) to undo your last step. Then simply click once on the artboard. The Ellipse dialog box appears.
8 Type the value of 1 in into the Width text field, and then press tab and enter 1 in into the Height text field. Click OK.
This circle will serve as the body of your fish.
|
Click once on the artboard to open the |
9 Zoom in so the fish’s body fills your window, click and hold on the Ellipse tool ( ), and select the hidden Polygon tool (
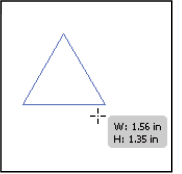
 ). Click and drag to create a polygon shape, but do not release it. Instead press the down-arrow on your keyboard several times until the polygon is a triangle. Release the mouse when you have a triangle shape. Do not be concerned with the angle or size for now.
|
Press the down-arrow (while |
10 Choose the Selection tool ( ) and notice that a bounding box appears around the triangle. If the bounding box is not visible, make sure that you are on the Selection tool and choose View > Show Bounding Box.
11 Position your mouse around an outside corner, and, when you see the curved arrow cursor, click and drag to rotate the triangle. Position your triangle so that it creates the shape of a fish tail.
|
Click and drag to rotate the triangle. |
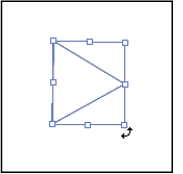
12 With the Selection tool still active, position your mouse on a corner point and click and drag to scale the triangle either up or down; you are now visually resizing the triangle. Resize the triangle until you think it would make a good fit as a fish tail. In our example, the tail is approximately .8 inches.
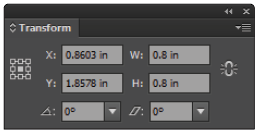
If you would rather enter an exact amount, choose Window > Transform; the Transform panel appears. With the triangle selected, type .8 in into the W: (Width) text field, then press Tab and type .8 in into the H: (Height) text field.
|
Enter an exact measurement in the |
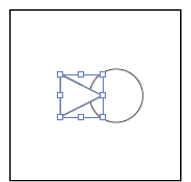
13 Using the Selection tool, click and drag to position the triangle so that it is on the left side of the ellipse, making sure it overlaps slightly.
|
Position the triangle so that it is slightly |
14 Choose File > Save or press Ctrl+S (Windows) or Command+S (Mac OS) to save your file. Keep it open for the next part of this lesson.
Combining the shapes
You will now start the process of combining your shapes.
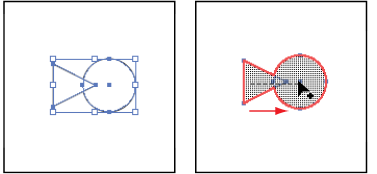
1 Using the Selection tool (), click on the triangle shape if it is not selected, then Shift+click on the ellipse.
2 Select the Shape Builder tool () in the Tools panel. Click and drag from one shape to another. The triangle and ellipse are combined into one shape.
|
Click and drag with the The resulting combined shape. |
Subtracting with the Shape Builder tool
You will now create what will soon be the mouth shape (when it is subtracted from your ellipse shape).
1 Click and hold down on the Polygon tool () in the Tools panel to select the hidden Ellipse tool ().
2 Choose View > Snap to Point to uncheck that feature. When creating small shapes, the Snap to Point feature can prevent you from forming the correct shape.
3 Click and drag a small ellipse over the right side of the newly created shape. Keep in mind that the ellipse will be subtracted from the combined shape to form the mouth.
|
Create the shape that will be subtracted to form a mouth. |
4 Switch back to the Selection tool and Shift+click on the combined shape to activate both the ellipse and combined shape at the same time.
5 Select the Shape Builder tool and hold down the Alt (Windows) or Option (Mac OS) key. The cursor now shows a minus sign in the lower-right.
6 With the Alt/Option key still being held down, click and drag from the inside-right edge of the ellipse into the left edge. When you release, the ellipse shape is subtracted from the combined shape, forming a mouth.
|
Select both shapes. Hold down Alt/Opt key and drag within the |

You will use the Shape Builder tool for one last time to add a shape (on top of the fish) to create the fin.
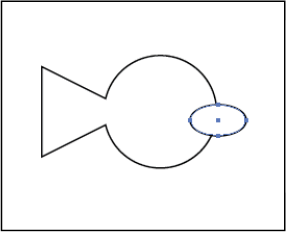
7 Select the Ellipse tool, then click and drag to create an oval shape that intersects across the top of the combined shape. Again, there is no exact size or position required for this shape.
In the next step, you will take advantage of a shortcut that allows you to activate the Selection tool temporarily, helping you to avoid switching tools.
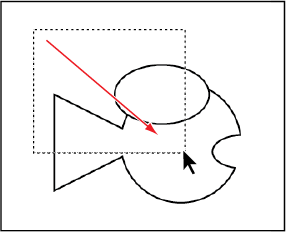
8 Hold down the Ctrl (Windows) or Command (Mac OS) key and notice that, even though you are on the Ellipse tool, the cursor has changed into the Selection cursor. With the Selection cursor, click and drag a marquee that touches both the ellipse and the fish body shape to activate both shapes.
|
Hold down the Ctrl/Command key to temporarily |
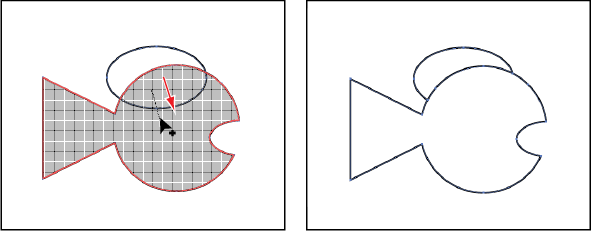
9 With both shapes selected, select the Shape Builder tool and click and drag from the area where the ellipse and the fish body shape meet into the fish shape. The intersected area is added to the fish body shape.
|
Click and drag from within the intersected The result. |
10 Choose File > Save or press Ctrl+S (Windows) or Command+S (Mac OS) to save your file. Keep it open for the next part of this lesson.
Creating the fish eyes
In this section, you add an eye to the fish illustration.
1 Select the Ellipse tool () and then click and drag a circle that will serve as the outside of the fish eye. In our example, the size was approximately .25 in.
If you want your circle to match our example, you can type the value of .25 in into the Width and Height text fields in the Transform panel.
2 Using the Selection tool (), reposition the circle so that it is approximately the correct position for the eye that is furthest away.
3 Select the Ellipse tool and, holding down the Shift key, draw a smaller circle to act as the iris in the eye.
4 Using the Selection tool reposition the iris, if necessary.
|
Create the eye for the fish. |

5 With the Selection tool, select both parts of the eye and then hold down the Alt (Windows) or Option (Mac OS) and drag the eye to the left. This clones the original eye, you now have two eyes.
|
Hold down Alt/Option and drag to clone a |
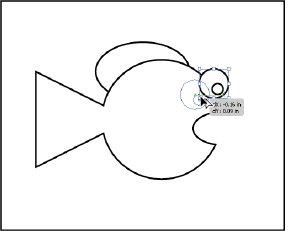
6 Make sure that the newly cloned eye is selected then position your cursor on a corner of the bounding box.
7 When the cursor changes to a double-arrow, click and drag outward to enlarge the eye slightly.
|
The illustration with the eyes added. |

8 Choose File > Save, and choose File > Close to close the file.