Illustrator tutorial: Using the Line Segment and Arc tools in Illustrator
What you’ll learn in this Illustrator Tutorial:
|
This tutorial provides you with a foundation for working with Adobe Illustrator panels. It is the first lesson in the Adobe Illustrator CC Digital Classroom book. For more Adobe Illustrator training options, visit AGI’s Illustrator Classes. |
Adobe Illustrator Tutorial: Using the Line Segment and Arc tools in Illustrator
As the tool names imply, the Line Segment and Arc tools create line segments and arcs. As you learned in the previous exercises, the Pen tool can also create lines and arcs. However, unlike the line segments and arcs that can be created with the Pen tool, each new line or arc is separate and unique from the previous one.
1 Choose File > Open. In the Open dialog box, navigate to the ai03lessons folder and select the ai0504.ai file. Click Open.
This is a practice file containing several different line templates that you will work through in the following exercises. Choose File > Save As. In the Save As dialog box, navigate to the ai03lessons folder, and type ai0504_work.ai in the File name text field. Click Save. In the resulting Illustrator Options dialog box, click OK to accept the default settings.
2 In the Control panel, choose None ( ) from the Fill Color drop-down menu and choose the color black from the Stroke Color drop-down menu, if it isn’t already selected. Choose 2 pt from the Stroke Weight drop-down menu.
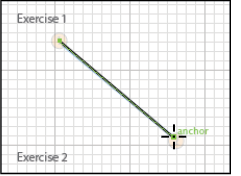
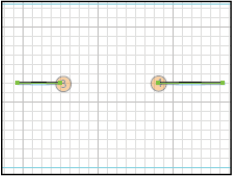
3 Select the Line Segment tool ( ) from the Tools panel on the left, and locate the template labeled Exercise 1. Hold the Line Segment tool over the start of the first line (labeled 1). Click and drag with your mouse from label 1 to label 2 to create a line segment.
|
Using the Line Segment tool. |
4 Position the cursor over label 3. While holding the Shift key, click and drag the mouse from label 3 to label 4. The Shift key is used to constrain the Line Segment tool to perfectly horizontal, vertical, or diagonal (45-degree) lines.
5 Position the cursor over label 5. While holding the Shift key, click and drag the mouse from label 5 to label 6.
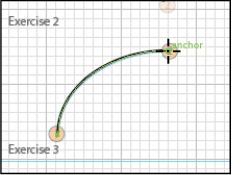
6 Click and hold the Line Segment tool to view the hidden tools. Select the Arc tool ( ) and locate the template labeled Exercise 2. Hold the Arc tool over the start of the first line (labeled 1). Click and drag with your mouse from label 1 to label 2. This creates an arc.
|
Create an arc path. |
7 Position the cursor over label 3. While holding the Shift key, click and drag the mouse from label 3 to label 4. The Shift key constrains the created arc.
8 Position the cursor over label 5. Click and drag to label 6. Continue pressing down the mouse button, and notice that the arc is very similar to the others you have previously created. While still holding the mouse button, press F on the keyboard and release it to reverse the direction of the arc.
|
Press F while creating an arc |
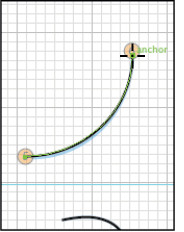
 | While drawing an arc, press the up- and down-arrow keys on the keyboard to change the angle of the arc. |
9 Choose File > Save to save your work, and then choose Select > Deselect.
Using the Pencil, Smooth, and Path Eraser tools
While the Pen tool exists for precise line work, the Pencil tool creates freeform lines. In addition to being able to draw lines, the Pencil tool can also be used to refine existing lines. You will now complete Exercise 3.
1 Select the Pencil tool ( ) from the Tools panel and locate the template labeled Exercise 3. Hold the Pencil tool over the start of the first line (labeled 1).
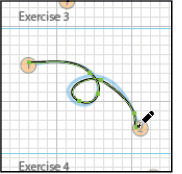
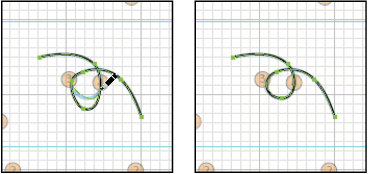
2 Click and drag with your mouse from label 1 to label 2 to replicate the looping line shown in the template. Don’t worry if your path doesn’t follow the path exactly. The freeform nature of the Pencil tool makes this difficult for even experienced users.
|
Create a line using the Pencil tool. |
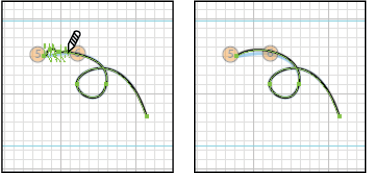
3 Choose the Selection tool ( ) and select the line between labels 3 and 4. Select the Pencil tool, then click and drag along the guideline between labels 3 and 4. The line adjusts to fit the new path you have created.
|
Select, and then redraw a part of the path. |
4 Choose the Selection tool again and select the line between labels 5 and 6. Click and hold the Pencil tool in the Tools panel, and choose the Smooth tool ( ).
).
5 Beginning at label 5, click and drag the Smooth tool back and forth across the jagged part of the line to label 6. This smooths out the jagged line. Depending upon the magnification at which you are viewing the page, you may have to repeat this process several times to match the example. When viewing the page at a higher magnification level, you will need more passes across the artwork with the Smooth tool.
|
Smooth the path using the Smooth tool. |
6 With the Selection tool, select the line between labels 7 and 8. Click and hold the Smooth tool in the Tools panel and choose the Path Eraser tool ( ).
).
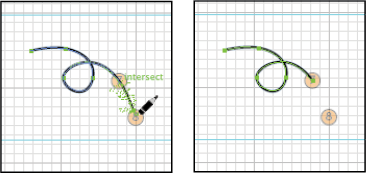
7 Beginning at label 7, click and drag the Path Eraser tool back and forth across the selected line to erase it. Be sure to thoroughly overlap the line or you may leave stray segments intact.
|
Using the Path Eraser tool, erase the path between labels 7 and 8. |
8 Choose File > Save to save your work.
Using the Eraser tool
The Eraser tool can erase vector objects in much the same fashion as a real-world eraser. This opens the door to the creation of a wide range of organic shapes in a very intuitive way.
1 Using the Selection tool (), select the black circle in Exercise 4, then choose the Eraser tool ( ) in the Tools panel.
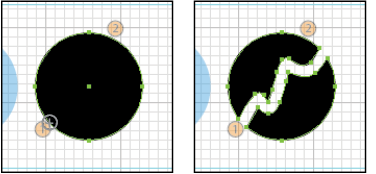
2 Click and drag from label 1 to label 2 in a pattern similar to the one in the template to the left of it. The Eraser tool bisects the circle, forming two separate shapes. Be certain to start outside the shape before clicking and dragging.
|
Use the Eraser tool to bisect the circle. |
3 Choose the Selection tool and select the black line located between labels 3 and 4. Choose the Eraser tool and drag over the line between labels 3 and 4 to sever it.
|
Use the Eraser tool to remove a section of the path. |
4 Choose File > Save to save your work.
Continue to the next Illustrator Tutorial: Editing existing paths in Illustrator >