InDesign tutorial: InDesign CC New Features
What you’ll learn in this InDesign Tutorial:
|
This tutorial provides you with a foundation for working with Adobe InDesign panels. It is the thirteen lesson in the Adobe InDesign CC Digital Classroom book. For more Adobe InDesign training options, visit AGI’s InDesign Classes. |
Adobe InDesign Tutorial: InDesign CC New Features
This lesson provides an overview of capabilities added to InDesign CC.
Starting up
This lesson is designed for existing InDesign users to get an understanding of what’s changed within this version of InDesign, or new users who may be working with one version of InDesign at home and another in the office, and want to know the differences. There are no specific lesson files used for this lesson.
About the new features in InDesign CC
Adobe InDesign CC is the ninth version of InDesign, and the software has been available for more than a decade. InDesign has a well-established way of performing most basic tasks, and the fundamentals of working with the software have not changed much in the last several versions. If you were to be placed in front of a computer using InDesign CS4, CS5, or CS6, you would likely feel right at home for creating most basic documents. The recent updates to InDesign have focused on minor improvements to the software to improve efficiency and more recently on digital publishing, especially ePub. We’ve updated every lesson in the InDesign CC Digital Classroom book to reflect changes in the InDesign CC software. Most of the new features are targeted at more experienced or advanced users, and the lessons that focus on advanced features and digital publishing contain the most significant updates from previous versions of this book. Here you will discover the new capabilities of InDesign CC that impact most users.
Updated user interface
As the various Adobe products have evolved, each of them has traditionally made changes to the user interface that caused each product to appear slightly different than the other. Even though they were different applications, the interface should have remained consistent between the applications.
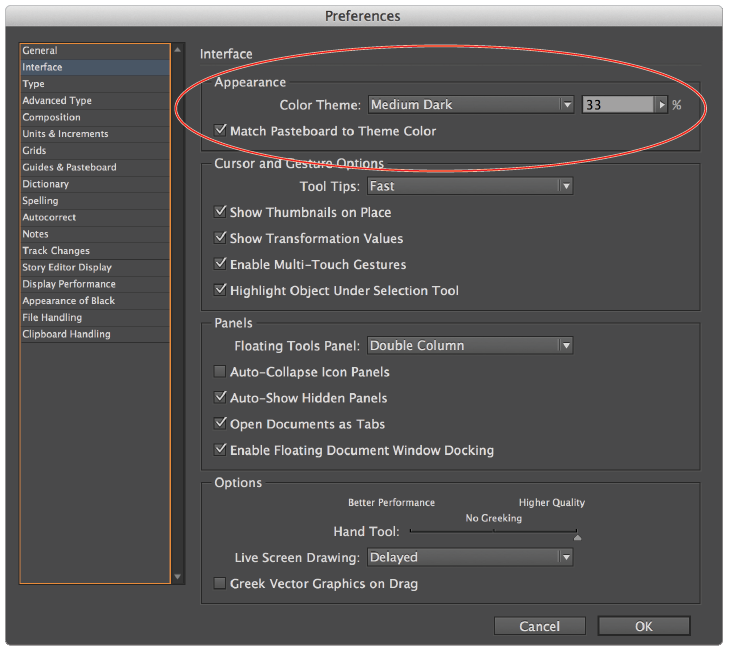
In CC, Adobe has worked to bring the interface appearance in-line with one another, creating a visually consistent interface between applications. Referred to as the “dark” interface, InDesign CC allows you to customize the appearance of the interface to meet your own personal needs. Whether you prefer a lighter interface or a darker interface, you can make adjustments to your liking by choosing Edit > Preferences > Interface (Windows) or InDesign > Preferences > Interface (Mac OS) and making the required adjustments in the Appearance section of the dialog box.
The icons in InDesign have been recreated at a higher resolution so that they look crisp on high resolution monitors such as the MacBook Pro with Retina® display, making the InDesign interface look better than ever
|
InDesign now allows you to customize the appearance of the User Interface in the Preferences > Interface dialog box. |
64-bit support
This is one of those features that will have a significant impact on your experience in InDesign, but one that’s difficult to physically see in the application. Since its inception, InDesign has been a 32-bit application, and for years it didn’t make a difference from a performance standpoint. As computers have become more powerful, they’ve outpaced the performance of 32-bit software applications. InDesign CC has been re-written (no easy task) as a 64-bit application. What does that mean to you? Well for one, InDesign will now be able to take advantage of all the RAM installed in your computer. Previously, regardless of how much RAM you had installed InDesign was only able to take advantage of a portion of that RAM. With the 64-bit application, you’ll notice that working on large files or multiple files at once will be faster and intense operations, such as exporting, will execute in a fraction of the time that it would normally require.
Improved Font menu
For beginner and advanced users alike, it’s always been time consuming to choose the desired font from the Font menu, especially if you didn’t know exactly what the font was called. In addition, it only listed fonts that began with the text that you typed. For example, if you typed Garamond in the Font menu but the name of the font was ITC Garamond, no fonts would display in the resulting list because there were no matches.
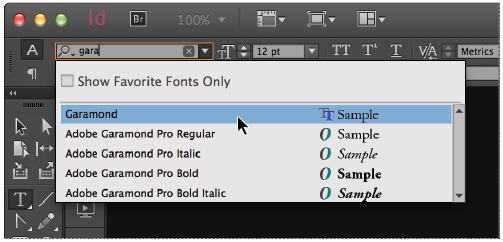
In InDesign CC, Adobe has added a much improved Font menu search that makes it quite easy to find the fonts that you are searching for. The Font menu now has two search options; Search Entire Font Name and Search First Word only. Search Entire Font Name (the default in InDesign CC) displays any font that contains the text that you type. If you type Gara, it will display any font that contains the text that you typed, regardless of what the font name begins with.
|
The new and improved search in the Font menu. |
Font favorites
In addition, fonts can now be marked as favorites to further reduce the time required to access a specific font. For example, if you use the font Zapf Dingbats on a regular basis, you need to either type the name of the font in the Font menu, or scroll to the very end of the font list to access the font. In InDesign CC, you can mark a font as a favorite, making it much easier to access in the Font menu. To mark a font as a favorite, click the star icon ( ) located to the left of the font name. Then when you go to the Font menu, you can click the Show Favorite Fonts Only check box to display only favorite fonts in the font list.
|
Accessing Font Favorites from the Font menu. |

Another helpful improvement to the Font menu is the ability to select text with the Type tool then click the Font menu to display the list of available fonts. With the Font menu open, you can now use the up and down arrow keys on your keyboard to not only navigate the Font menu, but also to change the preview of the selected text to the currently selected font. This makes it very easy to see how a font will appear when applied to the selected text without actually applying the font.
Native QR code generation
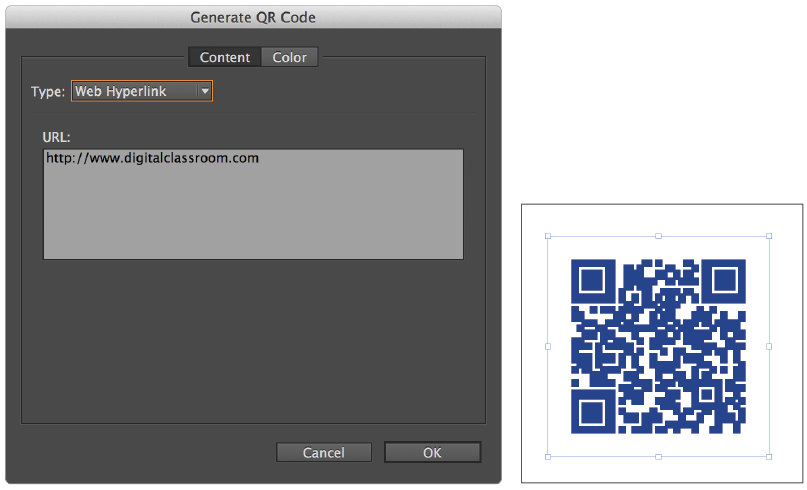
QR Codes have always been a powerful way to provide a path from a printed product to a web location. By taking a picture of a QR Code with a mobile device, you can be taken to a web address, e-mail address, text message, or even a virtual business card. It’s always been a bit challenging to generate these QR Codes, but now in InDesign CC, you can generate QR codes directly inside of your InDesign document by choosing Object > Generate QR Code. In the Generate QR Code dialog box, choose the type of code you want to create. Enter the value of the QR Code in the field provided, choose the color of the QR code by clicking the Color button, and choose a swatch. That’s all there is to it! Change the background color of the code by clicking the code with your Selection tool and choosing a swatch from the Swatches panel.
|
The Generate QR Code dialog box. The result. |
The New Document dialog box
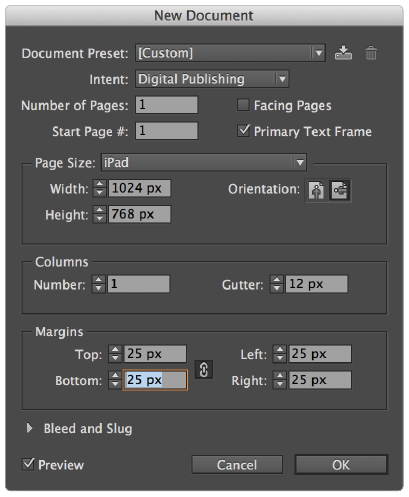
A seemingly minor addition, yet a powerful one, is the addition of a preview check box in the New Document dialog box. Now, as you are creating a new document in InDesign, you can turn on the preview check box to see exactly what your page will look like before you actually commit to creating it. If you are someone who often creates a document only to realize that an option was omitted, forcing you to start over from scratch, this option will sure to be a welcomed addition to your workflow.
|
Previewing a page during document creation. |
ePub enhancements
With the growing popularity of the ePub format, Adobe has been making changes to InDesign to improve the output of ePub files as well as the ability to control the properties of the exported ePub file. InDesign CC adds additions to the ePub export too numerous to mention here, however there are some nice improvements that are definitely worth mentioning.
Object Style additions
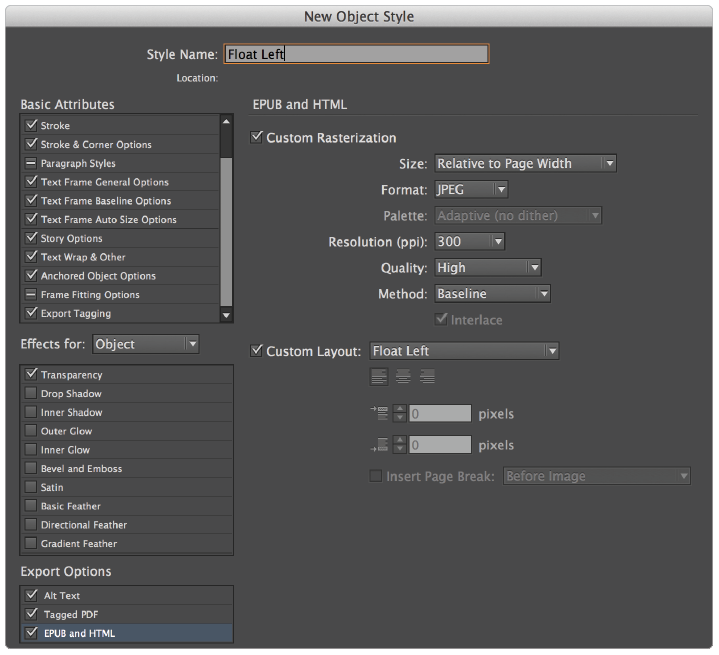
InDesign CC now allows you to control both Export Tagging and Object Export Options directly within an Object Style. This is a huge workflow improvement since it allows users to consistently apply styling and ePub properties by applying an Object Style to an InDesign element.
|
ePub properties available within an Object Style. |
Emit CSS
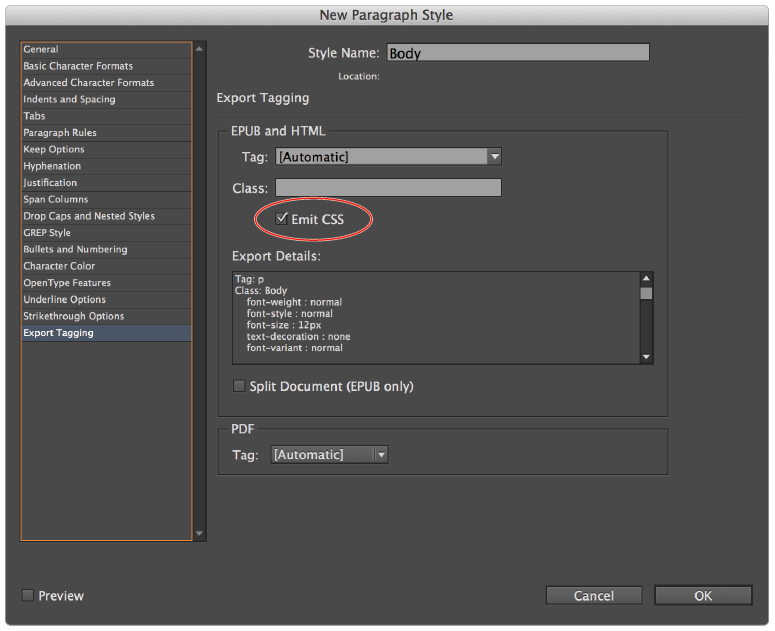
Traditionally when exporting an ePub that contained several styles that mapped to the same class, there would be conflicts between the styles resulting in complex CSS generation in the resulting ePub file. Now within each Character, Paragraph, or Object Style dialog box, you can enable the Emit CSS check box that makes that style the winner when multiple class definitions exist.'
|
Emit CSS defines the winner when a CSS class from several styles conflict. |
Index support
In previous versions of InDesign, if an index was generated in the InDesign document, links to the reference terms were not active. Now those reference hyperlinks will be functional in the resulting ePub file.
Table of contents
Although a physical table of contents in previous versions of InDesign worked when exported to ePub, if the TOC was edited, functionality was often lost in the exported ePub. The TOC generation has been significantly improved in InDesign so edited TOC information is retained. You are even able to copy portions of a table of contents story and paste it in a different location keeping the functionality in the resulting ePub file intact.
Improved CSS naming
In InDesign CC, auto-naming of CSS rules was improved so that the auto-generated CSS names are more logical and cleaner than in previous versions.