InDesign tutorial: Working with the Control panel in InDesign
What you’ll learn in this InDesign Tutorial:
|
This tutorial provides you with a foundation for working with the Adobe InDesign Control panel. It is the first lesson in the Adobe InDesign CC Digital Classroom book. For more Adobe InDesign training options, visit AGI’s InDesign Classes. |
Adobe InDesign Tutorial: Working with the Control panel in InDesign
The Control panel appears across the top of the workspace. The panel is contextual, so the content of the panel changes depending on the tool you are using and the object you have selected.
1 Choose the Selection tool ( ) in the Tools panel. The Control panel changes based upon the tool being used and the items selected in the layout.
2 Using the Selection tool, click the headline, Fending off the winter blues, positioned at the top of the page. The Control panel now displays information about this text frame.
3 Double-click the same headline. When you double-click the text frame, the Selection tool switches to the Type tool. The Control panel now displays information relating to the text.
|
The Control panel displays information about objects in your layout. The information displayed changes based upon the tool used for selection and the object selected. The icons displayed in the Control panel on your computer may differ slightly based on the resolution of your computer’s display. |

Navigating through an InDesign document
In this exercise, you’ll continue working with the id01_done.indd file, which is the completed newsletter that you opened at the beginning of the lesson. You’ll explore the tools used to navigate to different pages in an InDesign document, and how to change the document’s magnification to see more or fewer details in the document layout.
Using the Pages panel
The Pages panel provides a quick overview of the contents of each page in an InDesign document. You can use it to navigate between document pages, rearrange pages, and add or remove pages. You can also use it to create transitions between pages that are distributed as electronic documents, and create page variations such as portrait and landscape variations for use on a tablet.
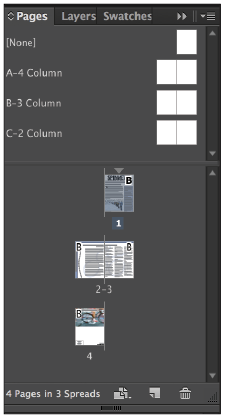
1 Click the Pages button ( ) in the dock at the right of the workspace to display the Pages panel. The bottom-left corner of the Pages panel indicates that there are four pages displayed in three spreads within this document.
|
You can use the Pages panel to add and delete |
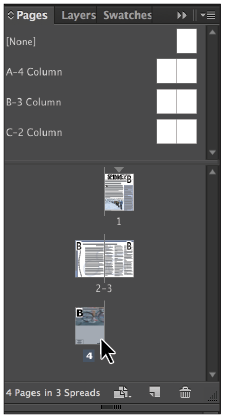
2 Double-click page 2 in the Pages panel to display page 2 of the document. The left page of the inside spread, which is page 2, appears in the document window.
3 Double-click page 4 in the Pages panel to display page 4 of your document.
 | If you are unable to see all the pages displayed in the Pages panel, you can make the panel larger by clicking and dragging the bottom-right corner of the panel. You can also scroll through the pages in the Pages panel by using the scroll bar along the right side of the panel or the scroll wheel on your mouse. |
|
Use the Pages panel to navigate to |
Changing the magnification of your document
You might want to get a closer look at parts of your document to align objects, check the spacing of type, or the position of items in your layout. InDesign makes it easy to change the magnification so you can zoom in on parts of your document, or zoom out to get a birds-eye view of your layout.
1 In the Pages panel, double-click the page 1 icon to display the first page of the document.
2 Select the Zoom tool ( ). Using the Zoom tool, click and hold the upper-left corner of the Spinnews logo at the top of the page, and then drag down to the lower-right corner of the logo. Release the mouse once you have reached the lower-right corner of the logo. The area you have selected with the Zoom tool is magnified.
You might have enlarged the document too much or not enough. To fine-tune the magnification, click with the Zoom tool to increase the magnification incrementally. If you zoomed in too close, decrease the magnification by pressing and holding the Alt (Windows) or Option (Mac OS) key while clicking with the Zoom tool.
|
Click and drag to increase the magnification of a specific area. |

| You can also increase or decrease the magnification of the document by using the keyboard shortcut Ctrl+plus sign (Windows) or Command+plus sign (Mac OS) to zoom in on a document, or Ctrl+minus sign (Windows) or Command+minus sign (Mac OS) to zoom out. If you have an object selected or your cursor is inserted within a text frame when using these key commands, the page will center on the selected object or cursor when changing the magnification. |
3 Select the Hand tool ( ) from the Tools panel, and then click and hold the page in the document window. The page magnification changes and a red frame appears, indicating the portion of the document that will be visible when you finish scrolling.
4 Use the Hand tool to arrange the page so that the logo is in the center of your document window. The Hand tool is used to move pages within the document window, allowing you to focus on specific areas of the layout.
5 Click and hold the page in the document window. Position the red frame so the entire border of the image is visible, and then release the mouse. The zoom returns to its original level, focused on the part of the page you identified using the Hand tool.
| You can access the Hand tool temporarily by pressing and holding the spacebar on your keyboard when using any tool except the Type tool. When the spacebar is pressed, the cursor changes to the Hand tool. If you have the Type tool selected, press and hold the Alt (Windows) or Option (Mac OS) key to temporarily access the Hand tool. |
6 To view the entire document, choose View > Fit Page in Window or press Ctrl+0 (Windows) or Command+0 (Mac OS). The currently selected page is displayed inside the document window.
7 Choose File > Close to close the document. If asked to save, choose No (Windows) or Don’t Save (Mac OS). You’ve completed your tour of the InDesign workspace, and will move into a tour of working with type.
Continue to the next InDesign Tutorial: Working with type in InDesign >