Photoshop Tutorial: Adding Text layers from another document in Photoshop CS6
What you’ll learn in this Photoshop Tutorial:
|
This tutorial provides you with a foundation for working with Adobe Photoshop text layers. It is the first lesson in the Adobe Photoshop CS6 Digital Classroom book. For more Adobe Photoshop training options, visit AGI’s Photoshop Classes. |
Photoshop Tutorial: Adding Text layers from another document in Photoshop CS6
In this next section, you will add text to the image and then save the text as a style, thus allowing you to reuse the style and keep your text styles consistent. To save time, you will open a .psd file with the text layers already created. You will then move both layers to your ps0101_work.psd file.
1 Choose File > Open, and then browse to and select ps0102.psd; a file opens with a transparent background and two text layers in the layers panel.
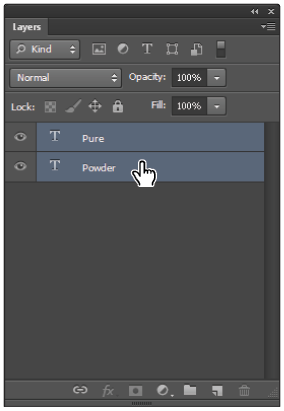
2 Click the Pure text layer, and then Shift+click the Powder text layer to select both layers.
|
Press Shift + click to select both layers. |
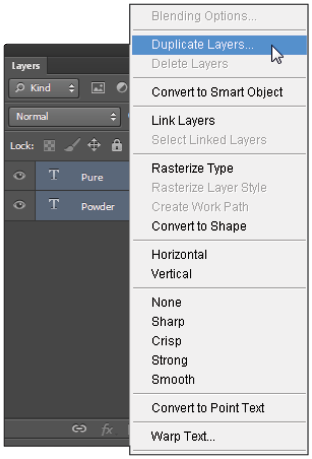
3 Right-click (Windows) or Ctrl+click (Mac OS) on the right side of either layer, and then select Duplicate Layers from the contextual menu that appears. You can also select Layer > Duplicate Layers.
|
Select Duplicate Layers from the contextual menu. |
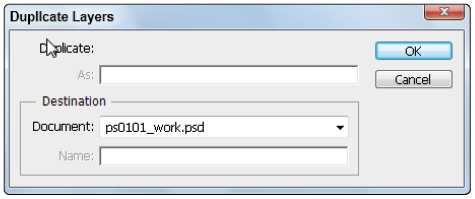
4 When the Duplicate Layers dialog box appears, select ps0101_work.psd from the Document drop-down menu in the Destination section, and click OK.
|
Duplicate the selected layers to an open file. |
5 In the ps0102.psd file, choose File > Close to close the file.
6 Return to the ps0101_work.psd file, select the Type tool ( ), and then click the text area that contains Pure to activate the cursor in that text area. Once your cursor is active, press Ctrl+A (Windows) or Command+A (Mac OS) to select all, or choose Select > All from the menu.
7 The text is already set to Myriad Pro in the Set the font family drop-down menu. In the Set the font style drop-down menu, select Bold.
Now you will decrease the spacing between each letter by changing the tracking value in the text.
8 Press Alt (Windows) or Option (Mac OS)+() left arrow repeatedly to decrease the spacing between the letters. Visually, decrease the size until you like the results. If you want to spread the text back out, press Ctrl+() right arrow until you have the spacing that you want.
|
Before tracking the text. After tracking the text. |

Select Window > Paragraph Styles; the Paragraph Styles panel appears. In Photoshop CS6, you can save both Paragraph and Character styles. Applying a saved paragraph style changes the style of text in an entire paragraph. Applying a saved character style allows you to change just the style of selected text.
You can easily create styles from text that you have already applied different attributes to, as you will do with the text that you just changed.
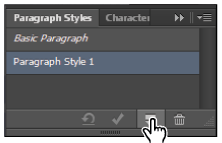
9 Click the Create new Paragraph Style button; Paragraph Style 1 appears in the Paragraph Styles panel.
|
Create a new paragraph style based |
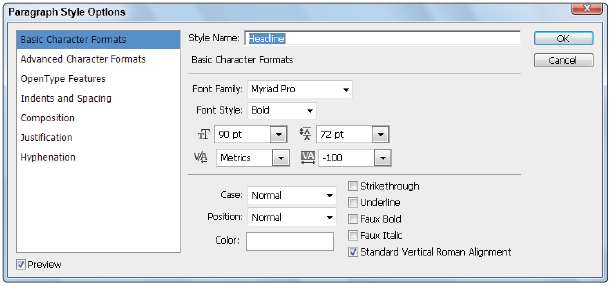
10 Double-click Paragraph Style 1 to open the Paragraph Styles Options dialog box and view the attributes that are stored in this style.
11 Change the Style name by typing Headline into the Style Name text field, and click OK.
|
Change the style name. |
12 Make sure that you are still on the Type tool, click anywhere in the Powder text area, and then click the Headline style that appears in the Paragraph Styles panel. The same text attributes are applied.
13 Click the Commit any current edits button ( ) in the Options bar to commit your style change.
A plus sign next to the Headline style indicates that there may have been a style manually applied. Click the Clear Overrides button ( |
 ) at the bottom of the Paragraph Styles panel to apply only the Headline style attributes to the text.
 Updating text styles
As you can see, saving styles can help you build more consistent text content, and it can also help you edit text more quickly. In this next section, you will make a change to your Headline paragraph style.
1 Double-click the Headline text style in the Paragraph Styles panel to open the Paragraph Style Options dialog box.
2 Click once on the Color field at the bottom of the Paragraph Style Options dialog box; the Color Picker appears.
3 Your cursor is now an eyedropper; use it to sample a color from your image. Choose a light gray from the snow and click OK in both dialog boxes. The style has been updated.
If your style does not automatically update, press the Clear Overrides () button. |
4 Choose File > Save and then File > Close to close this file.
Cropping an image
In this section you receive a quick overview of the Crop tool ( ) and how to use it in Photoshop CS6. Keep in mind that if you have used the Crop tool in previous versions, it has been improved on Photoshop CS6.
1 Choose File > Browse in Bridge. If you do not already have the contents of the ps01lessons folder open, click the Favorites tab in the upper-left of the Bridge workspace, and then choose Desktop. Locate the ps01lessons folder that you copied from your DVD to the Desktop.
2 Open the ps01lessons folder and double-click to open the ps0101_done.psd file. This is a final version of the completed lesson file from the previous exercise.
3 Choose File > Save As to open the Save As dialog box. Using the Save In drop-down menu, navigate to the ps01lessons folder. Type ps0102_work in the File Name text field and choose Photoshop from the Format drop-down menu. Then click Save. If the Photoshop Format Options dialog box appears, click OK.
4 In the Layers panel, select the Background layer, and then hold down the Alt (Windows) or Option (Mac OS) and double-click on the Background layer. This converts the Background layer into a layer named Layer 0.
5 Select the Crop tool. Handles appear around the image area. You can now crop using one of three main methods:
- Click and drag from the anchor points surrounding your image
- Click and drag anywhere in your image to create a new crop area.
- Enter in a fixed (Constrained) size in the textboxes in the Options bar while the Crop tool is selected.
Since the first two methods are self-explanatory, you will experiment with the third method, entering a fixed amount for your crop area.
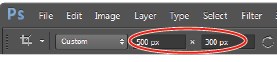
6 In the Options bar enter 500 px in the first textbox, and 300 px in the second textbox. Press the Tab key after you type in the 300 px value. The crop area immediately changes on your screen to reflect this amount.
|
Enter pixel values into the Crop tool Options bar. |
7 Uncheck the Delete Cropped Pixels checkbox in the Options bar.
8 Click and drag from the lower-right corner to see that your crop area remains proportionally correct to the values that you have entered. You can also see a crop preview in your layers panel. Click and drag to any size, making sure that you have some of the image area cropped, as indicated by the crop overlay that appears on your image.

9 Press the Commit current crop operation button () in the far right of the Options bar.
10 Select your Move tool ( ), and then select Layer 0. Click and drag to reposition the contents of this layer. Note that the pixels were not actually deleted; you can reposition any of the layers in this image file to show original content. Keep in mind that the cropped content of layers is saved, but not Background layers. This is why you converted the Background layer into a layer in step 4.