Photoshop Elements Tutorial: Making a selective change using the adjustment layer’s mask in Photoshop Elements
What you’ll learn in this Photoshop Elements Tutorial:
|
This tutorial provides you with a foundation for working with Adobe Photoshop Elements selective changes. It is the eighth lesson in the Adobe Photoshop Elements 10 Digital Classroom book. |
Photoshop Elements Tutorial: Making a selective change using the adjustment layer’s mask in Photoshop Elements
Now that you have lightened the image, you will make a selective adjustment to just one section of the image, using the selection tools. In this example, you will select and darken the face of the girl in the front right of the photo.
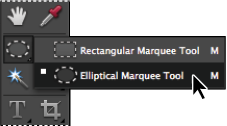
1 Click and hold down the Rectangular Marquee tool ( ) and select the hidden Elliptical Marquee tool (
 ).
).
|
Choose the Elliptical Marquee tool. |
2 Focus on the girl in the bottom right of the image in the foreground. Click and drag from the upper left area of the girl’s face to the lower-right area to make a selection that surrounds her face. You can reposition the selection by clicking and dragging it. Note that you need to have a selection tool active in order to reposition the selection without moving the pixel information.
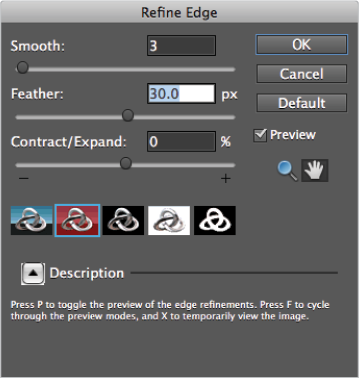
3 Choose Select > Refine Edge. The Refine Edge dialog box appears.
Press the Custom Overlay Color button ( ) in the bottom-left corner of the Refine Edge dialog box. This reveals your selection, as the clear area in the red (default mask color) mask. You can view the changes in your selection by keeping an eye on the mask.
4 Click and drag the Feather slider to the right to about the 30-pixel position. This softens, or vignettes, the selection so that any corrections you make (within that selection) blend into the rest of the image more smoothly. Press OK.
|
Feather the selection to soften the adjustments you will make. |
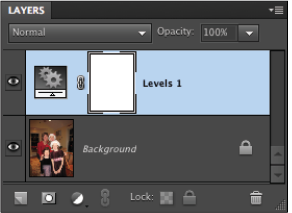
You will now take advantage of the Adjustment Layer mask (the white rectangle) that sits to the right of the adjustment you made, in the Layers panel. If you remember, you lightened the entire image when you created the initial layer mask. You will now use your selection to block that adjustment from occurring around the girl’s face.
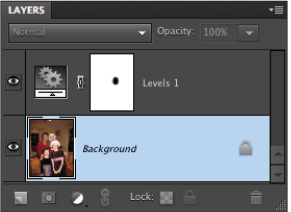
5 To make sure that the adjustment layer’s mask is selected, click once on the mask of the Levels 1 layer in the Layers panel.
|
Select the mask. |
6 Press D on your keyboard to set the foreground and background colors to their default black and white colors. Press X once. By pressing X, you switch the foreground and background colors. Look at the bottom of the Toolbox to verify that the black (foreground) color is in front of the white (background) color.
7 Choose Edit > Fill Selection; the Fill Layer dialog box appears. Leave it at the defaults, as shown below, and press OK. The layer mask now has a black feathered area. Where the black is on the mask, the image is no longer adjusted. Essentially, you are blocking the lightening adjustment that you made on the initial adjustment from occurring in the girl’s face, and so her face is darkened. Because you feathered your adjustment, it is faded into the rest of the image. Finally, remove the selection by choosing Select > Deselect.
|
Choose to fill your selection with black. |
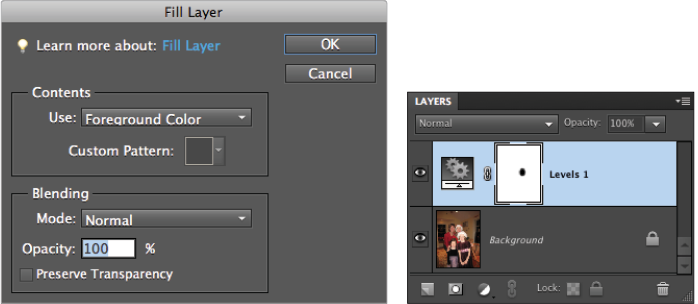
The adjustment layer effects are blocked where the black appears.
Brushing on corrections
Now that you have corrected the tonal values, you will use some of the retouching tools to clean up the faces of the girls.
1 In the Layers panel, select the Background layer to make it active.
|
Be sure to activate the Background layer before using the retouching tools. |
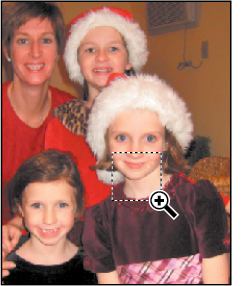
2 Using the Zoom tool ( ), click and drag over the lower section of the girl’s face, in the lower-right area of the image. You want to make sure you catch the small tooth and the area to the right of her mouth, as well as the chin.
|
Click and drag around the girl’s lower jaw to zoom into that region. |
3 From the Toolbox, select the Spot Healing Brush tool ( ). In the next step, you will choose a brush size to retouch with. Make sure that your Caps Lock key is NOT depressed. Having the Caps Lock key activated puts your cursor into precision mode, thereby preventing you from visually setting your brush size.
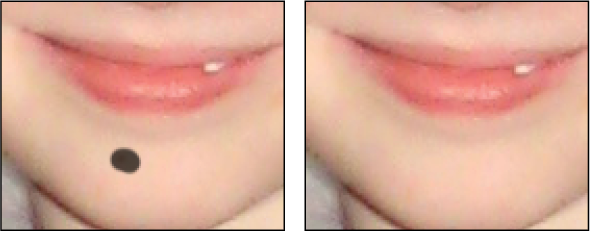
4 Press the ] (right bracket) or [ (left bracket) key to make your brush size larger or smaller respectively. Resize the brush so that it is slightly larger than the freckle on the chin of the girl.
5 Click and drag to paint over the freckle on her chin, and then release the mouse button. Notice that the Spot Healing Brush tool retouches in such a way that it quickly removes the freckle. When retouching blemishes, or other imperfections, you can either click once, or click and drag to smooth away imperfections in an area.
|
Click and drag with the Spot Healing Brush tool. The result. |
You will now manually retouch the image.
Using the Healing Brush tool
When you use the Healing Brush tool, you can define the area of an image that you want to clone. Depending upon what you are retouching, this added control can be helpful. In this example, you will clean up the girl’s face to the right of her mouth.
1 Click and hold the Spot Healing Brush tool () and select the hidden Healing Brush tool ( ).
).
2 Resize your brush to about 20 pixels. You can resize your brush by pressing the left and right bracket keys, [ or ], or by clicking and holding down on the Brush Picker arrow in the upper-left corner of the workspace. The size of the brush can be seen as you adjust it in the upper-left corner of your workspace as well.
|
Select a brush size. |

3 Now hold down the Alt key (Windows) or Option (Mac OS) and click a patch of clear skin near the location of the girl’s mouth. Release the Alt/Option key.
|
By holding down the Alt (Wndows) or Option (Mac OS) key and clicking, you define the area that you want to clone. |
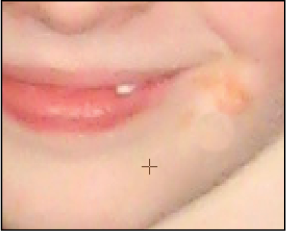
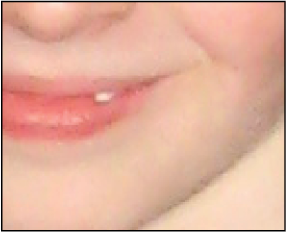
4 Click and drag over the food-stained area to the right of the girl’s mouth. Use small strokes, almost like you are blotting the food away to clear the skin. Not only do you have to pay attention to the area you are brushing, but you also need to watch the cross-hairs (the area you are cloning from). You don’t want to clone unwanted information. Sometimes it is necessary to Alt+click (Wndows) or Option+click (Mac OS) in multiple places to achieve the desired result. If you make a mistake, press Ctl+Z (Windows) or Command+Z (Mac OS) to undo the last step. You can press Ctrl/Command+Z continuously to continue undoing, or press Ctrl/Command+Y to redo your steps.
|
The mouth, after it has been retouched. |
5 Choose File > Save As. In the Save as dialog box, navigate to the Lessons folder and type Family_working in the Name text field. Make sure the format is set to Photoshop, and keep the bottom four options (default) selected, then press Save. Keep it open for the next part of this lesson.
Continue to the next Photoshop Elements Tutorial: Using the Clone Stamp tool in Photoshop Elements >