Photoshop Elements Tutorial: Processing multiple files in Photoshop Elements
What you’ll learn in this Photoshop Elements Tutorial:
|
This tutorial provides you with a foundation for working with multiple files in Adobe Photoshop Elements. It is the eleventh lesson in the Adobe Photoshop Elements 10 Digital Classroom book. |
Photoshop Elements Tutorial: Processing multiple files in Photoshop Elements
|
The Process Multiple Files dialog box. |
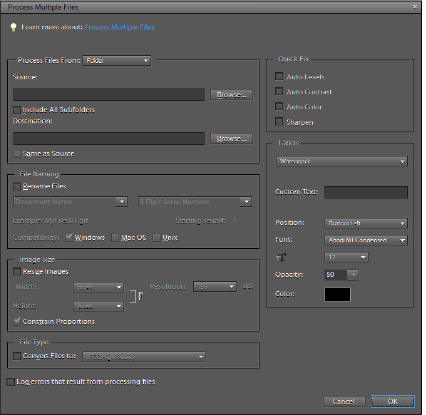
The Process Multiple Files command applies settings to the images in a folder or a group of files. It allows you to apply identical adjustments to a group of images automatically. When processing files, you have the option to leave all the files open in the Editor, close and save the changes to the original files, or save modified versions of the files to a new location, which leaves the originals unchanged.
1 From the Photoshop Elements Editor, choose File > Process Multiple Files. Choose the files you want to process from the Process Files From drop-down menu:
Folder: Processes files in a folder that you specify.
Import: Processes images from a digital camera or scanner that is currently attached to your computer.
Opened Files: Processes all open files from the Editor. If there are no files open, this option is grayed out.
2 For Destination, press Browse and select a folder location for the processed files. Note that if you choose Folder as the destination, you have to specify a file-naming convention and select file compatibility options.
3 Under Image Size, select Resize Images if you want each processed file to be resized to a uniform size.
To apply an automatic adjustment to the images, select an option from the menu in the top right corner of the dialog box.
To attach a label to the images, choose an option from the Labels menu, and then customize the text, position, font, size, opacity, and color.
4 Press OK to process and save the files.
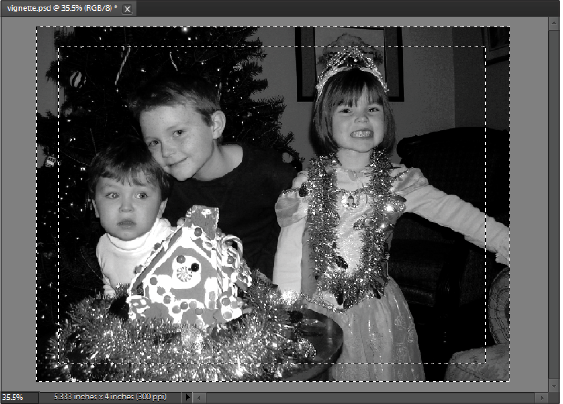
Vignetting a photo
A vignette is a decorative process where an image is intentionally faded toward the corners or edges. It can be used to focus a viewer’s attention toward the center of a photograph, or to cover unnecessary content at the edges.
1 From the Organizer, type holiday into the search text field to isolate the image you will use for this exercise. Right-click on holiday.jpg and select Edit with Photoshop Elements from the contextual menu that appears.
2 In the Editor, choose File > Save As. The Save As dialog box opens. Change the filename to vignette and for the format, choose Photoshop. Press Save. If a dialog box appears stating that Save in Version Set with Original is checked, press OK.
To add an interesting effect to this image, you will convert it to black and white, increase the contrast, and then vignette it to place emphasis on the faces of the children.
3 Choose Enhance > Adjust Color > Remove Color to convert the color image to black and white.
|
Removing color from an image. |
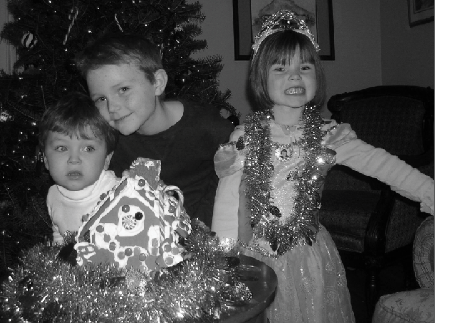
The color has been removed from the image, but the resulting image doesn’t have much contrast.
4 Choose Enhance > Adjust Lighting > Levels. In the Input Levels section of the Levels dialog box, drag the black slider to the right until the number field below it reads 10. Drag the white slider to the left until the number field reads 215. Press OK.
|
The Levels command is used to control the tonal values of an image. |
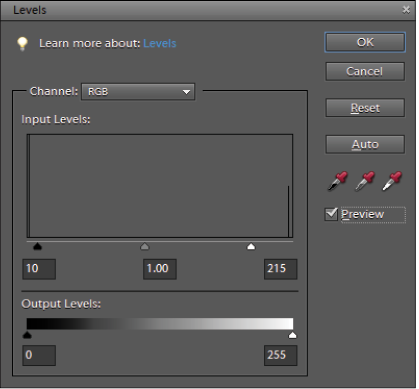
The Levels dialog box is used to control the tonal range of an image. The Input sliders are used to set the minimum tonal value that you want to be black and white. As the sliders are dragged closer toward the center, more areas of your image are changed to black and white, thus increasing the contrast in the image.
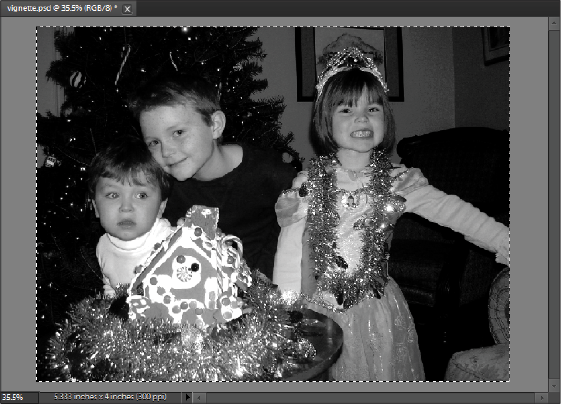
5 Press D on your keyboard to set the foreground and background colors to the default black and white. Choose Filter > Distort > Diffuse Glow. In the Diffuse Glow Options dialog box, type 0 in the Graininess text field, 3 in the Glow Amount text field, and 14 in the Clear Amount text field. Press OK.
The Diffuse Glow filter is used to add a glow to the highlight areas of an image. The glow color is set by the currently active background color of your document.
6 Choose the Rectangular Marquee tool ( ) from the Toolbox, then click and drag to draw a selection marquee around the entire image or type Ctrl+A (Windows) or Command+A (Mac OS) on your keyboard.
|
The Rectangular Marquee tool makes rectangular selections. |
7 For the vignette effect, you need to frame the image. With the Rectangular Marquee tool still selected, press and hold the Alt (Windows) or Option (Mac OS) key on the keyboard and draw a smaller selection inside the image. Holding down the Alt/Option key removes the new selection from the previous one.
|
Holding down the Alt/Option key causes your new selection to be removed from the current one, while holding down the Shift key adds to the current selection. |
8 Press the Create a New Layer button in the Layers panel. Double-click the name of the new layer and rename it Frame.
9 With the new Frame layer selected, hold down the Alt (Windows) or Option (Mac OS) key on the keyboard and press the Backspace key. This fills the selection with your current background color, which should be black. Press Ctrl+D (Windows) or Command+D (Mac OS) to deselect.
 | To fill a layer or selection with the background color, the keyboard shortcut is Ctrl+backspace (Windows) or Command+Delete (Mac OS). |
10 To create a vignette effect, you will soften the edge of the border. Make sure that the Frame layer is selected and choose Filter > Blur > Gaussian Blur. Type 40 in the Radius text field, and then press OK. Because the frame is on its own layer, the blur filter is only affecting the black border.
11 Choose File > Save or press Ctrl+S (Windows) or Command+S (Mac OS) to save the file, and then close the file.
The basics of filters
Most of the filters are accessible through the Filter menu. Certain filters are accessible all alone through their own dedicated control dialog boxes, while most automatically open the Filter Gallery. The Gallery allows you to apply a group of filters together simultaneously from a central location.
Filters permanently change the image, and aside from using the Undo command, they cannot be changed after being applied and saved.
Sharpening an image with Unsharp Mask
Some filters have very pronounced effects, while others, like the Sharpen filters, can be used for more subtle effects like correcting photos. It may sound strange that you sharpen an image with a filter called Unsharp Mask, but that is exactly what you will do in this exercise.
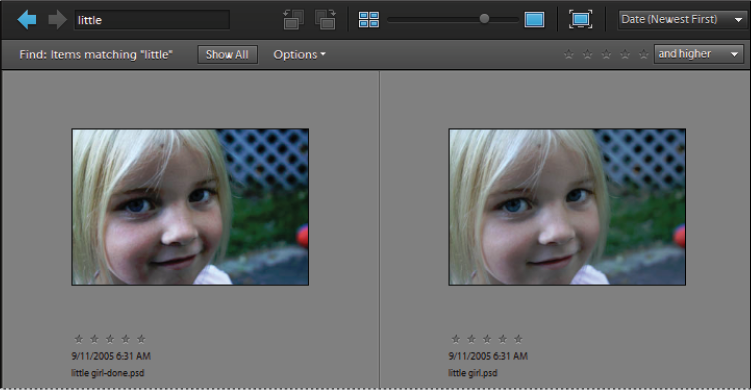
1 In the Organizer, type little in the search text field at the top of the workspace. This should reveal both the original little girl.psd file and the little girl-done.psd file created for this exercise along with any other files with little in their name. Right-click the little girl-done.psd file and choose Edit with Photoshop Elements from the contextual menu that appears.
This image has been retouched to correct the colors, but could still use a bit of sharpening to make it clearer.
|
The Photo Browser’s Search text field can be used to quickly sort through images in your catalogs. |
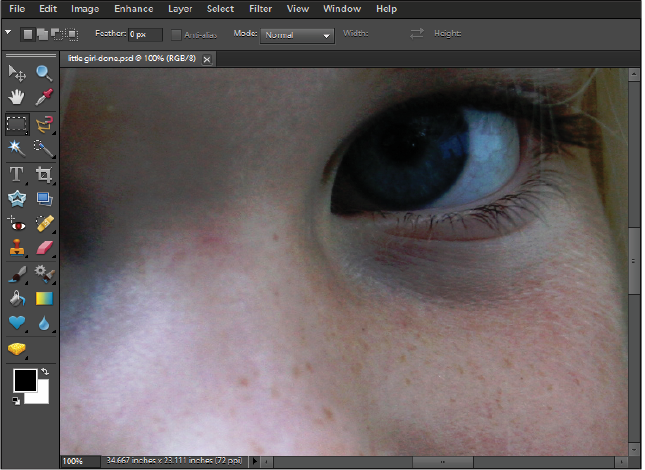
2 Choose View > Actual Pixels or press the Actual pixels button in the Options bar with the Hand tool ( ) selected. This sets the document zoom to 100 percent and is a helpful way to look at your images if you are going to apply any correction or filters to them, such as Unsharp Mask.
|
Using Actual Pixels shows an image at 100 percent zoom. |
| You can choose Window > Panel Bin to hide the Panel Bin to maximize your screen space. |
Select the Hand tool or press and hold down the spacebar on your keyboard. The cursor temporarily becomes the Hand tool. Click and drag to pan the document until you are looking at one or both of the girl’s eyes in your window.
3 Choose Enhance > Unsharp Mask. The Unsharp Mask dialog box opens.
| You can click and drag inside of the Unsharp Masks preview window to change the viewing area. |
What is Unsharp Mask?
Unsharp Mask is a traditional film compositing technique used to sharpen edges in an image. The Unsharp Mask filter corrects blurring in the image, and it compensates for the blurring that occurs during the resampling and printing process. Applying the Unsharp Mask filter is recommended whether your final destination is print or online.
The Unsharp Mask filter assesses the brightness levels of adjacent pixels and increases their relative contrast; it lightens the light pixels that are located next to darker pixels, as it darkens those darker pixels. You can set the extent and range of lightening and darkening that occurs, using the sliders in the Unsharp Mask dialog box. When sharpening an image, it’s important to understand that the effects of the Unsharp Mask filter are far more pronounced on-screen than they appear in high-resolution output, such as in a printed piece.
The Unsharp Mask dialog box displays the following options:
Amount: Determines how much the contrast of pixels is to be increased. Typically an amount of 150 precent or more is applied, but this amount depends on the subject matter of the image being sharpened. Overdoing Unsharp Mask on a person’s face can be rather harsh, and the value used in this case can be less than that used on an image of a piece of equipment, where the fine details are often very important.
Radius: Determines the number of pixels surrounding the edge pixels that are affected by the sharpening. For high-resolution, 300 ppi image, a radius of 1 and 2 is recommended. If you are creating oversized graphics for posters or billboards, for example, you might want to experiment with higher values.
Threshold: Determines how different the brightness values between two pixels must be before they are considered edge pixels and thus are sharpened by the filter. To avoid introducing unwanted noise into your image, a minimum Threshold setting of 10 is recommended.
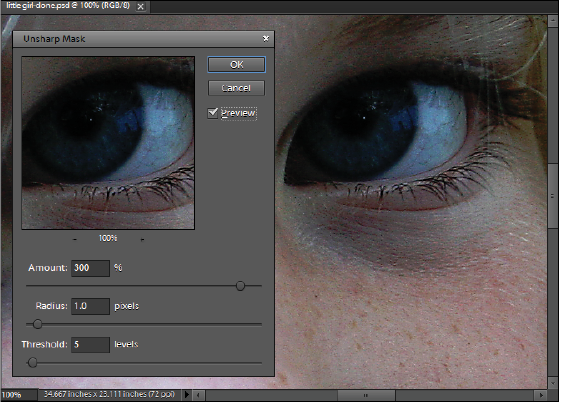
4 In the Unsharp Mask dialog box, type 300 in the Amount text field. The texture of a child’s skin is usually so soft that a higher Amount percentage can be used without bringing out unflattering detail.
5 Type 1 in the Radius text field and 5 in the Threshold text field. Press OK.
|
The Unsharp Mask filter works by increasing the contrast of the image. |
6 Choose File > Save As or press Ctrl+Shift+S (Windows) or Command+Shift+S (Mac OS) to open the Save As dialog box. Change the filename to little girl-done-unsharp.psd and press Save. Keep the file open, as you will need it in the next exercise.
Continue to the next Photoshop Elements Tutorial: Using Undo History for comparisons in Photoshop Elements >