Photoshop Elements Tutorial: The Art of Illusion: Photo Composites in Photoshop Elements
What you’ll learn in this Photoshop Elements Tutorial:
|
This tutorial provides you with a foundation for working with Adobe Photoshop Elements composites. It is the ninth lesson in the Adobe Photoshop Elements 10 Digital Classroom book. |
Photoshop Elements Tutorial: The Art of Illusion: Photo Composites in Photoshop Elements
The ability to combine multiple photos into a single image is one of the hallmarks of Photoshop Elements. With extensive layer editing, masking, and styling tools, you can easily create stunning composites from different photos and text. Effects once reserved for professional studios are now at your fingertips.
Starting up
Within the Photoshop Elements Organizer: You will work with several files from the Lessons folder in this lesson. Make sure that you have downloaded the Lessons folder onto your hard–drive. In order to access these files in the Organizer, you need to import them. See “Adding files and folders to the Organizer” located in Lesson 1.
Within the Photoshop Elements Editor: The Photoshop Elements Editor defaults to the last panel layout that you used. Before starting, make sure your tools and panels are consistent with the examples presented in these lessons by resetting the panels. Do this by choosing Window > Reset Panels or by pressing the Reset panels button ( ) in the Options bar.
Welcome screen
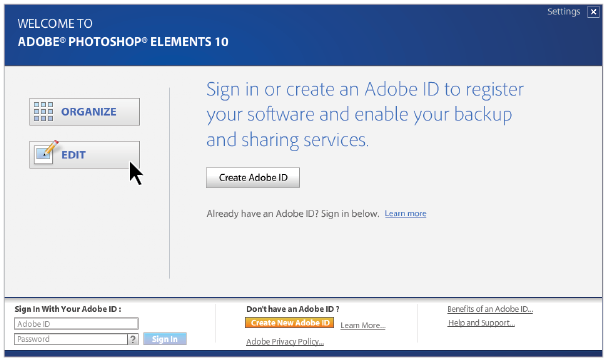
If you’re currently viewing the welcome screen, press the Edit button ( ) to enter the Editor workspace.
|
The Photoshop Elements welcome screen. |
What is a photo composite?
A photo composite is an image that contains two or more photos compiled together. In Photoshop Elements, you create composite images by using layers.
Understanding layers
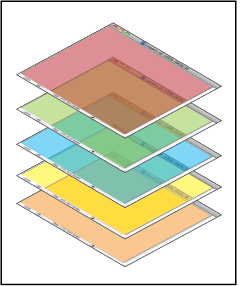
Think of layers as similar to stacked, transparent sheets of acetate that you can paint on. You can see through the transparent areas of each layer to the layers below. Each layer can be edited independently, allowing you to create the effect you want. Each layer remains independent of the others until you combine (flatten) the layers.
|
Layers can have transparent areas that let you see through to the layers below. |
Layers are managed in the Layers panel. It’s a good idea to keep this panel open and available whenever you’re working in Photoshop Elements. The Layers panel is an important source of information as you edit photos. Because multiple layers in an image increase the file size, you can reduce the file size by merging layers that you’re done editing. You can also use the Layer menu to work with layers.
Traditional layers are pixel-based (image) layers. There are various other layer types that you can use to simplify or enhance your workflow:
- Fill layers contain a color gradient, solid color, or pattern.
- Adjustment layers allow you to fine-tune color, brightness, and saturation without making permanent changes to your image (until you flatten, or collapse, the adjustment layer).
- Type layers and shape layers let you create vector-based text and shapes.
Working with layers
You’ll now create a new file and work with layers inside it.
Creating a new blank file
Although the majority of the editing work you’ll do in Photoshop Elements will use existing photos, in this exercise, you’ll start by creating a new blank file.
1 In the Elements Editor, choose File > New > Blank File. The New dialog box appears.
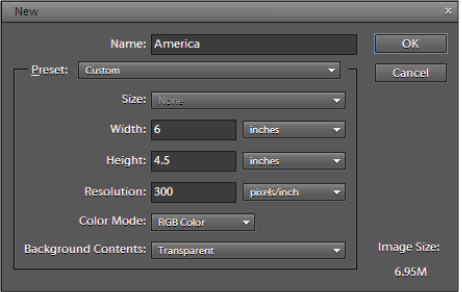
2 In the Name text field, type America as the name of your new file.
3 If it’s not already selected, choose Default Photoshop Elements Size from the Preset drop-down menu. The Preset drop-down menu gives you the ability to choose from predefined file templates for different output such as web, printing, and video content.
4 Change the value in the Height field to 4.5 inches. Note that the preset you chose in the previous step changes to Custom.
5 Leave the Resolution and Color Mode settings at their defaults, but from the Background Contents drop-down menu, choose Transparent.
6 Press OK. This file will serve as the base for your photo composite.
|
Use the New dialog box to define the properties of a new blank file. |
Creating a type layer
1 Select the Horizontal Type tool ( ), and click once on your transparent background. A blinking insertion cursor appears.
2 In the Options bar at the top of the workspace, set the following type options:
- From the Font drop-down menu, choose Arial.
- In the Size text field, type 100 pt.
- Make sure that the text color is black.
3 Click on the artboard and type the word America.
4 Press the Create warped text button ( ) in the Options bar. This opens the Warp Text dialog box.
|
Customize type in the Warp Text dialog box. |
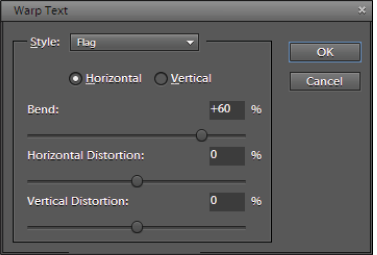
5 Choose Flag from the Style drop-down menu, and drag the slider to set the Bend value to +60.
6 Press OK to warp your text to create a flag-like appearance. If you need to reposition your type, choose the Move tool () from the Toolbox and move the type into the top center of the file.
7 Choose File > Save As and save your base file as pse09_work.psd in the Image Library folder. Leave this file open for later use.
Now you’ll prepare the other parts of your photo composite.
Combining images
1 Click the Organizer button ( ) and find the file called Marine.jpg. Select the Marine.jpg file and click on the triangle to the right of the Fix tab and choose Full Photo Edit or press Ctrl+I (Windows) or Command+I (Mac OS) to open the file in the Editor.
2 Click on the Organizer button again to return to the Organizer and locate the file Flag.jpg. This time, right-click on the image in the Organizer and choose Edit with Photoshop Elements. You should now see three images in your Photo Bin within the Editor, and you’ll work to combine these images into one.
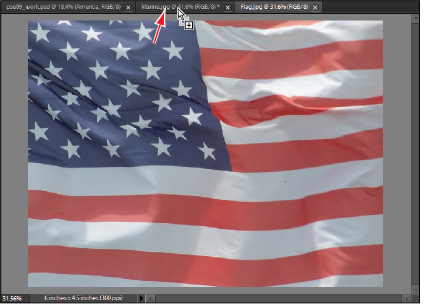
3 Select the Flag.jpg tab to make the flag image active. Select the Move tool ( ) and click directly on the flag image and drag on top of the Marine.jpg tab. Hold your cursor on the tab for a second until the Marine.jpg image is displayed, then move your mouse down on top of the Marine image and release. The flag image is placed on a layer above the Marine layer. If necessary, use the Move tool to center the image of the flag.
|
Moving the Flag.jpg image onto the Marine.jpg as a new layer. |
4 Click the x in the Flag.jpg tab to close the image.
To successfully composite these images, you’ll need to get acquainted with the Layers panel.
About the Layers panel
You access the Layers panel in the Editor by choosing Window > Layers. It lists all layers in an image, from the top layer to the Background layer at the bottom.
The layer that you are currently working on is called the active layer, and is highlighted for easy identification. As you work on an image, you should always keep track of which layer is active, in order to confirm that the edits you’re performing are affecting the correct layer. If you choose a command and nothing seems to happen, check to make sure that you have the correct layer selected.
Using the icons in the Layers panel, you can accomplish many tasks, such as creating, hiding, linking, locking, and deleting layers. With some exceptions, your changes affect only the selected (active) layer, which is highlighted.
|
Information about each layer is displayed in the Layers panel. |
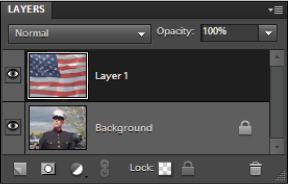
Each layer in the panel displays a thumbnail, a title, and one or more icons that provide information about the layer:
The visibility icon ( ). The layer is visible. Press the visibility icon to show or hide a layer.
The Link Layers button ( ). The layer is linked to the active layer.
The layer style icon ( ). The layer has a style applied to it. Click the icon to edit the layer style in the Style Settings dialog box.
The locked layer icon ( ). The layer is locked.
The set icon ( ). The image contains layer groups and was imported from Adobe Photoshop. Photoshop Elements doesn’t support layer groups and displays them in their collapsed state.
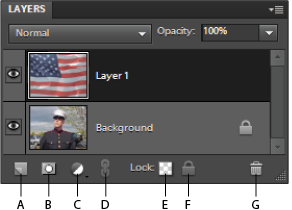
You’ll use the buttons at the bottom of the panel to perform actions.
|
A. Create a new layer. B. Add a layer mask. C. Create a new fill or adjustment layer. D. Link layers. E. Lock transparent pixels. F. Lock all layers. G. Delete a layer. |
Also at the top of the panel, you’ll find the Blending Mode drop-down menu, an Opacity text field, and a panel menu button ( ) displaying a menu of layer commands and panel options. (All these features are discussed later in this lesson.)
Continue to the next Photoshop Elements Tutorial: Editing layers in Photoshop Elements >