Photoshop Elements Tutorial: Using the Navigator in Photoshop Elements
What you’ll learn in this Photoshop Elements Tutorial:
|
This tutorial provides you with a foundation for working with the navigator in Adobe Photoshop Elements. It is the second lesson in the Adobe Photoshop Elements 10 Digital Classroom book. |
Photoshop Elements Tutorial: Using the Navigator in Photoshop Elements
The Navigator panel is a tool for monitoring an image; it also makes it easy to zoom and scroll in the image. The usefulness of the panel is that you can keep the current tool active, and, at the same time, zoom in and out of your image. Dragging the red frame to the area you want to see allows you to quickly scroll around the image, and is quicker and more efficient than trying to use the vertical and horizontal scroll bars. In this next exercise, you will work with controlling the Navigator.
1 Choose Window > Navigator to open the Navigator panel.
|
The Navigator panel. |
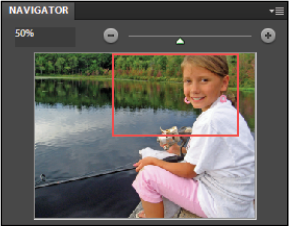
2 Click an image to select it, then use the slider in the Navigator panel to adjust the zoom level in of image. After adjusting the zoom level, review the results.
Dragging the slider to the right will make the red square smaller. When you do this and place your cursor in the middle of the square you will see a hand icon ( ) displayed. Click and drag the square around the image to reposition the zoom area. This is especially effective when retouching an image at a high zoom percentage. Instead of zooming out of the image to see where you are, in order to move to a different spot, you can utilize the Navigator’s thumbnail and red square to guide you to a different spot.
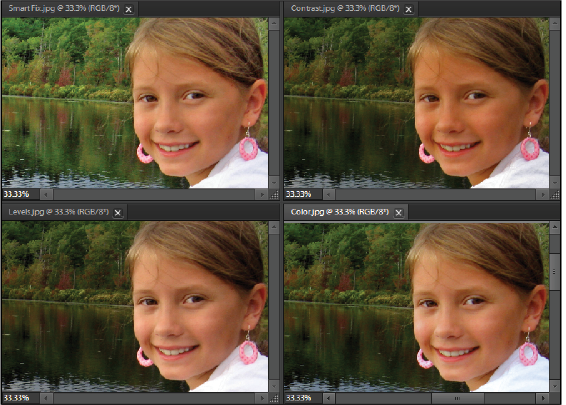
 | Another useful navigation tool is to select the Hand tool () and click an image to make it active. If you hold down the Shift key while dragging on that active photo, all four images will be repositioned consistently! |
|
All four images are tiled to the screen. |
3 Choose File > Close All. If asked if you want to save the changes, press Yes.
The Guided Edit mode
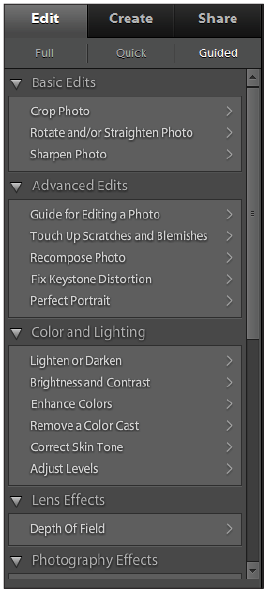
Using the Guided Edit mode is like having your own guide walk you through the steps to improve your images. It helps you accomplish common photo tasks quickly and easily, and provides you with explanations during the process. Guided Edit mode also gives you number values while using sliders, which allows you to make more precise changes. The Guided Edit section is located in the Edit tab. In this exercise, you will fix an image that is too dark (underexposed), and also fix an image that is too light (overexposed). For more on exposure, refer to Lesson 4, “Adjusting Exposure.”
|
The Guided Edit options. |
Fixing an underexposed or dark image
1 Press the Organizer button ( ) at the top of the workspace on the menu bar. The Organizer opens.
2 Locate the file named under_exposed.jpg, and select it. The image is too dark, and you’ll use Guided Edit mode to correct the image. Click the Fix tab at the top of the workspace, then click the triangle to the right of the tab and choose Guided Photo Edit from the menu that appears. The image opens in the Editor and the Guided Edit panel asks you how you would like to change this image.
|
Choose Guided Photo Edit from the drop-down menu. |

3 In the Color and Lighting section in the Guided Edit panel, choose Lighten or Darken. The Guided Edit panel changes to reflect the Lightening and Darkening options.
4 You can click the Auto button to see if Photoshop Elements can automatically fix the file for you. You’ll see that the image actually gets darker. This image needs some additional help. Undo the Auto change by pressing the Reset button located toward the bottom of the panel. Now you can use the sliders to manually lighten the photo.
There are three sliders in the Lighten and Darken section. The first slider lightens the shadows, or the dark area, of an image. The second slider darkens the highlights, or the lightest part, of an image, and the third slider affects the medium to bright parts of the image, which is everything in between light and dark.
5 Drag the Lighten Shadows slider to 20. The image now regains detail in the shadows.
6 Leave the Darken Highlights settings at their defaults, and drag the Midtone Contrast slider to the left to decrease that value to -9.
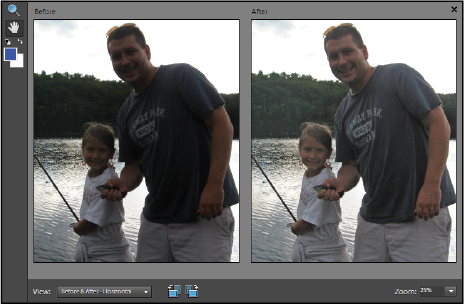
7 To compare the changes you made to the original image, press the After Only button at the bottom of the Guided Fix panel and choose Before and After - Horizontal. You can now see the before and after versions of your image.
|
Before and after the Lightening options. |
8 Press Done once you are happy with the changes.
9 Choose File > Save. In the Save As dialog box, type under_exposed_working in the Name text field and change the format to Photoshop. Press Save.
10 Choose File > Close. If you are asked to save changes, press No. You are returned to the Organizer.
You can now see how Guided Edit mode helped lighten this underexposed image.
Fixing an overexposed or light image
1 If the Organizer is not active, press the Organizer button ( ) at the top of the Editor workspace. This reveals the Organizer.
2 Locate the over_exposed.jpg file, and select it. The image is too light, and you’ll use Guided Edit mode to correct the image. Press the arrow on the right side of the Fix tab and choose Guided Photo Edit from the menu that appears.
3 In the Color and Lighting section of the Guided Edit panel, choose Lighten or Darken. The Guided Edit panel now changes to reflect the Lighten or Darken a Photo options.
4 You can click the Auto button to see if Photoshop Elements can automatically fix this file for you. Although the Auto feature effectively fixes the image, you’ll correct this image by using the sliders. Undo your Auto change by pressing the Reset button located toward the bottom of the panel. Now you can use the sliders to manually darken the dull, muted photo.
5 Drag the Lighten Shadows slider to 2. You can now see that the shadow areas are darker.
6 Drag the Darken Highlights slider to 10; this decreases the bright areas of the photo.
7 Drag the Midtone Contrast slider to the right to increase that value to 8.
You have successfully corrected an overexposed image.
|
Before and after using the Darkening options. |

8 Press Done once you are happy with the changes.
9 Choose File > Save. In the Save As dialog box, type over_exposed_working in the Name text field and change the format to Photoshop. Press Save.
10 Choose File > Close. If asked to save the changes, press No.
Using Full Edit mode
Unlike the Quick and Guided Edit modes in which you have a limited number of tools to use, in Full Edit mode you can use all the tools that Photoshop Elements has to offer. It is the most powerful photo correcting mode in Photoshop Elements. You can make selections using the selection tools, add type, and access and use the Layers panel. Instead of destructively editing a photo by changing the original image, you can also select a portion of the photo and use adjustment layers. Refer to Lesson 4, “Adjusting Exposure” for more on adjustment layers. In this exercise, you will use the Full Edit mode to remove a color cast, and also to correct skin tones.
1 If the Organizer is not currently active, press the Organizer button ( ) at the top of the Editor workspace in the menu bar. This reveals the Organizer.
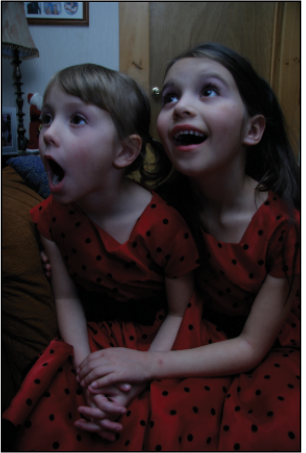
2 Locate and select the wonder.jpg file. The image is too blue, and you’ll use Full Edit mode to correct the image. Press the arrow to the right of the Fix tab and choose Full Photo Edit from the menu that appears, or use the keyboard shortcut, Ctrl+I (Windows) or Command+I (Mac OS).
|
This image has a bluish color cast. |
Removing a color cast
A color cast is an unwanted color shift in an image. In this exercise, the image has a color cast of blue due to the poor lighting conditions at the time that the photo was taken. You’ll use the Remove Color Cast command to correct this photo.
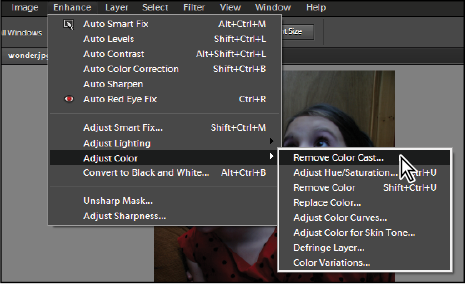
1 From the Menu bar, choose Enhance > Adjust Color > Remove Color Cast.
|
Choose Remove Color Cast from the menu. |
2 Once the Remove Color Cast dialog box appears, your cursor becomes an eyedropper ( ). You can use this eyedropper to select any white, black, or gray in the image, and this feature automatically removes the color cast. Click the gray part of the wall behind the children to automatically remove the bluish tint.
3 Press OK to apply this change.
|
The color cast is removed. |

Although the color cast has been removed, you may notice that the shadows are still a bit dark. Feel free to use the Color and Lighting Guided Edit technique that you discovered earlier in this lesson to further refine this image.
4 Choose File > Save. In the Save As dialog box, type wonder_working in the Name text field and change the format to Photoshop. Press Save.
5 Choose File > Close. If you are asked to save the changes, press No.
Correcting skin tone
This next image has a blue color cast to it. Instead of using the Remove Color Cast command, you will use the Adjust Color for Skin Tone command. Because there is a skin tone in this image, Photoshop Elements can remove the color cast for you by letting you adjust the skin color.
1 If the Organizer is not currently active, press the Organizer button ( ) at the top of the Editor workspace. This reveals the Organizer.
2 Locate and select the skin_tone.jpg file. The image is too blue, and you’ll use the Full Edit mode to correct the image. Press the arrow to the right of the Fix tab and choose Full Photo Edit from the menu that appears, or use the keyboard shortcut, Ctrl+I (Windows) or Command+I (Mac OS).
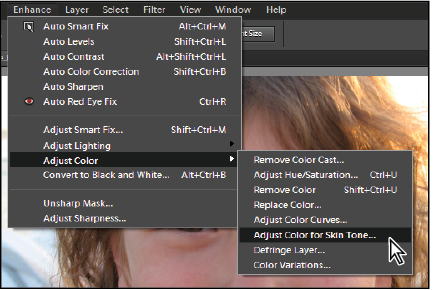
3 Choose Enhance > Adjust Color > Adjust Color for Skin Tone.
|
Choose Adjust Color for Skin Tone from the menu. |
4 Once the Adjust Color for Skin Tone dialog box opens, your cursor becomes an eyedropper ( ). You can use this eyedropper to select any skin tone in the image, and this feature automatically removes the color cast and tries to make the skin look more natural. Click the girl’s nose to automatically remove the blue tint. Click other areas of the photo to experiment with this tool. You also have a slider for the skin color; you can choose to make it more tan, and also change the blush, which adds or takes away red from the image. There is also a Temperature slider. Drag the Temperature slider up (to the right) to make this image warmer.
|
The color cast is removed using Adjust Color for Skin Tone. |
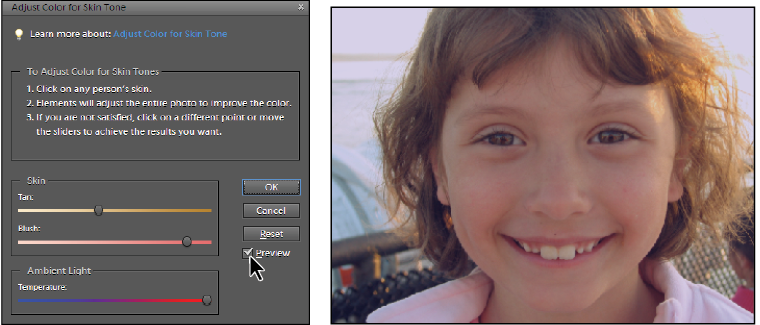
| To compare what the image used to look like versus what it currently looks like, click the Preview checkbox on and off. |
5 Press OK once you are happy with the changes.
6 Choose File > Save. In the Save As dialog box, type skin_tone_working in the Name text field and change the format to Photoshop. Press Save.
7 Choose File > Close. If asked to save the changes, press No.
Photomerge Exposure
When taking pictures, it’s often difficult to get the desired exposure on camera. You see, the human eye can see a much wider range of tones than a camera can capture. This often leads to images that are either too dark or too light because the camera can’t capture the range from darks to lights in the same picture. Photoshop Elements contains a feature called Photomerge Exposure. This feature can actually combine two or more images with varying exposures into one image that contains the best tonal ranges from the combination of exposures. To get the best results with this feature, you must do a little pre-planning by taking photos at different exposure values (a minimum of two photos is required). In addition, although you can get decent results holding the camera by hand, you’ll get the best results when you use a tripod.
1 If the Organizer is not currently active, press the Organizer button ( ) at the top of the Editor workspace in the Menu bar. This reveals the Organizer.
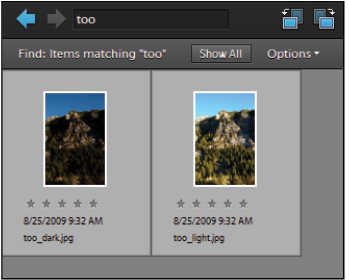
2 Type too in the Search text field at the top of the Organizer to filter the images displayed to those that contain too in the filename. Two images are displayed.
3 Click the first image to select it, then hold down the Shift key on your keyboard and click the second image to select it as well.
|
Both images are selected in the Organizer. |
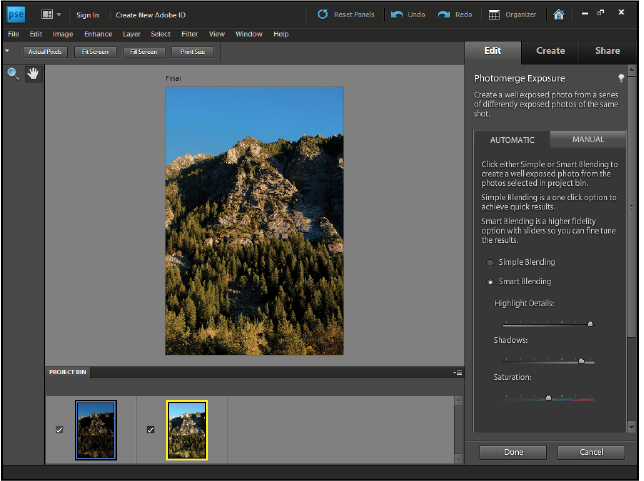
4 With both images selected in the Organizer, choose File > New > Photomerge Exposure.
The Editor opens and processes both images using Guided Photo Edit, displaying the merged image with the Automatic Photomerge panel active in the Panel bin. Automatic Photomerge has two options: Simple Blending and Smart Blending. Simple Blending is a quick one step process that merges the photos where the Smart Blending provides a more advanced blending giving you adjustment options.
5 Make sure that the Smart Blending radio button is selected and drag the Highlight Details slider to about 90 and the Shadows to about 70. Feel free to experiment with the sliders to see the different effects that can be achieved. Press the Done button at the bottom of the Photomerge panel when you are finished.
| Photomerge Exposure also has a manual mode when the automatic mode doesn’t process the exposures of multiple images properly. Manual mode allows you to define areas of each image that should be used for the final exposure. Try Manual mode when the Automatic mode doesn’t fit the bill. |
|
The two images are processed into the final image. |
6 When the final output image is finished processing, you’ll have your merged image. Choose File > Save. In the Save As dialog box, type too_perfect in the file name field and choose Photoshop from the drop-down menu. Press the Save button.
7 Choose File > Close All in the Elements Editor, you are automatically returned to the Organizer. Notice that all three images have been put into a Version Set.
8 Expand the Version Set by clicking on the arrow at the right side of the thumbnail and you’ll see the merged image, the too_light and the too_dark images.
Continue to the next Photoshop Elements Tutorial: The Toolbox in Photoshop Elements >