Premiere Pro tutorial: Understanding media management in Premiere Pro
What you’ll learn in this Premiere Pro Tutorial:
|
This tutorial provides you with a foundation for working with Adobe Premiere Pro media. It is the second lesson in the Adobe Premiere Pro CS5 Digital Classroom book. For more Adobe Premiere Pro training options, visit AGI’s Premiere Pro Classes. |
Adobe Premiere Pro Tutorial: Understanding media management in Premiere Pro
Media Management is the organization or management of the media you work with in a project. There are two equally important aspects to Media Management. The first is how you manage the media on your hard drives, and the second is how you organize the different media references that you import into Premiere Pro.
To ensure portability, performance, and security, we highly recommend that you store media on an external hard disk drive. The two standard connection types for external hard drives are FireWire (400 and 800) and USB 2.0. Most video editors recommend a FireWire drive because of its higher sustained bus speed, but any type of drive works for your projects.
The files that you will work with to complete the lessons in this book are organized into a single folder called Media Library. Within that folder, there are additional folders for each individual project. In each respective project folder, there are folders that separate the different types of media (video, audio, and still images) you will use. This type of hierarchical structure is also used to keep the project panel organized and makes it easier to locate the media you want to add to the Timeline panel.
Before you can edit any piece of footage, you must first add it to your Premiere Pro project. You can import a wide variety of media, including video, audio, still images, After Effects Projects, and other Premiere Pro projects.
In this section, you will import a variety of media files into your project that you can later organize and add to your Timeline.
1 With the pr0201-working file still open, confirm that you are using the Digital Classroom-Editing workspace that you created earlier in this lesson. If you have made any changes to the workspace, you can reset it now.
2 Choose File > Import to open the Import dialog box, then navigate to the Media Library folder located in the prlessons folder that you copied to your hard drive.
Select the Travelogue-Boston folder, and then click the Video subfolder to select it and reveal the video files you will import for this lesson.
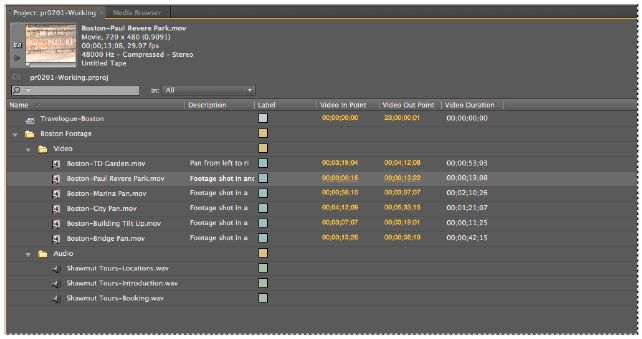
3 Inside the Video folder, there are six video files shot in the city of Boston: Boston-Bridge Pan.mov, Boston-Building Tilt Up.mov, Boston-City Pan.mov, Boston-Marina Pan.mov, Boston-Paul Revere Park.mov, and Boston-TD Garden.
Click the first video file in the dialog box, hold the Shift key on your keyboard, and then click the last file to select every file between them.
Click the Open button to import all the selected files into your project panel.
|
All imported files are automatically |

 | Holding the Shift key while selecting files only selects files in a sequential list. To select files non-sequentially, hold the Control (Windows) or Command (MacOS) key and click individual files. |
4 In addition to importing individual or groups of files, you can import entire folders and their content.
Choose File > Import, and in the Import dialog box, click the Audio folder inside the Travelogue-Boston folder.
With the Audio folder selected, click the Import Folder button.
|
Importing entire folders is a quick way |

When you import a folder into Premiere Pro, the application creates a bin in the Project panel with the same name as the imported folder. The content of the folder on your hard drives, as well as the content of any sub-folders, is placed inside this bin.
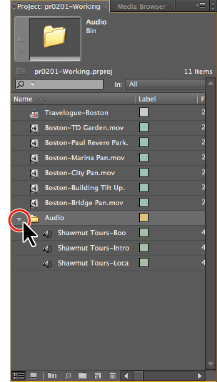
5 Click the reveal triangle to the left of the Audio bins name to show the clips that you imported.
|
Each bin’s reveal triangle can show |
6 Choose File > Save or press Control + S (Windows) or Command + S (MacOS) to save the project file.
In the next part of the lesson, you will create a new bin to hold the video files you just imported and keep the project panel organized.
Creating and organizing bins
The term bins comes from the days of editing film when the developed film clips were stored in bins for easy organization. In the Premiere Pro project panel, bins serve as file folders to hold and organize your media assets. Bins can hold any combination of media: video, audio, still images, and other bins. The organizational scheme you use for this exercise will create a separate bin for each different type of media used in the project.
The media management strategy that you adopt depends on the specifics of the project and the quantity of footage. For larger projects, you might break the footage into bins based on the content of the video, location, or for dramatic works, the footage needed for a scene (scene-based organizational system).
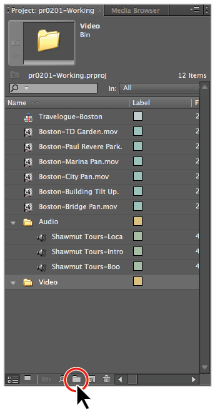
1 If the Audio bin is still selected, click on any empty area of the Project panel to deselect it. Then create a new bin by clicking the New Bin button located at the bottom of the Project panel. Rename this bin Video.
When you create a new bin, it will automatically be placed inside of the bin that you currently have selected. This is why it is important to remember to deselect the Audio bin in this step.
| When you create a new bin, the default name is highlighted immediately so you can change it. If you click another item in the Project panel or click another pane, the name becomes deselected. To make the name editable again, right-click the bin name and choose Rename from the menu that appears. Additionally, clicking the name of any item in the Project panel makes the name editable. |
|
The term bin is a legacy from the days |
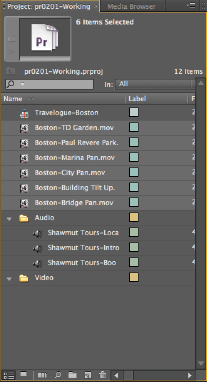
2 Click the first video clip in the Project panel, hold the Shift key on your keyboard, and click the last video clip to select every clip between them.
|
Holding the Shift key allows you to |
3 Click any selected file and drag it to the Video bin. When the bin’s folder icon becomes highlighted, release the mouse to move all the selected files into the bin.
|
Moving and arranging media items in the Project panel is similar to moving |

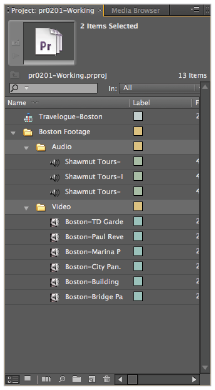
4 Click any empty area of the Project panel to deselect the Video bin, and then click the New Bin button again to create a third bin. Rename this bin Boston Footage.
5 Click the Audio bin, hold the Shift key on your keyboard, and then click the Video bin to select both.
6 Drag either of the selected bins into the Boston Footage bin. This places both of the selected bins inside of the bin named Boston Footage.
|
Storing bins inside one another is |
7 Choose File > Save or press control + S (Windows) or command + S (MacOS) to save the project file.
Now that you have organized the Project panel, in the next part of the lesson you will modify the panels display so that it is easier to view the most relevant information about your media items.
Modifying the Project panel display
The Project panel displays information about each item it contains in a series of columns to the right of each item’s name. This information display can be customized so that you can control which properties display and in what order. This allows you to only view the attributes that are most relevant to the type of work you are currently doing at any given time in Premiere Pro.
Adding/removing columns
The default column display can be changed to add hidden panels or remove panels that you may consider extraneous.
1 Since the Project panel is very small when compared with the overall Premiere Pro interface, seeing all the columns at the same time is impossible. The first thing you will do is expand the panel to full-screen size.
Click on any area of the Project panel to select it. You will know it is selected when it has an orange border around it.
With the Project panel selected press the tilde (~) key on your keyboard.
|
The tilde (~) key acts as a minimize/maximize toggle for whichever panel is currently active. |

2 The expanded Project panel makes it much easier to see the clip properties.
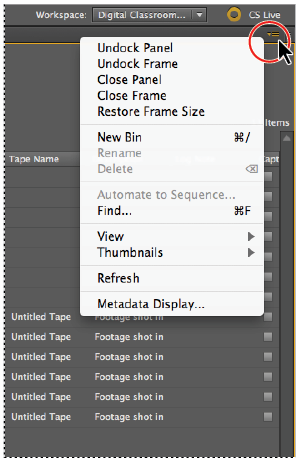
Click on the menu button located at the upper-right corner of the Project panel and from the menu that appears, choose Metadata Display.
|
Even though the clip properties are only used inside |
3 In the Metadata Display panel click on the reveal triangle to the left of Premiere Pro Project Metadata to reveal its properties.
Click and drag the lower right corner of the dialog box to enlarge it so that you can see all the revealed attributes. Each one attribute corresponds to one of the visible columns in the Project panel.
|
Some clip properties that are turned off by default in the Project |
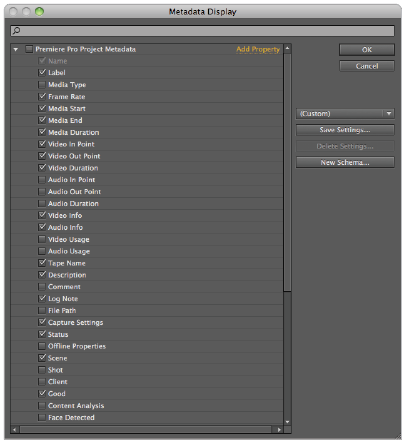
4 In the dialog box, disable the following attributes by clicking to clear the check mark to the left of the attributes.
Frame Rate | Media Start | Media End | Media Duration | Video Info |
Audio Info | Tape Name | Log Note | Capture Settings | Status |
Scene | Good |
You do not need these attributes for the work you will do in this project. The Media (displayed in Timecode) and Tape Name properties refer to the tape that these clips were captured from. The Frame Rate, Video, and Audio Info and Capture settings are the same for all the clips you will work with in this project. You will not use the other properties because they are intended for a different type of project workflow.
Understanding time code

Time code is used in video editing and motion graphics programs to keep track of your position along a Timeline, tape, or any time-based medium. You can identify time code as a series of four numbers separated by colons or semicolons. As seen in the example above and reading from left to right, the numbers represent: Hours ; Minutes ; Seconds ; Frames.
You can count hours, minutes, and seconds in much the same way as you would with a standard clock, but the counting begins at zero instead of one. The one variable with time code is the number of frames that make up a second, which is based on the frame rate of the media you are dealing with. Depending on the Composition settings, you could be using the American television standard of 30 FPS (frames per second), the European standard of 25 FPS, or the film standard of 24 FPS. In essence, time code provides a discrete address to each frame of video.
5 Click the OK button. The Project panel was reduced to a few columns.
|
The visible columns in the Project panel can be adjusted at any time depending on the needs of your project. |
6 Choose File > Save or press Control + S (Windows) or Command + S (MacOS) to save the project file.
In the next section, you will edit the clip descriptions and change the order that the columns display in.
Continue to the next Premiere Pro Tutorial: Adding a clip description in Premiere Pro >