Protecting Excel Workbooks and Worksheets with Passwords
How to Secure Excel files with Passwords and Security
You can protect Excel files with passwords and use other options to secure Excel worksheets and workbooks. Excel files are not secure by default. When you create a new Excel workbook based on a template, other users can freely edit the file if you share it. You can customize the template to suit your personal needs by changing formats, adjusting categories, and entering your own data. When you create templates to be shared with other users, you can use a variety of protection methods to prevent the template from experiencing unintentional damage, including applying passwords and other secruity options. Security can be applied to Excel files at the workbook, sheet, or cell level, including the use of password security.
By protecting Excel workbooks, you can prevent other users from accidentally deleting important formulas or worksheets. Protecting a workbook is especially useful when working with templates, because this can help prevent accidental deletions or misuse.
You can protect Excel workbooks at the file level or at the worksheet level. There are three levels of password protection in Excel: password protection to open a file, password protection to change data, or password protection for changing the file’s structure, such as adding, deleting, or hiding worksheets.
There are three other levels of protection in Excel: workbook, worksheet, and specific cells. When you enable workbook protection, Excel greys out the menu items that are not available in protected mode. You can also assign a password that users would be required to enter in order to disable worksheet protection.
Excel Workbook protection levels | |
Protection | Description |
Workbook | Prevents users from altering the structure of the workbook, including adding or deleting sheets and displaying hidden worksheets. You can also prevent users from changing the size or position of worksheet windows. |
Sheet | Prevents users from making changes to a worksheet. You can specify the elements that users are allowed to change. |
Cells | Cells are locked by default in a protected worksheet. Users cannot edit, insert, delete or formats cells. You can unlock cells that users are able to edit. |
Applying a password to secure an Excel workbook
To apply a password to an Excel workbook follow these steps:
- Open the Excel file you wish to secure.
- Choose Protect Workbook from the Review tab.
- Select Structure in the Protect Structure and Windows dialog box.
- Enter a password to secure the workbook.
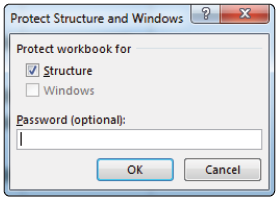
Prevent users from making changes to the structure
of a workbook by turning on workbook protection. - Click OK. When a workbook is protected, the Protect Workbook tool in the Ribbon remains selected.
- Close the file. You can choose not to save it.
About adding password protection to Excel Workbooks
When you protect a workbook at the Workbook level so that the workbook’s structure can’t be modified, you can add an additional layer of protection by assigning a password. When you do, users are unable to turn off workbook protection unless they have the password.
 | When applying a password to an Excel document make sure you note the password in a secure password, since you will be unable to retrieve a forgotten password. |
Adding a password to your workbooks prevents users from turning off workbook protection. You can use these steps to apply a password to an Excel file:
- Open any Excel file.
- From the Review tab, choose Protect Workbook.
- Select Structure in the Protect Structure and Windows dialog box.
- In the Password text box, type sesame, and then click OK.
- In the Confirm Password dialog box, retype sesame, and then click OK to assign the password.
Disabling Excel Passwords
You can disable Excel passwords and remove workbook protection by following these steps:
- With an Excel file choose Protect Workbook from the Review tab.
- In the Password text field of the Unprotect Workbook dialog box, type sesame, and then click OK.
- Enter the password to disable workbook protection.
Protecting an Excel file
To protect an Excel file, follow these steps:
- Open an Excel file then click File > Save As.
- From the Save As section, choose Computer, and click Browse.
- In the Save As dialog box, click the Tools drop-down list, and click General Options.
Protecting Excel worksheets
Within a workbook, you can protect a worksheet so that users cannot make any changes to the sheet. When you assign sheet protection, every cell in the sheet is locked unless you unlock specific cells. You can also provide users with a certain level of rights so they can work with data in the sheet. For instance, you can specify that users can insert columns, but are not allowed to delete them.
- Using an Excel file choose Protect Sheet from the Review tab.
- Make sure that Protect worksheet and contents of locked cells is selected.
- In the Allow all users of this worksheet to area, select Format Cells and Sort, and then click OK.
You can then indicate the specific tasks that users are allowed to and are not allowed to perform with worksheet protection.