InDesign tutorial: InDesign CC Essential Skills
What you’ll learn in this InDesign Tutorial:
|
This tutorial provides you with a foundation for working with the Adobe InDesign workspace. It is the first lesson in the Adobe InDesign CC Digital Classroom book. For more Adobe InDesign training options, visit AGI’s InDesign Classes. |
Adobe InDesign Tutorial: InDesign CC Essential Skills
This lesson gets you started with InDesign CC, covering essential skills necessary for working efficiently with InDesign documents. It provides a high-level overview of key concepts associated with creating layouts using InDesign. You’ll work with an existing document to understand how to navigate, place graphics, and add formatting to text, creating a finished newsletter that can be printed or distributed as a digital document.
Starting up
Before you begin, make sure that your tools and panels are consistent by resetting your preferences. (For more information, see “Resetting the InDesign workspace and preferences” in the Starting up section of this book.)
In this lesson, you will work with several files from the id01lessons folder. Make sure that you have copied the idlessons folder onto your hard drive from www.digitalclassroombooks.com/epub/idcc. For more information, see “Loading lesson files” in the Starting up section of this book. If you are completely new to InDesign and don’t have much computer experience, it might be easier to follow the lesson if the id01lessons folder is placed on the desktop of your computer. This lesson provides an overview of InDesign concepts. After completing this lesson, you’ll examine individual capabilities and features in more details in each of the remaining lessons. It might be helpful to view this lesson as a broad survey, providing you with a general understanding of the InDesign landscape, while the remaining lessons provide much more detail about specific InDesign capabilities.
InDesign tools
You’ll use InDesign’s tools for creating or modifying everything that appears in your documents, including text, images, and multimedia elements for digital documents. You’ll also use InDesign’s tools for navigating around the document. All tools are found in the Tools panel, located along the left side of your screen.
Many tools displayed in the tools panel have related tools that provide additional functionality, and you can select these related tools by clicking and holding the tool that is displayed in the tools panel. You can identify the tools with additional functionality by the small arrow in the lower-right corner. You can also right-click (Windows) or Ctrl+click (Mac OS) any tool to access related tools.
If you place your cursor over any tool in the Tools panel without clicking, a tooltip appears displaying the tool’s name and a keyboard shortcut in parentheses. You can use the keyboard shortcut to access a tool from your keyboard, instead of clicking it with your mouse.
|
Use the InDesign CC Tools panel to create objects, make selections, and modify objects and pages. |

The InDesign workspace
InDesign documents are displayed in the center of the work area, while panels that let you control objects or perform specific tasks are displayed along the right side of the workspace in the panel docking area. InDesign uses many panels, and many are critical for editing and design work you perform. InDesign includes various workspaces that provide easy access to the panels and tools you’ll use for specific tasks. Let’s take a closer look at the InDesign workspace, including the document window and panels.
The document window
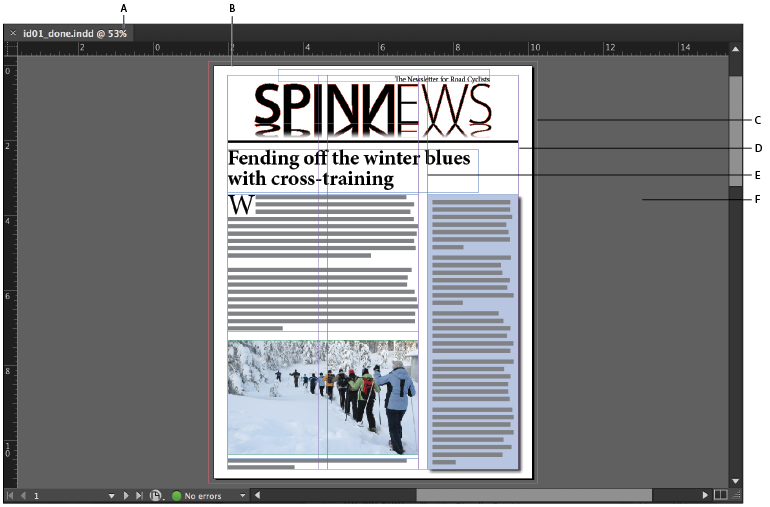
InDesign pages are displayed within a black border. Anything positioned within this area appears in the final product. The area outside of the black border is referred to as the pasteboard. Anything that is placed completely outside this black border on the pasteboard is generally not visible when the final document is distributed.
You can use the pasteboard to temporarily hold elements while designing your project. You can move design elements such as images from the pasteboard to the page, trying different layout variations. The pasteboard can also be useful for placing notes to colleagues (or to yourself) regarding the project. To get a better understanding of the InDesign workspace, you’ll open up the completed project, reset the workspace, and look at the work area.
1 Choose File > Open. In the Open a File dialog box, navigate to the id01lessons folder and select the id01_done.indd file. Click Open.
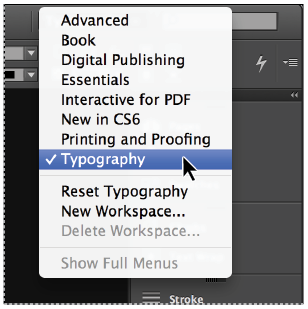
2 Choose Window > Workspace > Typography. Panels containing controls that help you work with type are now displayed.
 | You can also use the dedicated Workspace switcher to switch to a specific workspace. The Workspace switcher is located in the Application bar above the Control panel. The Workspace switcher displays the name of the current workspace and can also be used to change between workspaces or to reset the current workspace. The selected workspace determines the panels to display and the menu items that are available. The number of available panels and menu choices is based upon the selected workspace. The workspace switcher makes it easy to display |
3 Choose Window > Workspace > Reset Typography to reset the InDesign panels to their default positions for the Typography workspace. This ensures that your panels are in position, making them easier to locate during this lesson.
|
A. The document window. B. The page border (black lines). C. Bleed guides. D. Margin guides. |
Using guides
Non-printing guides help you align content on your page and create an organized layout. There are several types of guides, but the essential guides for starting to work with InDesign are margin guides and ruler guides. Margin guides define the space around the edge of your document—a space you generally want to keep free from objects. White space around the edge of your document creates good design, and also eliminates the risk of content being cut off if your document is printed and trimmed to a specific size at a printing plant. Margin guides are displayed in magenta by default, immediately inside the page border. By default, they display one-half inch inside of the page edge, but you can adjust them, as you will learn in Lesson 2, “Working Smarter with Master Pages.”
Ruler guides are the other type of guide you should add to your document layout. Ruler guides are created manually by dragging them from the rulers onto the page. Both ruler guides and margin guides are useful, but they can also be distracting when you want to see the elements of your page design. In such a case, you can hide the guides.
1 Choose View > Grids & Guides > Hide Guides, or use the keyboard shortcut Ctrl+; (Windows) or Command+; (Mac OS), to hide all the guides in the open document.
3 You can show or hide guides by toggling back and forth using these commands.
Another type of guide is the liquid guide, which is used to help adjust the layout of an InDesign page when it is displayed as a digital document. Liquid Guides is a more advanced topic and is covered in Lesson 11, “Getting Started with Digital Documents.”
Viewing modes
You can use viewing modes to hide guides and other items that will not display when the final document is printed or distributed. This provides a fast-and-easy way to preview your document. You can even turn your document into a presentation.
The viewing modes option lets you choose whether all content and guides display on your monitor, or whether InDesign displays only content that is positioned on the page and will print. Here you will explore the various viewing modes.
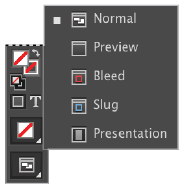
1 At the bottom of the Tools panel, click and hold the Mode button ( ) and choose Preview from the available modes. Notice that the entire pasteboard appears gray and all elements located on the pasteboard are hidden. The borders do not display around any items on the page if they are not selected.
|
Click the display mode button |
2 Click and hold the Mode button again and choose Bleed from the menu. This shows the allowable bleed area that was specified when the document was created. Bleed is an area outside of the page that is intentionally used by designers so that any inaccuracies in the cutting, trimming, and binding process do not create a visible white space along the edge of an object that is intended to print all the way to the edge of a document. This mode is useful when you need to make sure that all the elements on your page extend to a specific bleed value. In this document, the bleed is set to ⅛ inch, which is a standard bleed value in the printing industry.
3 Click and hold the Mode button again and choose Presentation from the menu. This mode presents your document on a black background with no distracting interface elements. This is great for viewing your document or showing it to a client. When in this mode, you can navigate through the pages of your document by using the up and down or left and right-arrow keys on your keyboard as well as the spacebar. To exit Presentation mode, press the Escape key on your keyboard.
4 Click and hold the Mode button again and choose Normal.
| You can also use the shortcut key W on your keyboard to switch between Preview and Normal modes, and Shift+W to activate Presentation mode, or you can use the Screen Mode button in the Application bar. Keep in mind that keyboard shortcuts do not work if you are using the Type tool and working with text inside a text frame. |
Working with panels
Another important part of the InDesign workspace are the panels used to modify and create objects. You can access panels by clicking their name in the panel docking area, or choose the panel you want to access from the Window menu.
The Tools panel
The Tools panel is located on the left side of your screen and contains all the tools necessary to draw, add, or edit type, and edit items in your document. The Tools panel appears as a single column attached to the left side of your screen. You can modify the appearance and location of the Tools panel to accommodate your needs.
1 Click the double-arrow icon ( ) at the top of the Tools panel. The Tools panel changes from a single column to a double column. If the Tools panel is not docked, you have a third option when you click the double-arrow; it changes to a horizontal layout, then to a single column, and then a double column each time you click. Go to step 2 to learn how to dock and undock panels in InDesign.
|
Clicking the double-arrow icon at the top of the Tools panel changes its appearance between a one-column, two-column, or horizontal layout. |

2 Click the dark gray bar at the top of the Tools panel, and while pressing and holding the mouse button, drag the panel to the right, into the document area. Release the mouse button when over the document area. The Tools panel is repositioned as a free-floating panel at the location where you released the mouse button. You can position the panel anywhere on your display, or return it to the docking area on the side of the workspace.
3 Click the dark gray bar at the top of the Tools panel and drag the panel to the right so that it is positioned just to the left of the panels. A blue, vertical bar appears. Release the mouse button; the Tools panel is docked to the right of your screen. If you have trouble moving the panel by clicking the dark gray bar, click the dotted area just below the dark gray bar at the top of the Tools panel to reposition and dock the panel.
|
The tools panel can be docked along either the left or the right |
Managing panels
InDesign’s panels are essential for your design work. They help you create new objects, edit existing objects, and work more efficiently as you design your documents. The various workspaces include different panels that are docked at the right side of the document window. The available panels change based upon the selected workspace. You can add panels to the workspace as you need them, or remove panels. When the panels display only their name or icon, they are in collapsed mode. Collapsed mode saves screen space by providing you with easy access to many panels, and only displaying the full panel when you need to access all the controls. Here you will work with the various display modes available for panels.
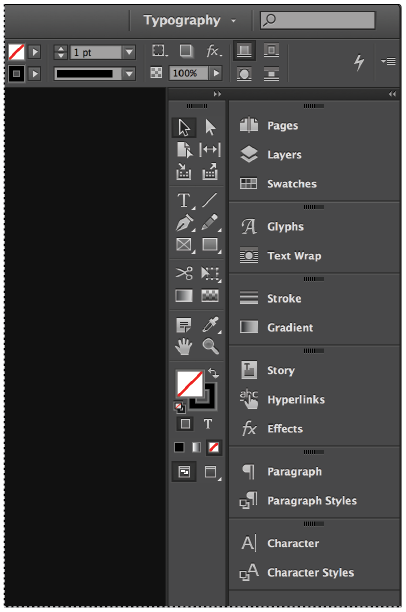
1 Click the double-arrow icon ( ) at the top-right corner of the docked panels that are in collapsed mode along the right side of the document window. Notice how all the docked panels expand to reveal their options.
2 Click the double-arrow icon again to collapse the dock and return the panels to their previous state.
3 Click the Pages button in the dock. This reveals the entire contents of the Pages panel. When you click a panel button, only the individual panel expands.
4 Click the Pages button again; the panel closes and is displayed only as a button.
5 Place your cursor along the left edge of the panel docking area, between the docked panels and the toolbar panel. When the cursor changes to a double-arrow ( ), drag the panels to the right until the panels display only as icons. Click and drag back to the left so the panels display as icons along with their name.
|
Click and drag the panel docking area to |

6 Click and drag the Pages button, moving it to the far-left side of the document window. When a vertical bar appears, release the mouse button. The Pages panel is docked to the left side of the document window.
You can place panels anywhere on your workspace, including over the document or on either side of the work area, and customize panels in any way that makes it easier for you to work. Keep the panel in this location, since you will work with customizing workspaces in the next exercise.
Saving your workspace
Once you have selected the panels that you need, and positioned them in the locations that let you work most efficiently, you can save the location of the panels as a workspace.
Once you have saved a workspace, you can quickly access the exact panels displayed and their location by returning to the default setup of that workspace.
1 From the Workspace drop-down menu, located in the Application bar to the left of the Help search text field, choose New Workspace.
|
Choose New Workspace from the Workspace switcher |

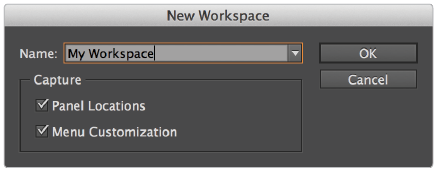
2 In the New Workspace window, type My Workspace in the Name text field and then click OK, leaving all the settings at their defaults.
|
Saving your workspace allows you to easily restore the panel positions. |
You’ve now saved the locations of your panels.
3 From the Workspace switcher drop-down menu, choose Typography. Then click the Workspace switcher drop-down menu again and choose Reset Typography. Note how the panels revert to their default locations.
4 From the Workspace switcher drop-down menu, choose My Workspace. Alternatively, choose Window > Workspace > My Workspace. All the panels are restored to their location that was part of the workspace you saved earlier in this project.
You can create and save multiple workspaces. Workspaces are not document-specific; you can use them in any document. Before proceeding to the next section, reset your workspace to the default Typography workspace using the Workspace switcher drop-down menu. This allows the panels to match the descriptions used in the remainder of this lesson. If necessary, you can also choose Reset Typography from the Workspace switcher drop-down menu to reset the workspace to its default appearance.
Continue to the next InDesign Tutorial: Working with the Control panel in InDesign >