How to use Photoshop Filters
What you’ll learn in this Photoshop Tutorial:
|
This tutorial provides you with a foundation for working with Adobe Photoshop filters. It is the eleventh lesson in the Adobe Photoshop Digital Classroom book. For more Adobe Photoshop training options, visit AGI’s Photoshop Classes. |
Photoshop Tutorial: Using Adobe Photoshop Filters
Filters allow you to apply artistic effects to your images. You can make images look as though they were sketched with chalk, drawn with a graphic pen, or even add perspective to them. In this lesson, you will learn how to use filters to apply interesting effects to your images.
Starting up
Before starting, make sure that your tools and panels are consistent by resetting your preferences. See “Resetting Adobe Photoshop CS6 preferences” in the Starting up section of this book.
You will work with several files from the ps11lessons folder in this lesson. Make sure that you have loaded the pslessons folder onto your hard drive from the supplied DVD. See “Loading lesson files” in the Starting up section of this book.
Filter basics
Filters are accessed using the Filter menu. When you select certain filters, the Filter Gallery opens. Other filters, when selected, open their own dedicated dialog box. Some, like the Clouds filter, don’t even have a dialog box.
Filters are always applied to the layer you currently have selected and cannot be applied to Bitmap mode or indexed color images. Note that some filters, such as Brush Strokes and Sketch, work only in the RGB mode and are not available when working in the CMYK mode.
Starting to use filters
Before starting, you may want to view the file that you are going to create.
1 Choose File > Browse in Bridge. Navigate to the ps11lessons folder and open the file ps1101_done.psd.
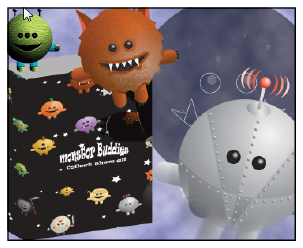
A file including several monsters and a package design appears.
|
The completed lesson file. |
2 You can keep this file open for reference, or choose File > Close to close it.
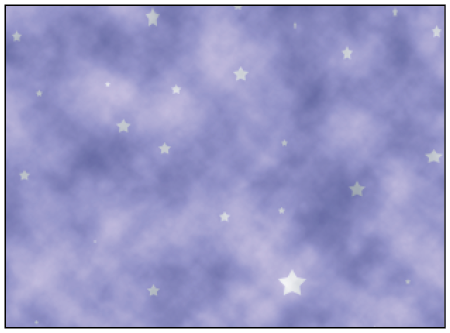
Using the Clouds filter
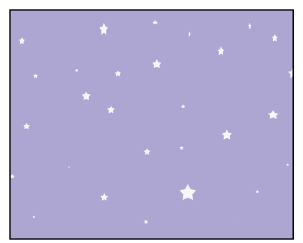
In this lesson, you will use the Clouds filter to build a smoke-like background. The Clouds filter generates a cloud pattern, using random values from the selected foreground and background colors.
1 Choose File > Browse in Bridge, and navigate to the ps11lessons folder and open the file ps1101.psd.
2 Choose File > Save As. In the Save As dialog box, navigate to the ps11lessons folder and type ps1101_work in the File name text field. Choose Photoshop from the format drop-down menu and click Save.
3 If the Layers panel is not visible, select Window > Layers. Click on the layer named sky background to activate this layer.
4 Many filters in Photoshop render differently, depending on your current foreground and background colors. Press D on your keyboard to return to the default colors of black and white.
|
Select the sky background layer. |
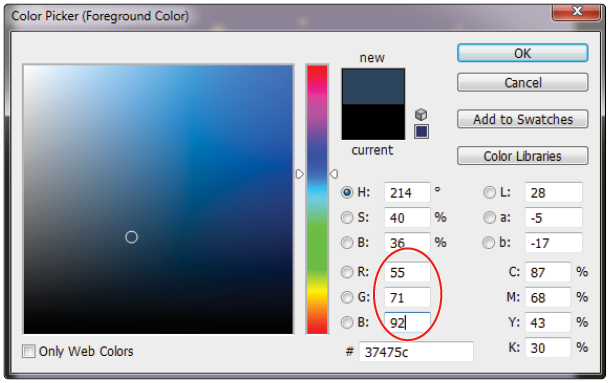
5 At the bottom of the Tools panel, click the foreground color, black. The Color Picker opens.
6 In the RGB text fields, type the values, R: 55, G: 71, B: 92. Then press OK. Your foreground color has been changed. You are now ready to apply the Clouds filter.
|
Enter custom values in the Color Picker. |
7 Choose Filter > Render > Clouds.
A cloud pattern is generated, using random values of the foreground and background colors. Do not save your file, continue to the next part of this lesson.
| To achieve a more high-contrast effect, press the Shift keys (Windows) or the Option key (Mac OS) while selecting the Clouds filter. |
Fading your filter
Now that you have made some clouds, you’ll fade the effect of the Cloud filter. The Fade command gives you the opportunity to change the opacity and blending mode of a filter effect immediately after you have applied it. Fade also works with the erasing, painting, and color adjustment tools.
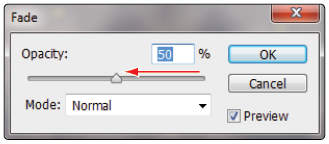
1 Choose Edit > Fade Clouds. The Fade dialog box appears. Check the Preview option to preview the effect if it is not already checked.
If Fade Clouds is not available, you did something else with the file after using the Clouds filter. Use the Window > History panel to select the Clouds state, then select Edit > Fade Clouds again. |
2 Drag the slider to the left to adjust the opacity from 100 percent down to 50 percent. Leave the Mode drop-down menu set to Normal, then press OK. Keep this file open for the next part of this lesson.
|
The Fade dialog box. |
|
Fading the effect of the Cloud filter. |
Using the Filter Gallery
The Filter Gallery allows you to apply more than one filter to an image at a time, and rearrange the order in which the filters are applied.
Note that not all filters are available in the Filter Gallery, and that the Filter Gallery is not available in CMYK, Lab, or Bitmap mode.
1 With ps1101_work.psd open, click the Visibility icon () next to the layer group named monsters. Three monsters appear.
2 Expand the layer group by clicking on the triangle immediately to the left of the monsters layer group. This displays the monster1, monster2, and monster3 layers that are included in this group.
|
Click on the arrow to the left of the The individual monster layers are revealed. |
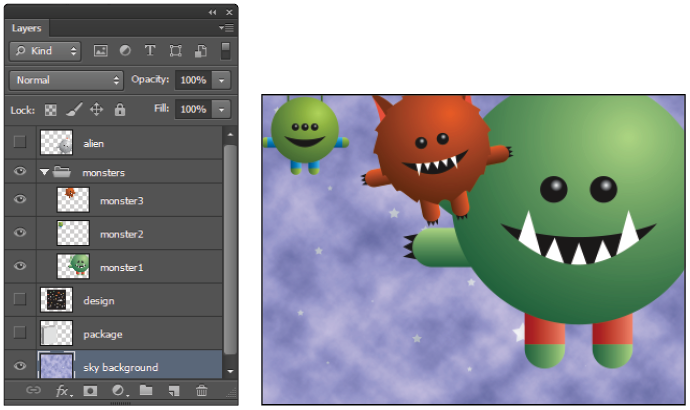
3 Select the monster1 layer.
4 Press D on your keyboard to return to the default foreground and background colors of black and white.
5 Choose Filter > Filter Gallery. The Filter Gallery dialog box appears.
6 Press Ctrl+- (minus sign) (Windows) or Command+- (minus sign) (Mac OS) four times to zoom to 25%.
Applying filters in the Gallery
You’ll now apply several filters to create different versions of the monster image. When you apply a filter from the filter categories, located in the center portion of the window, a preview of the image with the filter applied is displayed in the Preview pane. Along the right side of the window, options for the selected filter are displayed.
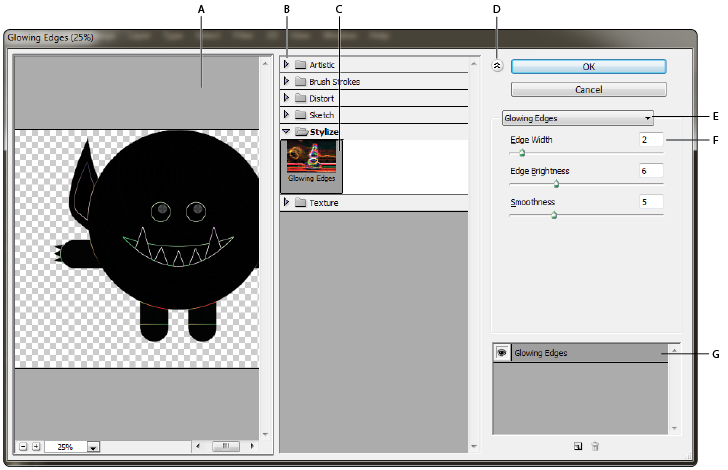
1 In the filter categories section, expand the triangle next to the Stylize folder to reveal the Glowing Edges filter.
|
A. The Preview pane. B. Filter categories. C. Thumbnail of filter. D. Show/Hide filter thumbnails. |
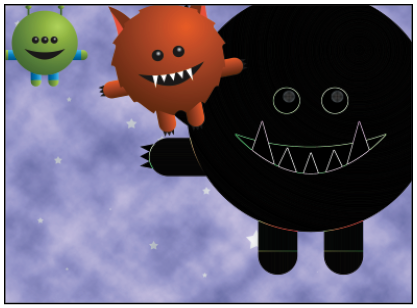
2 Click the Glowing Edges thumbnail to add a glow to the edges of areas with color; the monster now has bright neon, glowing edges. Press OK to apply the filter.
|
The monster with the Glowing Edges filter applied. |
3 To make the monster slightly transparent click and drag the Opacity slider in the Layers panel until you reach 50%.
You’ll now apply additional filters to the other monster layers.
4 Select the monster2 layer in the Layers panel.
5 Choose Filter > Filter Gallery to apply a filter to this layer. Do not select the Filter Gallery menu item that appears first under the Filter menu. That is where your last-used filter appears, and it does not allow you to change options. Choose the second Filter Gallery menu item that appears further down in the menu.
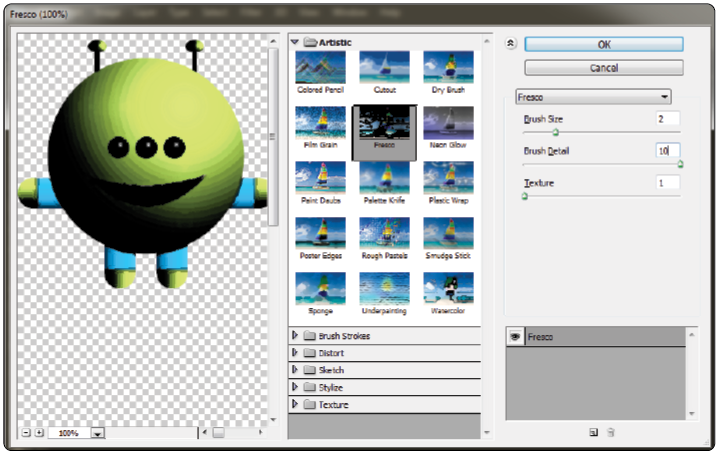
6 Click on the triangle to the left of Artistic to expand and show the artistic filters, and then click on the Fresco thumbnail. The Fresco filter is applied to the image in the Preview pane.
Fresco is an Italian term for a mural painting done on a wet, freshly plastered wall. It creates an interesting abstract effect. The Fresco filter adds a good deal of black to the image in the process of abstracting it, so you will tone it down a bit with another filter.
7 In the Fresco filter options pane make sure the Brush size is set to 2, the Brush Detail to 10, and the Texture to 1. Do not press OK, as you will add another filter.
|
Applying the Fresco filter effect. |
Now you’ll apply a second filter to this layer.
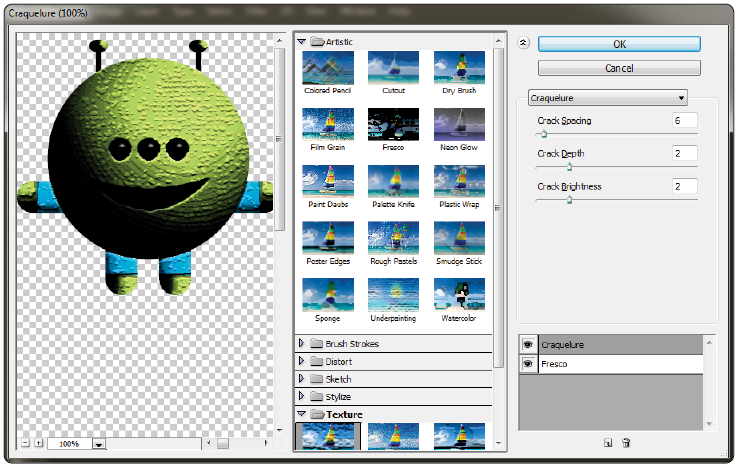
8 Click the New Effect Layer button () located at the bottom of the filter effects area. This adds a new filter instance above the previous filter effect. There are now two instances of the Fresco filter applied.
9 Click the triangle to the left of Artistic to close that filter category, and then click the triangle to the left of Texture to expand that category.
10 In the filter categories section, select Craquelure. Craquelure is a term used for the network of fine cracks that can appear on a painting, either over the whole painting or just in parts. You will use the Craquelure filter to add some texture to the monster.
11 In the Craquelure filter options pane use the sliders to change the Crack Spacing to 6, the Crack Depth to 2 and the Crack Brightness to 2. Press OK to apply the filter.
|
Two filters are applied in the Filter Gallery. |
12 Choose File > Save. Keep this file open.
You can add more effect layers and experiment with different orders to produce new effects. You can also show and hide the visibility of each filter effect by clicking on the Visibility icon next to each effect. |
Continue to the next Photoshop Tutorial: Taking advantage of Smart Filters in Photoshop CS6 >