Using Copy and Paste in Photoshop
What you’ll learn in this Photoshop Tutorial:
|
This tutorial provides you with a foundation for working with copy and paste in Adobe Photoshop. It is the fourth lesson in the Adobe Photoshop Digital Classroom book. For more Adobe Photoshop training options, visit AGI’s Photoshop Classes. |
Photoshop Tutorial: Using Copy and Paste in Photoshop
In this lesson, you’ll learn how to combine images while gaining an understanding of image resolution and file size. You’ll also learn about file formats and options for saving your files for use on the Web or in print.
1 If necessary, click the tab of the rooster image, ps0402.psd, to make it active.
| You can have many documents open at once in Photoshop, but only one of them is active at any given time. |
2 Choose Select > All to select the entire image. This creates a selection marquee around the outside edge of the image. You can learn more about selections in Lesson 5, “Making the Best Selections.”
3 Choose Edit > Copy to copy the selected image area. The image is now in your computer’s clipboard, ready to be pasted into another document.
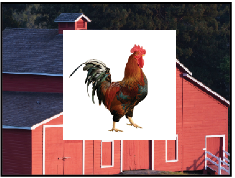
4 Select the tab of the barn picture, ps0401.psd, to make it the active document. Choose Edit > Paste to place the image of the rooster into the picture of the barn.
The rooster appears on top of the barn, and the background surrounding the rooster blocks part of the image. Both these items will be addressed in future steps in this lesson.
|
The image of the rooster is now in |
5 Select the tab of the rooster image, ps0402.psd, and choose File > Close to close the file. Do not save any changes.
Dragging and dropping to copy an image
In this section, you’ll drag and drop one image into another.
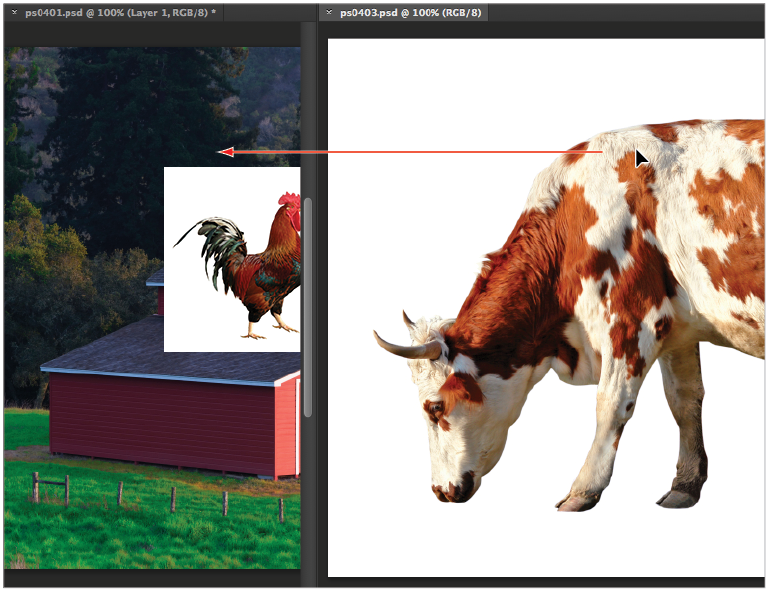
1 Choose Window > Arrange > 2-up Vertical to view both the cow (ps0403.psd) and the barn (ps0401.psd) pictures at the same time. The Arrange features allow you to determine how windows are displayed on your monitor. The Tile features allow you to see all the open images.
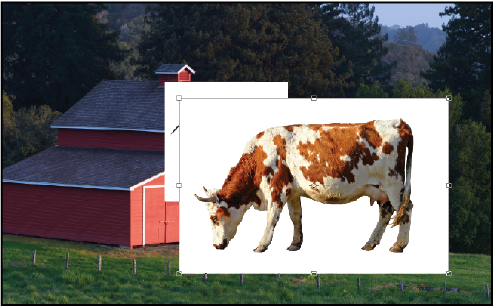
2 Select the Move tool ( ), and then select the picture of the cow, which is the ps0403.psd image. Click and drag the cow image over to the barn image. When your cursor is positioned over the picture of the barn, release your mouse. The cow picture is placed into the barn picture on a new layer.
Like using the Copy and Paste command, you can use the Move tool to copy images from one document to another.
|
Click and drag the cow image into the picture of the barn. |
You do not have to position images beside each other to move them from one image file to another. You can also drag and drop an image to the document tab of another image, and then drag down into the image area. |
3 Select the tab of ps0403.psd and choose File > Close to close the file containing the picture of the cow. Do not save any changes to the file.
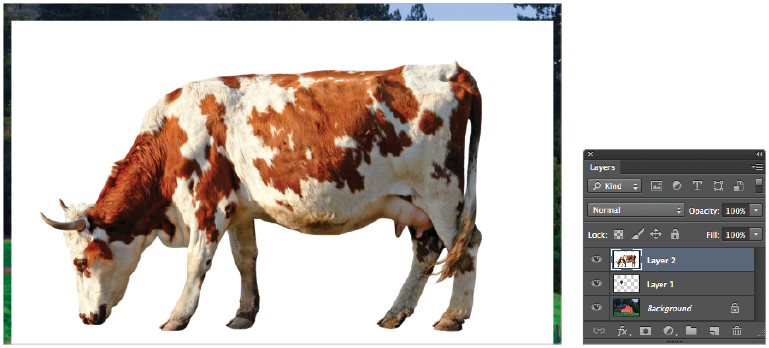
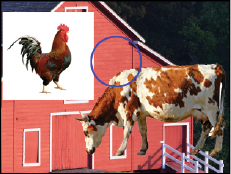
4 With the composite image of the barn, rooster, and cow active, choose View > Fit on Screen, or use the keyboard shortcut Ctrl+0 (zero) (Windows) or Command+0 (zero) (Mac OS). This fits the entire image into your document window. You can also see that you have three layers in this document.
|
The barn picture combined with the other images. The images are now layers. |
5 Choose File > Save As to save this file. When the Save As dialog box appears, navigate to the ps04lessons folder and type ps0401_work in the Name text field. Choose Photoshop from the format drop-down menu and press Save. If the Photoshop Format Options dialog box appears, press OK.
Transforming and editing combined images
Although you have combined three images together, they still require some work. The background remains in the two imported images, and the picture of the cow is out of proportion when compared with the barn.
In order to use the transform options, the affected area must reside on a layer. Layers act as clear overlays on your image and can be used in many ways. Find out more about layers in Lesson 8, “Getting to Know Layers,” and Lesson 9, “Taking Layers to the Max.” |
In this section, you will do the following:
- View the stacking order of the layers that were automatically created when you combined the images;
- Remove the background from the copied images;
- Refine the edges of the combined images;
- Name the layers to organize them.
Changing the size of a placed image
While you could have adjusted the image size prior to dragging and dropping it into the barn picture, you can also make adjustments to layers and the objects that reside on the layers. Here you will adjust the size and position of the placed images.
1 Make sure the Layers panel is visible. If you do not see the Layers panel, choose Window > Layers.
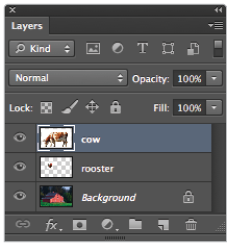
2 Double-click the words Layer 1, to the right of the image thumbnail of the rooster in the Layers panel. When the text field becomes highlighted, type rooster, and then press Enter (Windows) or Return (Mac OS) to accept the change. Repeat this process to rename Layer 2, typing the name cow.
|
The layers renamed. |
3 With the cow layer selected in the Layers panel, choose Edit > Free Transform, or use the keyboard shortcut Ctrl+T (Windows) or Command+T (Mac OS). Handles appear around the edges of the cow. Keep the cow selected. If you do not see handles, press Ctrl+0 (zero) (Windows) or Command+0 (zero) (Mac OS) to fit the image into the window.
4 Press and hold Alt+Shift (Windows) or Option+Shift (Mac OS), and then click and drag any one of the handles on the outside corner edges of the cow toward the center. The image size is reduced.
Notice that the scale percentages in the Options bar change as you scale the image. Reduce the size of the cow image to approximately 50 percent of its original size. Holding the Shift key maintains the proportions as you scale, while the Alt or Option key scales the image toward its center.
5 In the Options bar, click the Commit Transform button ( ) located on the right side, or press Enter (Windows) or Return (Mac OS), to accept the changes.
6 If you do not see the Rooster image, use the Move tool to reposition the cow to reveal it. In the Layers panel, click to activate the rooster layer, and then choose Edit > Free Transform.
7 Press and hold Alt+Shift (Windows) or Option+Shift (Mac OS) and reduce the size of the rooster to approximately 60 percent, using the Options bar as a guide to the scaling you are performing. Click the Commit Transform button, or press Enter (Windows) or Return (Mac OS), to accept the changes.
|
The cow layer being reduced in size, using the Free Transform command. |
Removing a background
Photoshop makes it easy to remove the background of an image. Here you’ll use a method that works well with solid backgrounds, such as the white behind the cow and rooster.
1 Select the cow layer in the Layers panel.
2 In the Tools panel, click to select the Magic Eraser tool ( ). You may need to click and hold on the Eraser tool to access the Magic Eraser tool.
3 Position the Magic Eraser tool over the white area behind the cow, and click once to remove the white background.
|
Use the Magic Eraser tool to remove |
4 In the Layers panel, click to activate the rooster layer.
5 Position the cursor over the white area adjacent to the rooster, and click once to remove the white background.
Continue to the next Photoshop Tutorial: Understanding the stacking order of layers in Photoshop >