Photoshop Elements Tutorial: Using shapes creatively in Photoshop Elements
What you’ll learn in this Photoshop Elements Tutorial:
|
This tutorial provides you with a foundation for working with shapes in Adobe Photoshop Elements. It is the twelfth lesson in the Adobe Photoshop Elements 10 Digital Classroom book. |
Photoshop Elements Tutorial: Using shapes creatively in Photoshop Elements
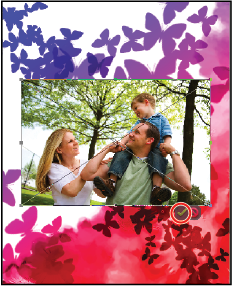
Shapes are vector-based objects that can be used like brushes to add emphasis and excitement to your work. The details of vector-based artwork aren’t really important here, but the advantage of vector-based shapes is that, unlike photographs, they can be scaled to any size without a loss of quality. Photoshop Elements ships with many pre-created shapes that can cover a wide range of different needs. Everything from animal silhouettes to comic-style thought balloons are represented here. In this exercise, you will use a shape to create a picture frame for an imported graphic.
1 In the Layers panel, click the top layer, Gradient, to activate it. Choose File > Place to import a photo into this document. Navigate to the Lessons folder and double-click the Family in the Park.jpg file to open it.
2 Click the checkmark at the bottom of the image to approve the placement of the file.
|
All placed items must be approved before you can work with them in Photoshop Elements. |
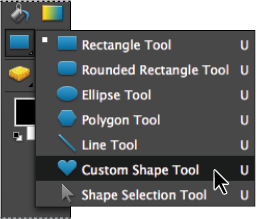
3 Click and hold the Rectangle tool ( ) in the Toolbox, and select the Custom Shape tool (
 ) from the menu that pops up.
|
There are several shape options, from simple circles and rectangles to more complex custom shapes. |
4 In the Options bar at the top of the workspace, choose frame 19 from the Shape drop-down menu and double-click it. Click and drag from the upper-left corner of the photo to the lower-right corner.
|
Additional shapes can be loaded by shape icon in the Options bar and choosing them from a list. |
 | If the frame doesn’t fit exactly, press Ctrl+T (Windows) or Command+T (Mac OS) on your keyboard and select the Move tool, position the cursor over one of the squares of the bounding box on any side, then click and drag to enlarge or contract it. You have to click the check mark to approve your transformation. |
5 Double-click on the new Shape layer’s name in the Layers panel and rename it Frame. Drag the Frame layer and drop it just below the layer named Family in the Park. Hold down the Shift key and click the Family in the Park layer to select it as well. Press the Link Layers button ( ) at the bottom of the Layers panel to link the two layers together.
6 With the Move tool ( ) active, press Ctrl+T (Windows) or Command+T (Mac OS) on your keyboard or choose Image > Transform > Free Transform and position the cursor outside one of the corner points of the bounding box that surrounds the layer, and wait for it to become a curved arrowhead. Click and drag to rotate the layer. Click the checkmark to approve the change.
7 Choose File > Save.
 | The keyboard command for Save is Ctrl+S (Windows) or Command+S (Mac OS), while the keyboard command for Save As is Ctrl+Shift+S (Windows) or Command+Shift+S (Mac OS). |
Fun with the other drawing tools
Although you haven’t used them in this lesson, there are other drawing tools in the program that can be used either individually or in combination with other tools to produce some very creative results.
Pencil tool: The Pencil tool creates hard-edged, freehand lines. In addition to the most obvious use—sketching in Photoshop Elements—the Pencil tool functions much like a brush with a consistently hard edge.
Dodge, Burn, and Sponge tools: Taken from two traditional tools used in photography, the Dodge tool is used to lighten areas of an image, while the Burn tool darkens them. These tools are used to bring out details in the shadow and highlight areas of an image. A third tool associated with them, the Sponge tool, is used to saturate or de-saturate the color areas of an image.
Blur, Sharpen, and Smudge tools: The Blur and Sharpen tools are used to soften hard edges in an image and increase the contrast between pixels, respectively. The Smudge tool simulates the effect of rubbing against wet paint, picking up the color where the drag begins and moving through the image as the drag continues.
The Eraser tool: The Eraser tool is used to change pixels in an image. When used on the background layer, the tool erases to the current background color, and when used on any other layer, it erases to transparency.
The Cookie Cutter tool: The Cookie Cutter tool uses a series of custom shapes to mask out an image. Anything inside of the shape remains, while what is outside is removed. You can think of it as a kind of custom crop tool.
Working with patterns
In addition to brushes and shapes, another useful and fun feature that Photoshop Elements has is patterns. Patterns are repeatable images or parts of images that can be applied similar like how color is applied. In this exercise, you will define and apply a pattern to the Happy Birthday image.
Creating patterns
Patterns can be created from the contents of any square or rectangular selection. Any type of artwork—including photographs, drawings, and scanned art—can be used to create a pattern. If you can draw a rectangular selection around it, you can define it as a pattern.
1 In the Editor, choose File > Open and navigate to the Lessons folder that you copied from the DVD that came with this book. Open the file named flowerpattern.psd.
2 Select the Rectangular Marquee tool ( ) from the Toolbox on the left. Click and drag with the tool to select the entire canvas.
 | You can use the keyboard command Ctrl+A (Windows) or Command+A (Mac OS) to select all the contents of a document. |
3 Choose Edit > Define Pattern from Selection to create the pattern.
 | Patterns saved with the program are always accessible in any file. |
4 In the Pattern Name dialog box, type flower pattern and press OK.
5 Close the file.
Applying patterns
1 Open the Happy Birthday.psd file from the Editor, if it is not already open from the previous exercise
 | Choosing File > Open Recently Edited File is a quick way to locate and open a file that you have recently been working on. |
2 In the Layers panel click the flowers layer to select it, and then click on the Create a New Layer button (). Double-click on the name of the new layer, and rename it pattern.
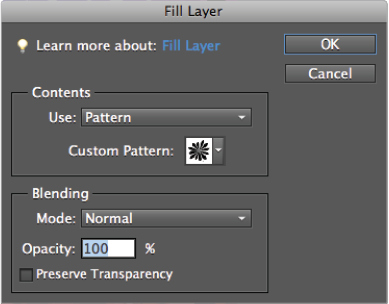
3 Choose Edit > Fill Layer. Choose Pattern from the Use drop-down menu of the Contents section. From the Custom Pattern menu, choose the pattern you created in the previous step; it is the last one in the menu. Leave all other options as you find them, and press OK.
|
The Fill Layer dialog box can fill a layer with a color or pattern. |
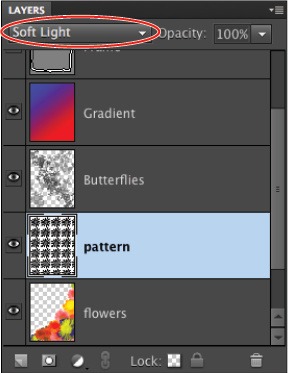
4 In the Layers panel, change the blending mode for this layer from Normal to Soft Light. The addition of the pattern creates an even more textured background.
|
Change the blending mode to Soft Light. |
5 Choose File > Save to save your work. Close the file.
Scrapbooking made easier
Creating scrapbooks and photo albums to record memorable events has been a tradition in many families for a long time. However, over the last decade or so, scrapbooking has become more widespread than ever before. This exercise will take you through the process of creating a scrapbook page using Photoshop Elements. You will use the various tools and effects in the program to create the impression of both texture and dimensionality in your work.
Creating a texture
This part of the lesson will take you through the creation of the initial document you will use to construct the scrapbook page. You will also create a background wood texture using a combination of several different filters available in the program.
1 In the Photoshop Elements Editor, select File > New > Blank File to create a new document.
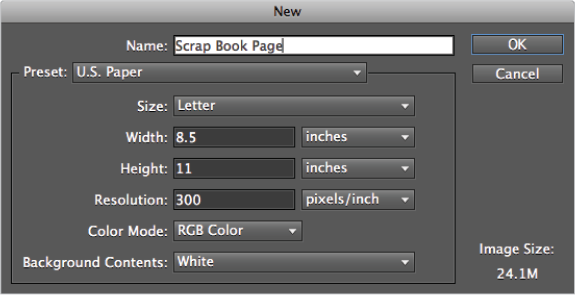
2 In the New dialog box, type Scrap Book Page in the Name text field.
3 Choose U.S. Paper from the Preset drop-down menu. This sets the size and resolution options to produce a high-quality printable image.
|
The New dialog box can be used to create original artwork for a variety of applications. |
4 In the Size drop-down menu, make sure Letter is selected. Letter is the standard paper size, with a width of 8.5 inches and a height of 11 inches.
5 In the Resolution text field, change the default of 300 ppi by typing 150. Leave the other two options, Color Mode and Background Contents, at their defaults and press OK.
6 In the Layers panel, double-click the background layer and type Wood in the Name text field and press OK.
|
Double-clicking a background layer launches the New Layer dialog box to convert it into a layer. |
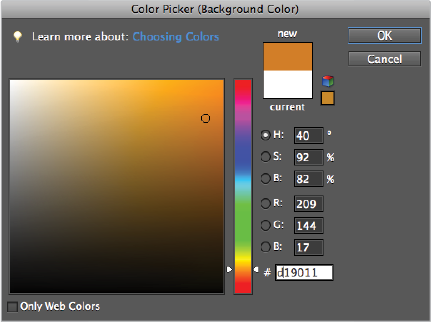
7 Click the Set foreground color swatch located at the bottom of the Toolbox to open the Color Picker. Type d19011 in the hex code (#) text field at the bottom of the dialog box and press OK. Hex, or hexadecimal, colors are used on the Web to define color values. Here you use it as a quick way of referencing the color values for the brown. Any RGB color can be referenced using hex code.
|
The Photoshop Elements Color Picker supports HSB, RGB, and Hexadecimal color values. |
8 In the Toolbox, choose the Paint Bucket tool ( ), then click the document to fill the current layer with the brown color you chose in the last step. Later, on your own, you can experiment with different variations on the brown color used here to create the appearance of different types of wood.
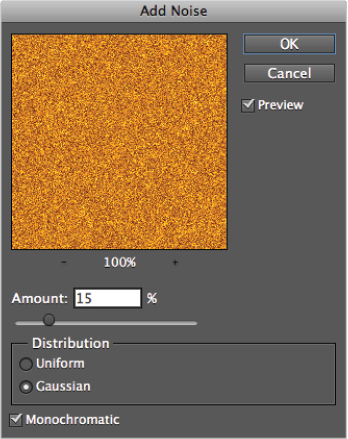
9 Choose Filter > Noise > Add Noise to open the Add Noise dialog box. From here you can control the amount and type of noise created. Type 15 in the Amount text field and choose Gaussian from the Distribution section. Click the Monochromatic checkbox at the bottom of the dialog box and press OK. The noise will be used in the next few steps to create the wood grain appearance.
|
The Add Noise filter uses a mathematical algorithm to add speckling to the image. |
 | You see the term Gaussian quite often in Photoshop Elements. It is a specific type of function that creates a normal distribution of values and describes the way each pixel is transformed. A Gaussian blur reduces image noise, so it is useful for old photos with excessive grains when applied at smaller values. |
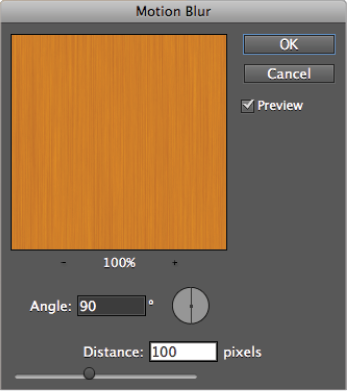
10 Choose Filter > Blur > Motion Blur. The Motion Blur filter simulates the effects of motion on a layer. Type 90 in the Angle text field and 100 in the Distance text field and press OK.
The Motion Blue filter modifies the noise to have a top-to-bottom look.
|
The Motion Blur dialog box can give a layer the illusion of movement. |
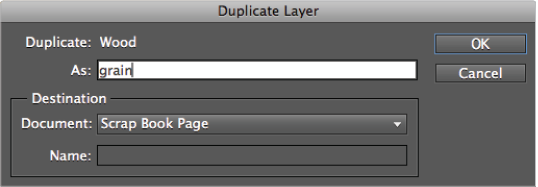
11 Duplicate the Wood layer by right-clicking on it in the Layers panel and choosing Duplicate Layer. Type grain in the As text field to name the new layer, then press OK.
|
From the Duplicate Layer dialog box, you can use the Destination section to create a new document. |
12 With the grain layer selected, choose Enhance > Adjust Color > Remove Color. This will remove all color from this layer, so that you can use it to create the appearance of the wood grain.
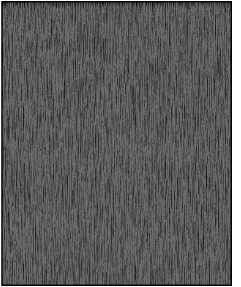
13 With the grain layer still selected, choose Filter > Artistic > Poster Edges. Leave the settings in the Poster Edges dialog box at their defaults and press OK.
|
The image resembles a rough black- and-white wood texture. |
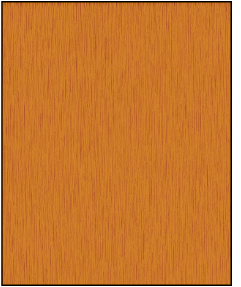
14 In the Layers panel, choose Soft Light from the Blending mode drop-down menu, and type 70 in the Opacity text field.
|
The image resembles a stylized, perfect wood texture. |
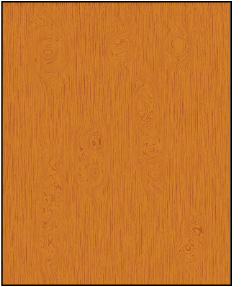
The image now resembles stylized wood. Real wood has imperfections, such as knots in the grain that twist and misshapen it. You will add these imperfections in the next step.
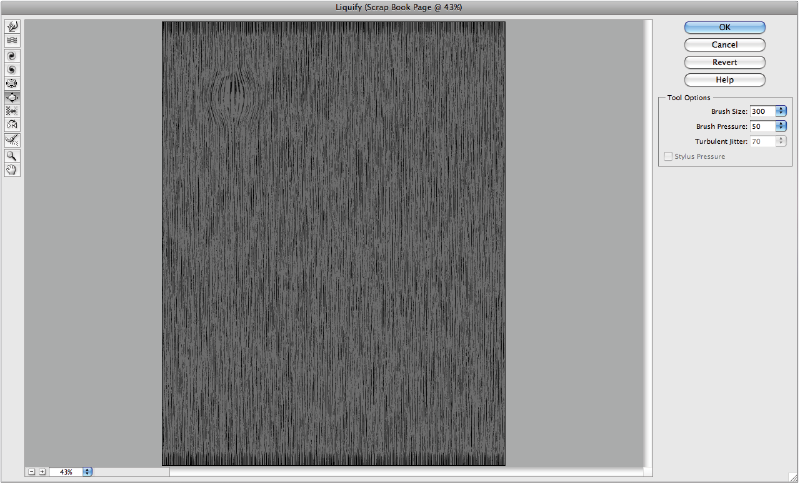
15 Choose Filter > Distort > Liquify to open the Liquify dialog box. You are going to use the Bloat and Twirl tools to simulate knots in the wood grain.
16 Select the Bloat tool ( ) from tools on the left side of the Liquify dialog box. In the Tool Options section on the right side of the dialog box, type 300 in the Brush Size text field. Click in the upper-left corner of the artwork to make that area appear to bulge outward. The longer you hold the mouse down using the Bloat tool, the greater the effect will be. Click and release the mouse a couple of times to create a slight bulge in the grain.
|
The Bloat tool adds a bulging effect to the image. |
17 Select the Twirl Clockwise tool ( ) and click the area to which you just applied the Bloat tool. Begin by holding the Twirl Clockwise tool in place for a few seconds while you click with the mouse, then begin to move the tool slightly up and down over the bulging area to deform the grain around the knot.
 | Experiment with the tools to get different effects. You may want to use a different-sized brush or drag the tools diagonally instead of up and down. If you feel you have made a mistake, you can always hold down the Alt (Windows) or Option (Mac OS) key on your keyboard until the Cancel button becomes a Reset button to return to the original state of your artwork. |
18 Type 200 in the Brush Size text field to reduce the brush size, and repeat steps 16 and 17 on another area of the image. Type 100 in the Size text field to further reduce the brush size and repeat steps 16 and 17 again on another area of the image.
This allows you to create the appearance of different-sized knots within the wood. Place the knots at random while trying to be as asymmetrical as possible.
Press OK to close the Liquify dialog box and apply the changes to your document.
|
The completed wood texture. |
19 Choose Layer > Merge Down to combine the two layers into one.
20 Choose File > Save As to save your document. Navigate to the Lessons folder and click Save to add your file to this folder. Because you named the file upon creation, the name field is already occupied. Leave the file open, as we will use it again in the next exercise.
Continue to the next Photoshop Elements Tutorial: Creating a text effect in Photoshop Elements >
