Premiere Pro tutorial: Using multiple video tracks in Premiere Pro
What you’ll learn in this Premiere Pro Tutorial:
|
This tutorial provides you with a foundation for working with multiple video tracks in Adobe Premiere Pro. It is the third lesson in the Adobe Premiere Pro CS5 Digital Classroom book. For more Adobe Premiere Pro training options, visit AGI’s Premiere Pro Classes. |
Adobe Premiere Pro Tutorial: Using multiple video tracks in Premiere Pro
You can keep all your clips on a single video track, but it might not always be practical. For example, you can easily create a cut-in or cut-away by placing a new clip containing B-roll footage on a track above the one containing an A-roll. Multiple tracks are also useful when you need to place graphics or titles above your video footage, or to compose multiple video clips to create a ghostly effect.
Adding and deleting tracks
When you create a new sequence in Premiere Pro, you specify the number of audio and video tracks to include in the Tracks panel of the New Sequence dialog box. By default, the dialog box creates three video and three stereo audio tracks for each new sequence, but you can add additional tracks or remove empty, unused ones. In this lesson’s project, the Central Park Coverage sequence has only a single video track.
In this part of the lesson, you will add a new video track to the sequence so you can add the trimmed Bystander Interview 01 clip to it.
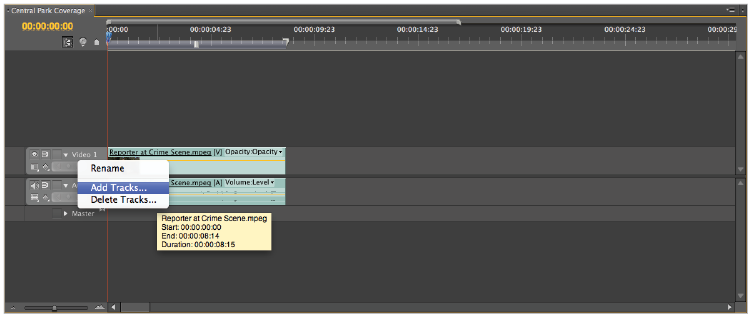
1 With the pr0301-working.prproj project still open, right-click the Video 1 track in the Timeline and choose Add Tracks from the menu that appears.
|
You must right-click an empty area of the Timeline to open the context menu. |
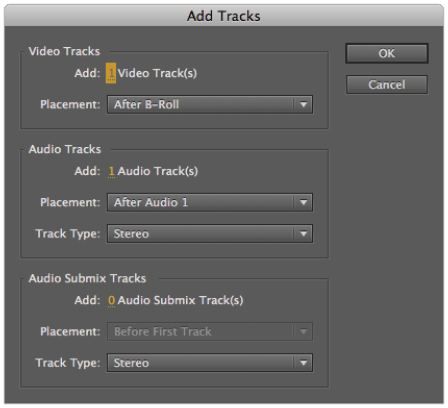
2 In the Video Tracks section of the Add Tracks dialog box, set the Video Tracks to add to 1; in the Audio Tracks section, set the number of audio tracks to add to 1.
The third section allows you to add a video sub mix track to the Timeline. By default, you should set it to 0.
You can specify where the new video and audio tracks are placed in relation to the current tracks on the Timeline. Confirm that the new video track is placed after Video 1 and the new audio track is placed after Audio 1. Confirm also that the new audio track is a stereo track.
Press OK to close the dialog box.
|
The Add Track dialog box allows you to add Video, Audio, and Audio Sub |
 | To delete tracks, right-click a current track and choose Delete Tracks. In the dialog box that appears, choose whether to delete Audio and Video tracks by name or remove all empty audio and video tracks. Remember that the sequence needs at least one of each track type at all times; you cannot remove a track if it is the last of its kind left on the Timeline. |
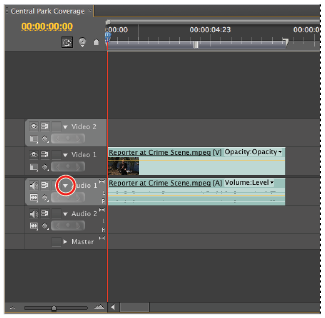
3 With the Timeline panel active, click the Collapse-Expand Track triangle located to the left of the track name for Video 2. This expands the track’s height to match that of Video 1.
Repeat for Audio 2.
|
The Collapse-Expand Track button toggles the track |
4 Choose File > Save or press Control + S (Windows) or Command + S (Mac OS) to save these changes to your project. Do not close this file; you will need it in the next part of the lesson.
Renaming tracks
By default, Premiere Pro names tracks in a linear manner. Video 1, Video2, Audio 1, Audio 2, etc. You can change the names to more easily identify which tracks hold specific types of content.
1 With the pr0301-working.prproj project still open and the Timeline panel active, right-click Video 1 track and choose Rename from the menu that appears. Change the default name to A-Roll and press the Enter (Windows) or Return (Mac OS) key on your keyboard to exit the text editing mode.
2 Right-click the Video 2 track that you created in the previous exercise and again choose Rename from the menu that appears. Change the default name to B-Roll and press the Enter (Windows) or Return (Mac OS) key on your keyboard to exit the text editing mode.
3 Repeat this process for both audio tracks, renaming Audio 1 to A-Roll and Audio 2 to B-Roll.
4 Choose File > Save or press Control + S (Windows) or Command + S (Mac OS) to save these changes to your project. Do not close this file; you will need it in the next part of the lesson.
Adding clips to the Timeline
You can add clips directly to the Timeline from the Project panel, Media Browser, or Source Monitor. In this lesson, you will add the clips that you trimmed in a previous exercise by dragging them from the Source Monitor and dropping them into an appropriate place on the Timeline panel.
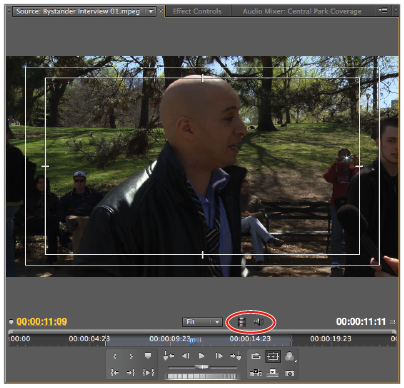
1 With the pr0301-working.prproj project still open, double-click the Bystander Interview 01.mpeg in your Project panel to make it active and open it in the Source Monitor. This action also makes the Source Monitor active.
Notice the two icons to the right of the Select Zoom level menu; one is similar to a film strip and the other is similar to a speaker. These icons indicate that the currently selected clip contains an audio and a video track.
|
In Premiere Pro, your clips can contain audio, video, or both. |
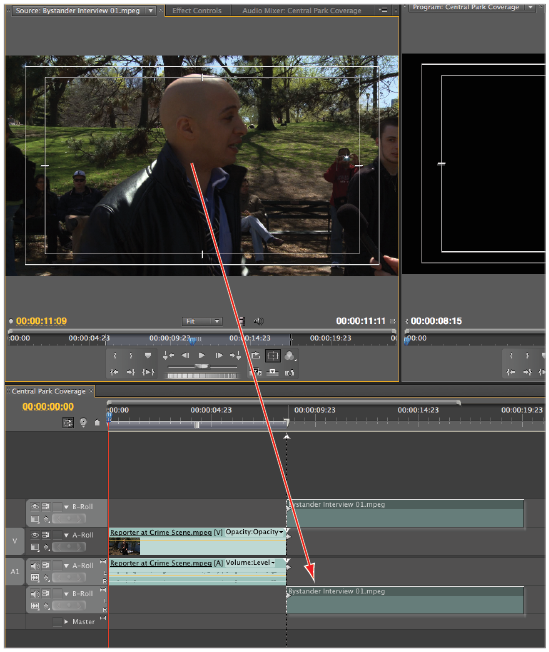
2 Click the middle of the video frame in the Source Monitor and drag it to the B-Roll track in the Timeline panel so the beginning of the Bystander Interview 01.mpeg clip is at the end of the Reporter at Crimescene.mpeg clip on the A-Roll track. The clips snap together when close to one another.
|
When you add a clip to the second video track in the Timeline, its audio is automatically |
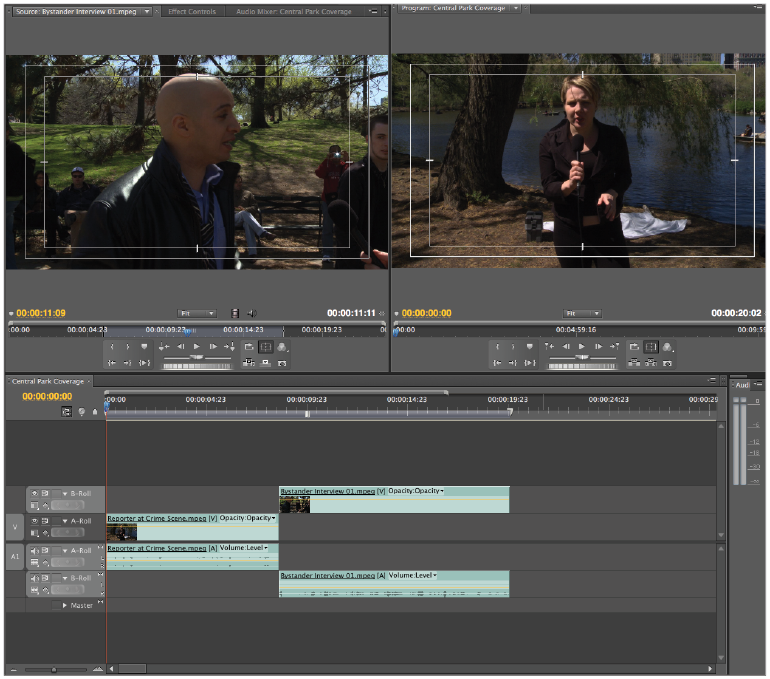
3 Move the playhead to the beginning (00;00;00;00) of the Timeline and press the spacebar on your keyboard to preview the clips in the Program Monitor.
|
You can start previews in the Timeline using keyboard commands or in the Program Monitor using the Transport controls. |
| You can stop the Timeline playback at any time by pressing the spacebar again or by clicking the time ruler at the top of the Timeline panel. The time ruler is the area where the Timeline’s time code appears. |
4 Choose File > Save or press Control + S (Windows) or Command + S (Mac OS) to save these changes to your project. Do not close this file; you will need it in the next part of the lesson.
When you previewed the file, you might have noticed that the edit point, where the shot of the reporter cuts to the bystander being interviewed, is rough. You will correct this in the next part of the lesson when you trim these clips in the Timeline panel.
Continue to the next Premiere Pro Tutorial: Trimming clips on the Timeline in Premiere Pro >